|
When you're traveling or site seeing, one of the most frequent challenges is how to take a photo without it being filled with people obstructing part of the building, bridge, road, waterfall or other object of interest. So what are your options? Here are five proven solutions to removing those unwanted people in your image.
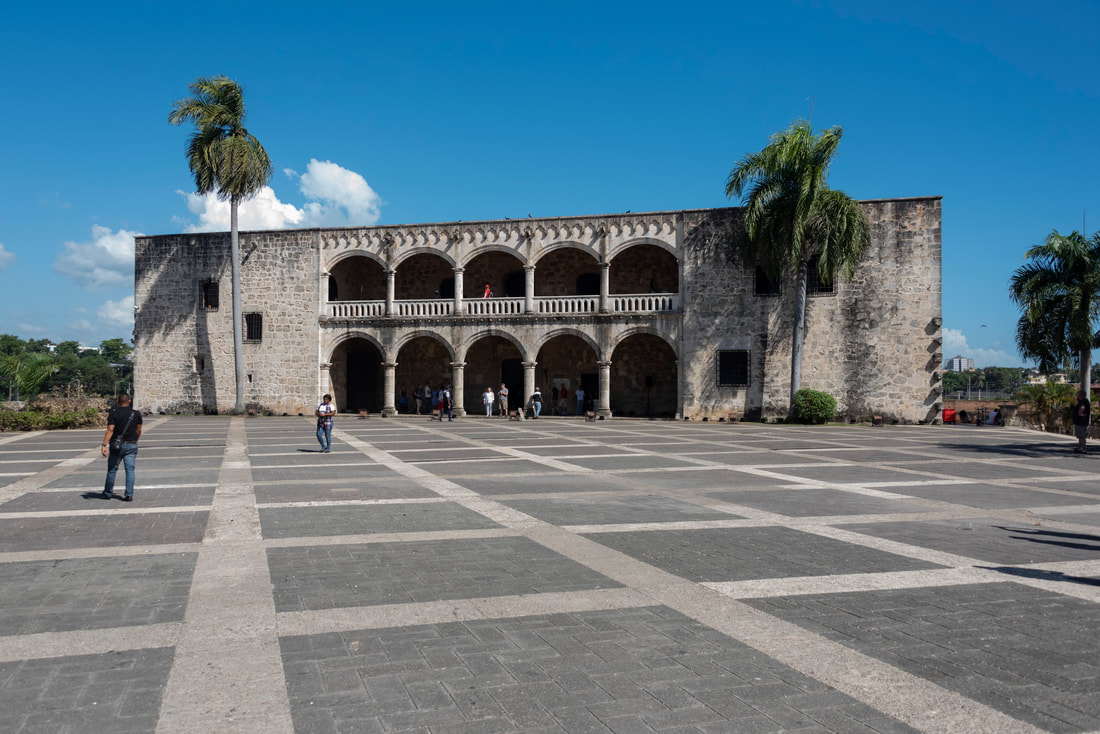
In the following example I'll walk through option 5, using multiple photos and then blending the people away in the image. In the following two images you can see a couple of people in the foreground as well as an individual in front of a column by the building that I want to remove.
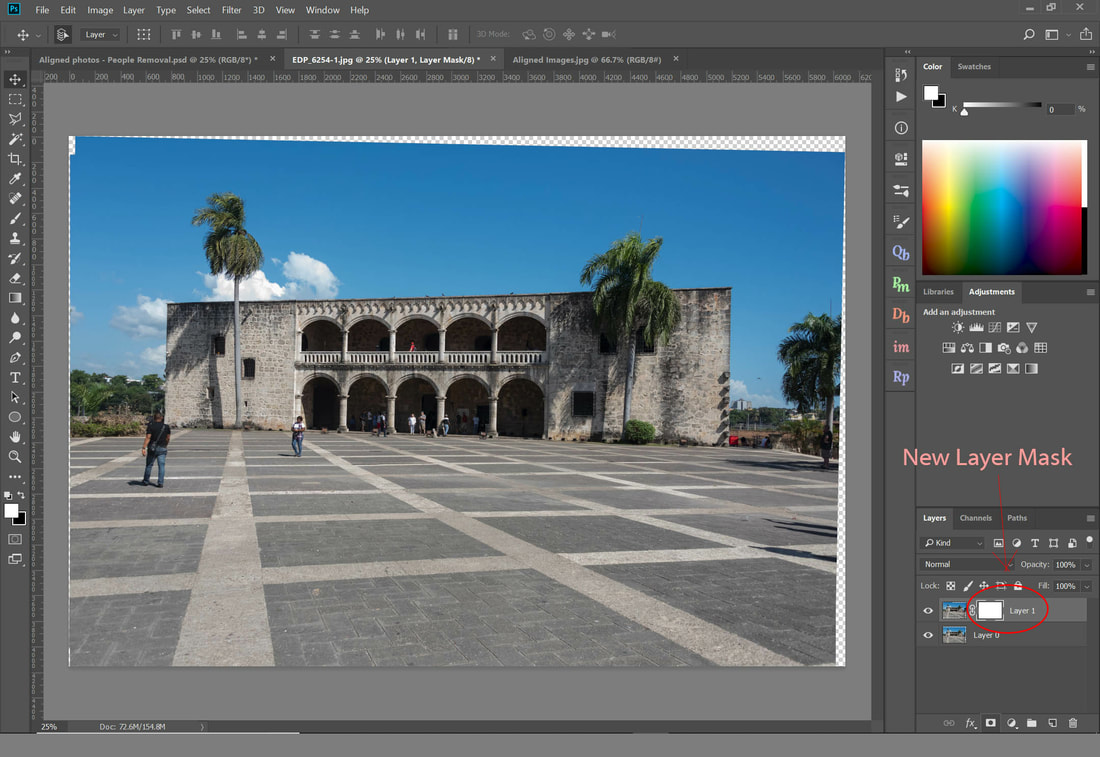
The first step is to open both images on different layers in Photoshop. 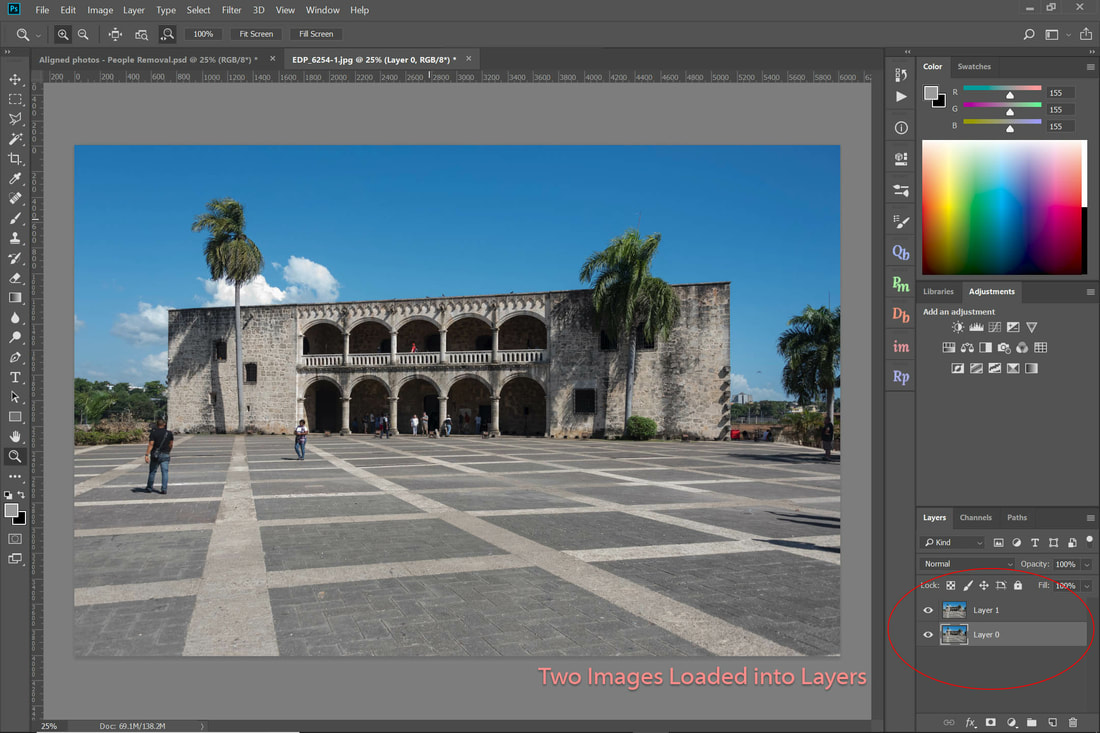 The next step is to align the layers. Select both layers and then use the Edit > AutoAlign Layers command to auto-align these layers. In the pop-up window select the Auto-Align projection option. 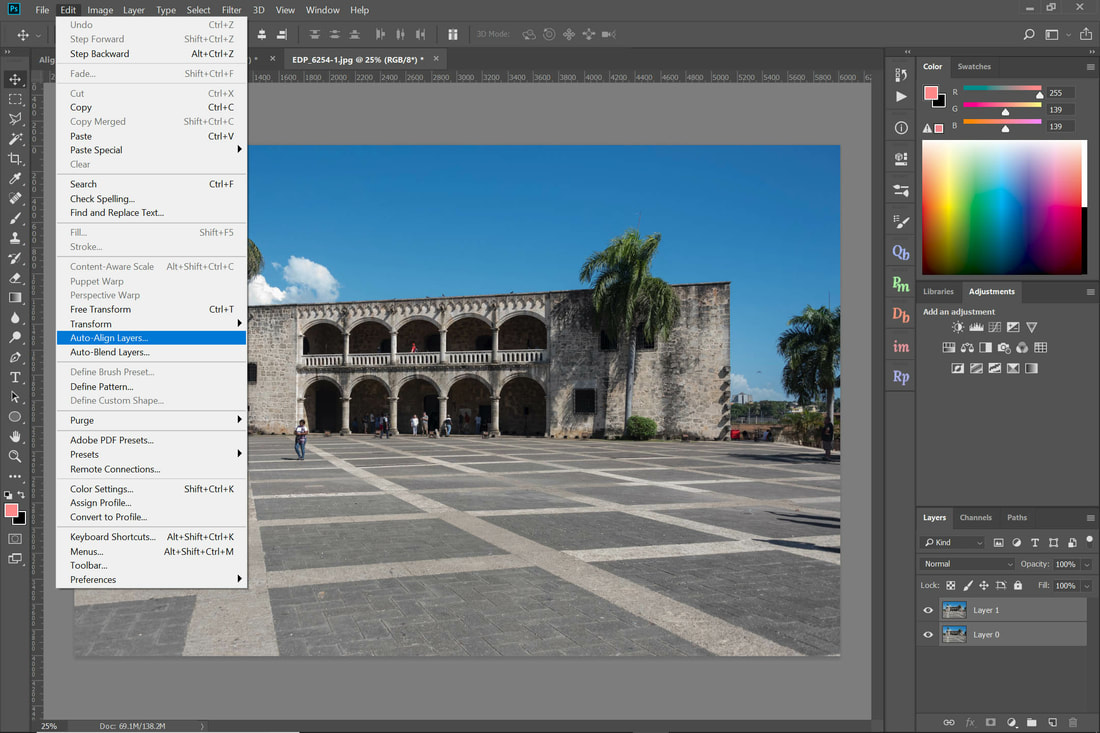 Your images will now be aligned. They may be a bit skewed or stretched as in the image below.  Next, add a layer masks to the top most layer.
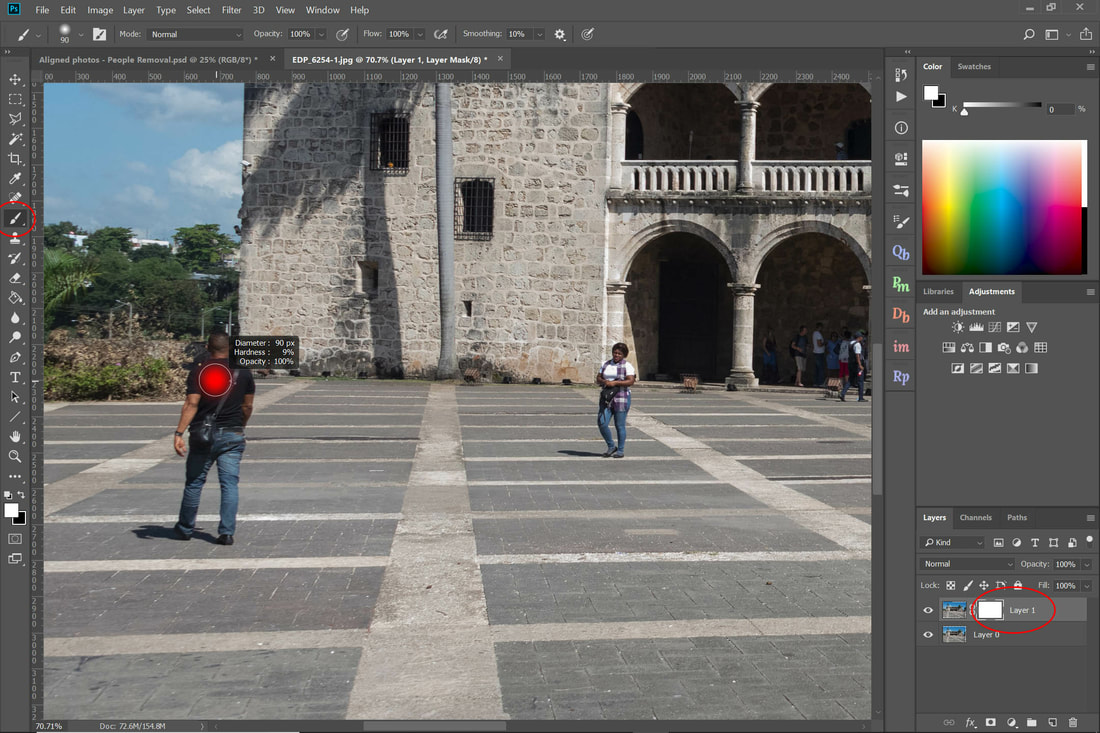
Once you have added your layer mask, you can now remove the figures you don't want by painting out the image using the Brush Tool. In a layer mask everything that is visible will have a white mask, everything you don't want to see will have a black mask. First Select the layer mask, ensure that your brush colour is black and then select the Brush Tool. Zoom into the person you want to remove and then start painting.
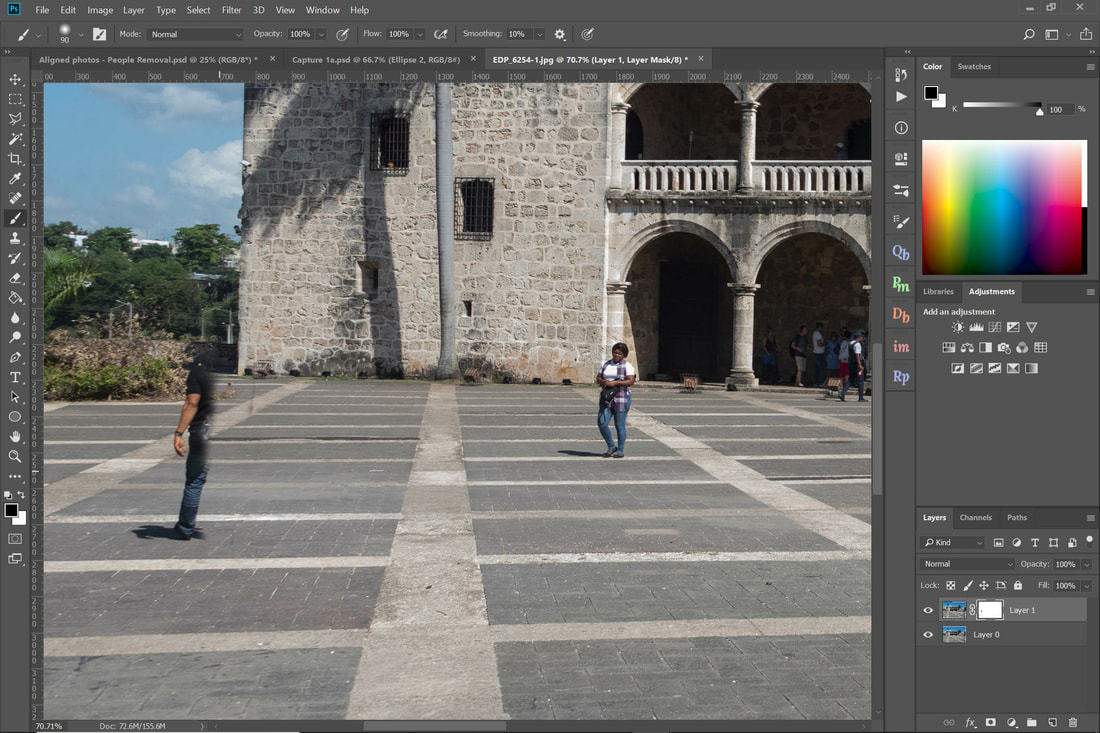
Keep on painting to remove additional figures in the image. 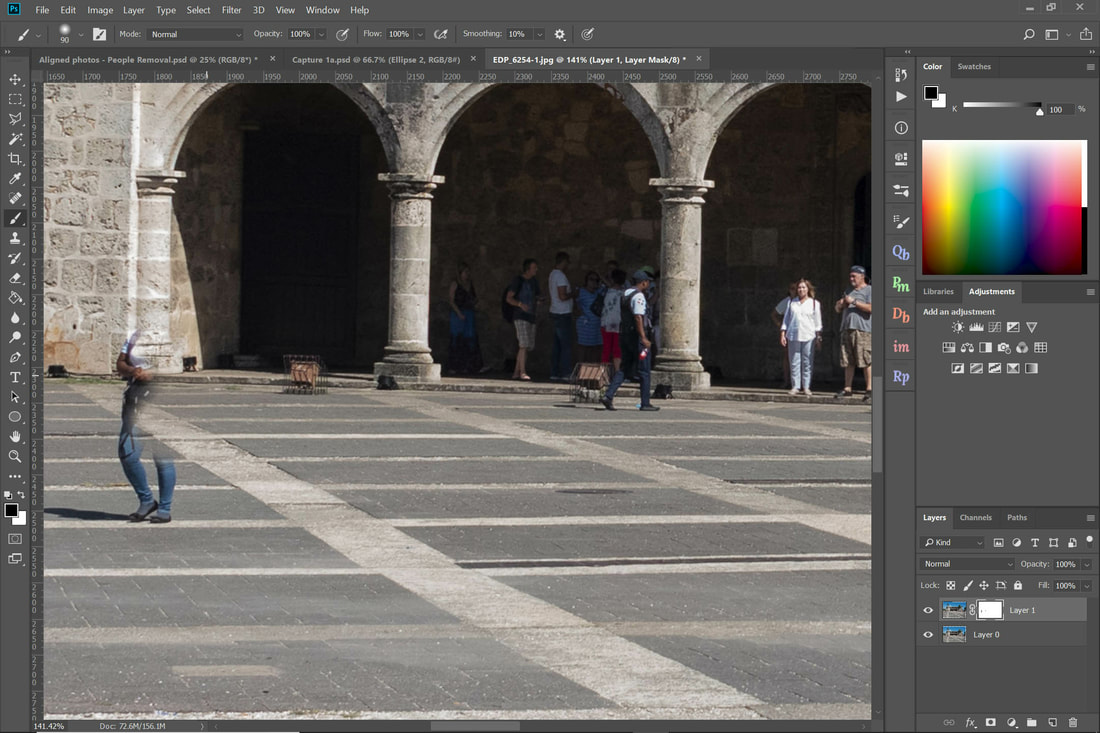 After removing your last person, crop the image (if necessary) and save. Just like magic, unwanted people in the image have been removed!  Thought for the day “Patience is bitter, but its fruit is sweet.” Aristotle
3 Comments
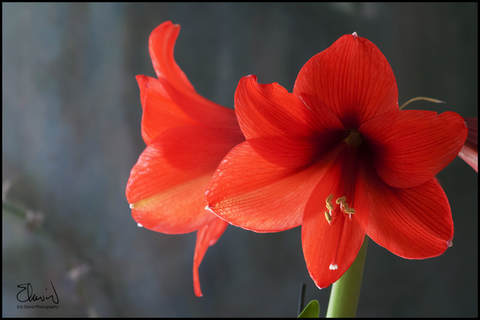
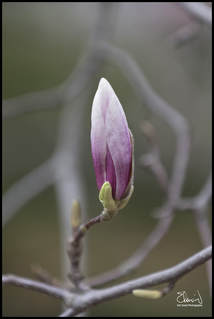
What's the best type of day to take photos of flowers? Surprisingly, not when you're taking that stroll through a wonderful garden on a sunny day. Bright overhead sun creates harsh shadows and can wash out colour. 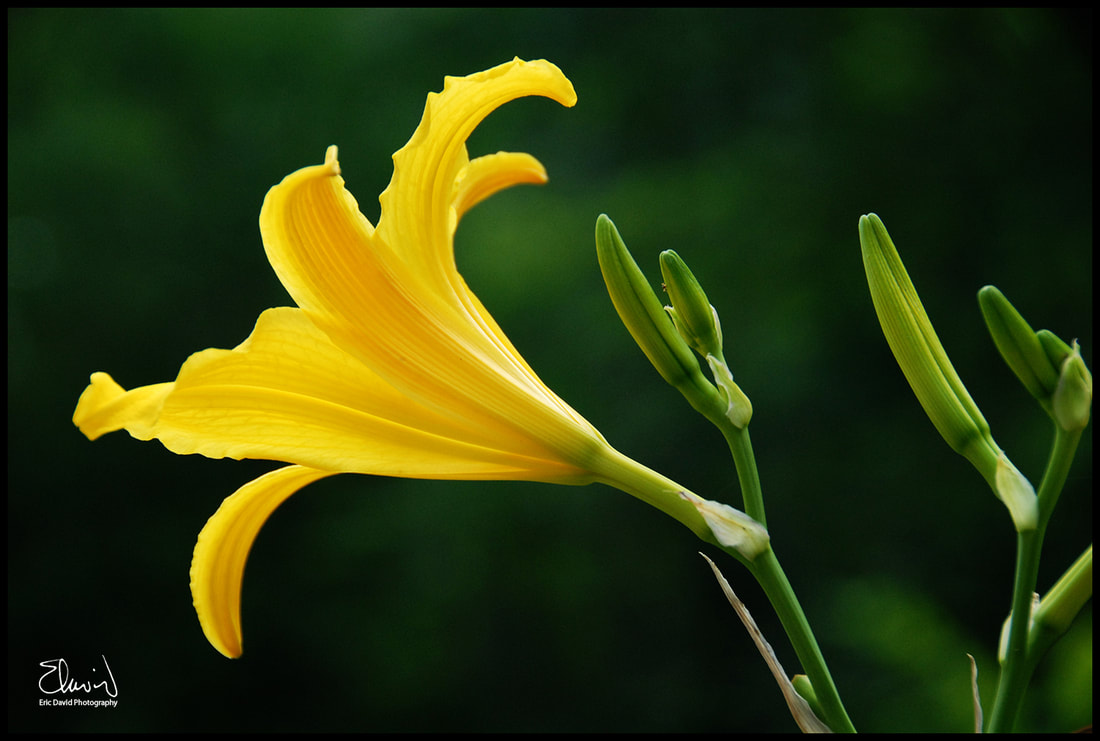 Photo taken on overcast day Take photos on bright overcast days or step out just after the rain has stopped and it's still cloudy. The overcast sky acts as a large soft box removing harsh shadows and enhancing colour. After a fresh rain colours are also intensified. 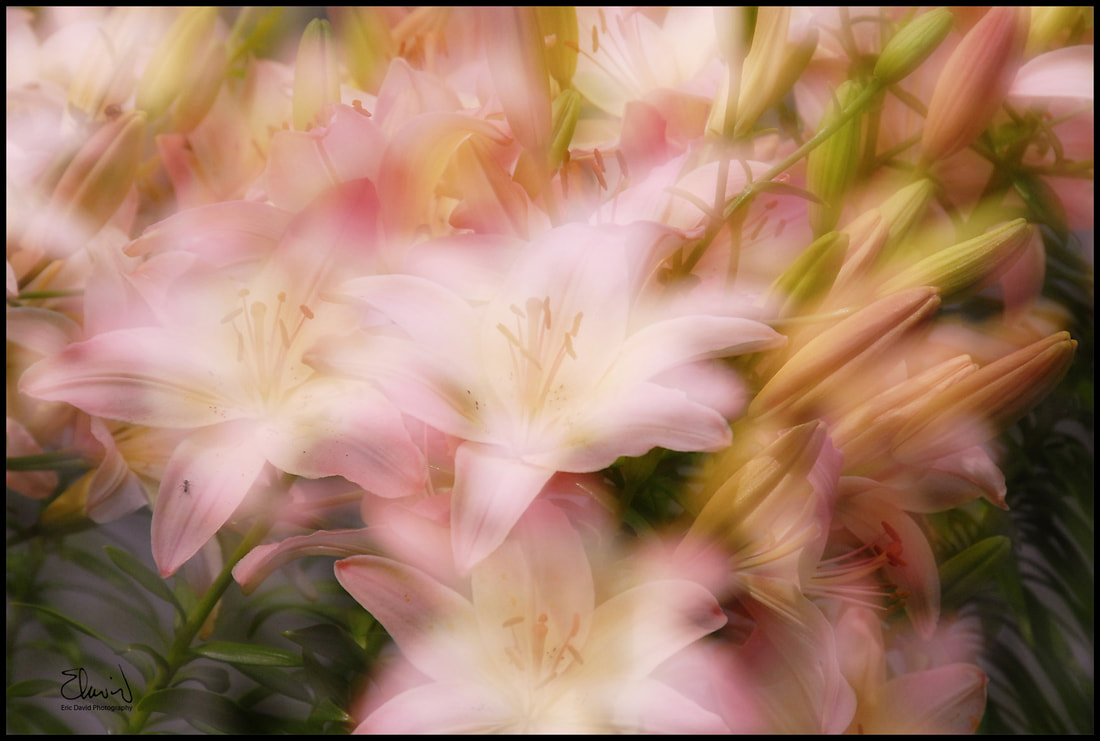 Multiple exposure photo If you can't avoid the sun try take an in-camera double exposure. By combining one exposure that's sharp with another that's out of focus you can reduce the amount of harsh contrast and create a glow around the flower. It's important to either use a tripod, or if hand holding the shot, keep your camera as steady as possible. Another option on sunny days is to take the photo while the flower in covered in shade, or create your own shade with a hat.
Isolate the flower and remove clutter by changing your perspective and simplify the background. This allows the flower to stand out. Alternatively, if you can't simplify the background this way, use a widest aperture available on the lens (F2.8 for example), and use the longest focal setting (for example 200mm) to blur the background. This isolates the flower by blurring the background. 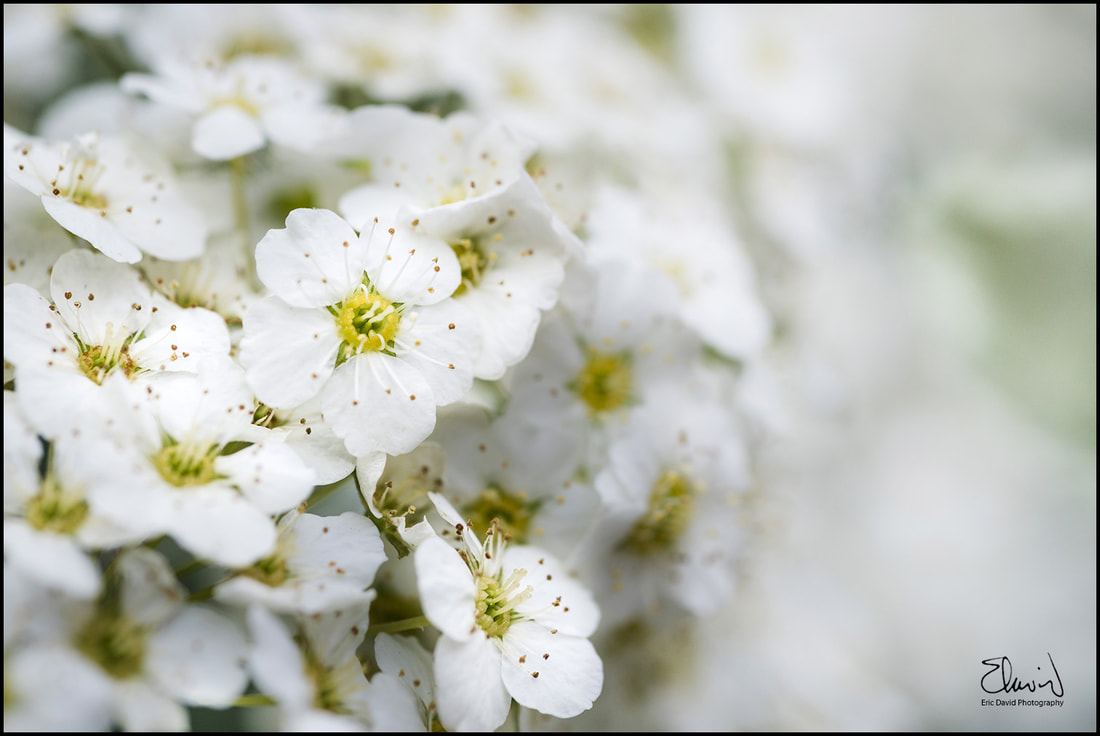 Dancing pattern of florettes Create a visual pattern. This works well if there are many flowers in a field or if there's a bunch of flowers in the garden. Look for interesting or repeating patterns and textures to lead the eye through the image.
Take a close up! If you have a lens with macro capability zooming into a portion of the flower can provide opportunities to make wonderful images. Be careful with your focus however, as the depth of field will be very shallow. Thought for the Day
“To photograph truthfully and effectively is to see beneath the surfaces.” – Ansel Adams  Creating an animated GIF from a series of photos is another way to turn a still image into something more interesting. If you have access to an image editing program like Photoshop, you can create an animated GIF in 10 easy steps.
Thought for the Day “Learn the rules like a pro, so you can break them like an artist.” Pablo Picasso Artists such as George Braque and Pablo Picasso created a new way of seeing the world from different vantage points. In doing so they created a movement called cubism. For more information see the following link: cubism One famous example is the piece entitled Nude Descending a Staircase, where Marcel Duchamp wanted to explore motion and movement. I discussed an approach to movement and motion in my photography blog post "Go with the Flow" whereby using slow shutter speed one can capture a sense of motion. The blog can be found here: go-with-the-flow Another approach is to take a number of successive shots on the same frame. This more closely approximates Marcel Duchamp's painting as you can see in the image below. 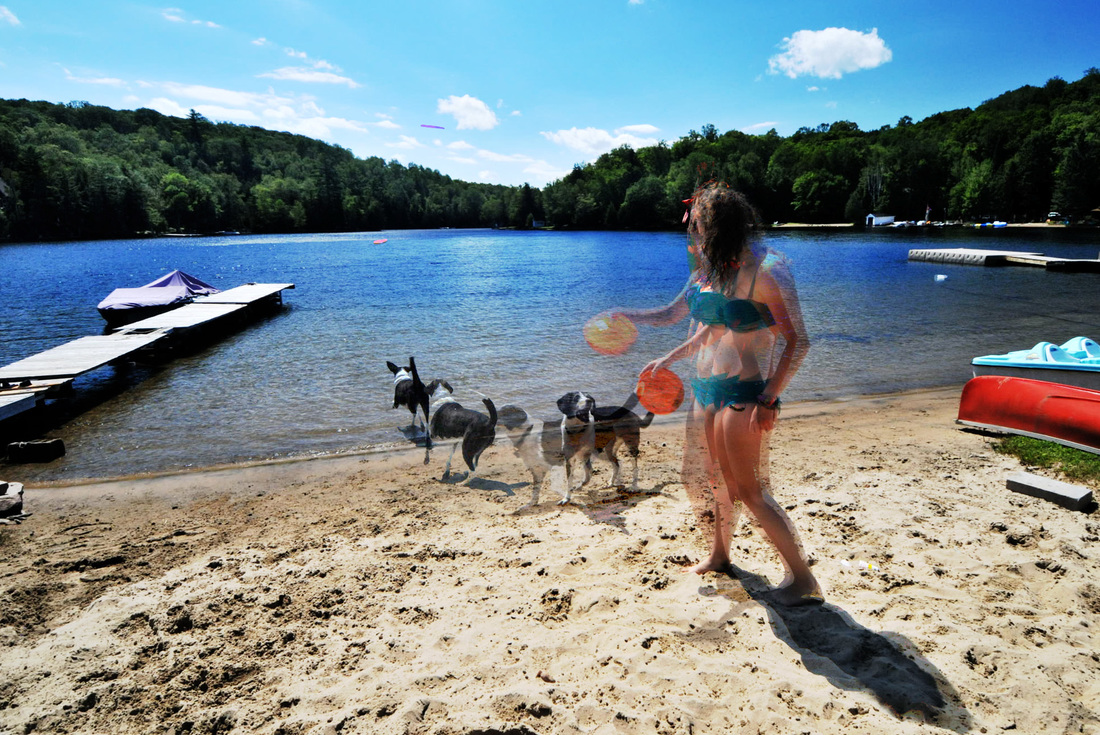 The following drawing study conceptually uses the same technique. As the model moved from position to position I continued to draw over the same image (frame) blending one position into the next. 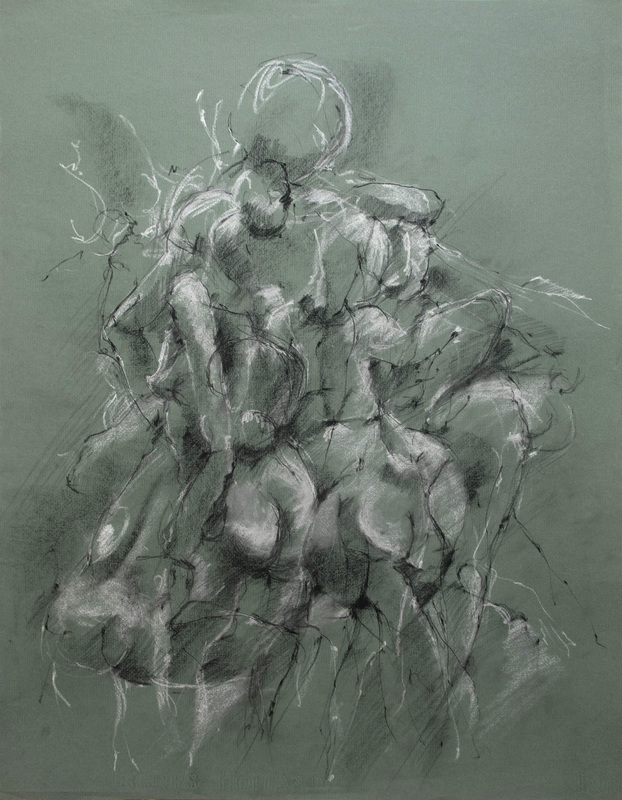 Thought for the Day
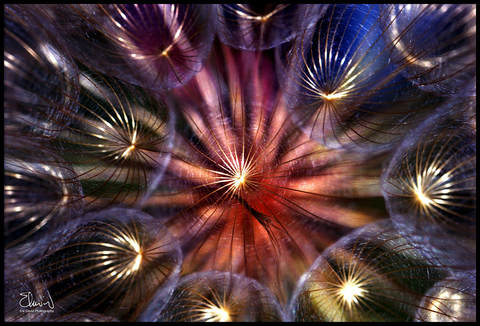
"Vision is the art of seeing what is invisible to others." Jonathan Swift 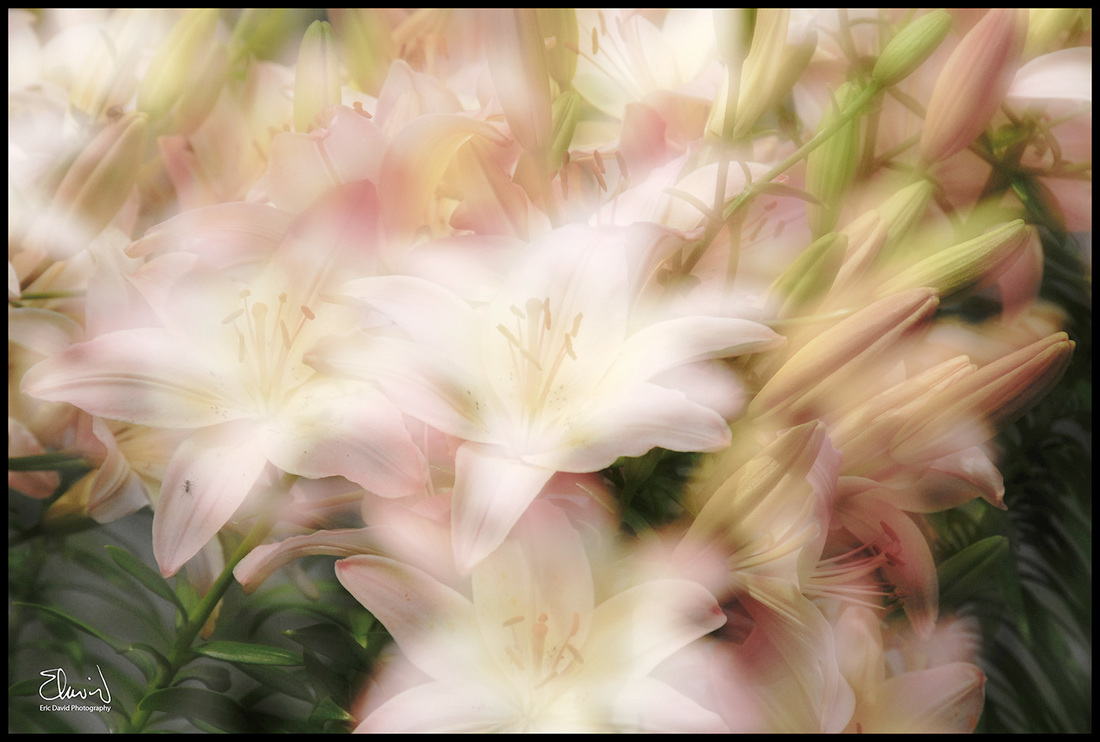 One of my favourite ways to photograph a flower is to take two or three exposures exposures - the first in focus, and the 2nd and 3rd progressively less focused and more overexposed (by 1 or 2 stops). You should have your camera mounted on a tripod to minimize movement between shots. If your camera has a multiple exposure setting, then this effect is created in-camera. Alternatively you can also create the effect through post processing by merging the photos into one image using software such as Photoshop. This Orton effect is named after Michael Orton who invented the technique by overlaying two or more slides to create a unique composite image. The Orton technique is also great for Portraits. I use it to soften the image and add atmosphere to the portrait. In the photo below I combined two images using Photoshop, using the "overlay" blend mode to create a warmer, richer composite photo. 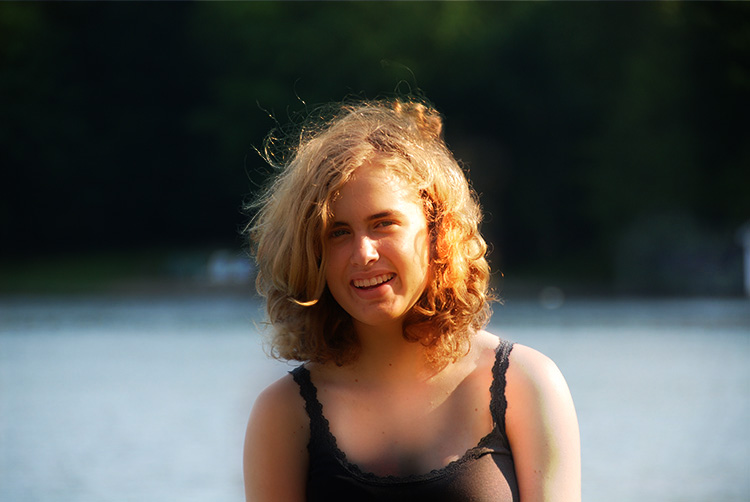 The photos shown below were used to create the composite, above. Thought for the Day
“To be creative means to be in love with life. You can be creative only if you love life enough that you want to enhance its beauty, you want to bring a little more music to it, a little more poetry to it, a little more dance to it.” Osho |
Eric David
Eric David is a visual artist / fine art photographer that lives and works in Toronto. Archives
March 2020
Categories
All
|


 RSS Feed
