|
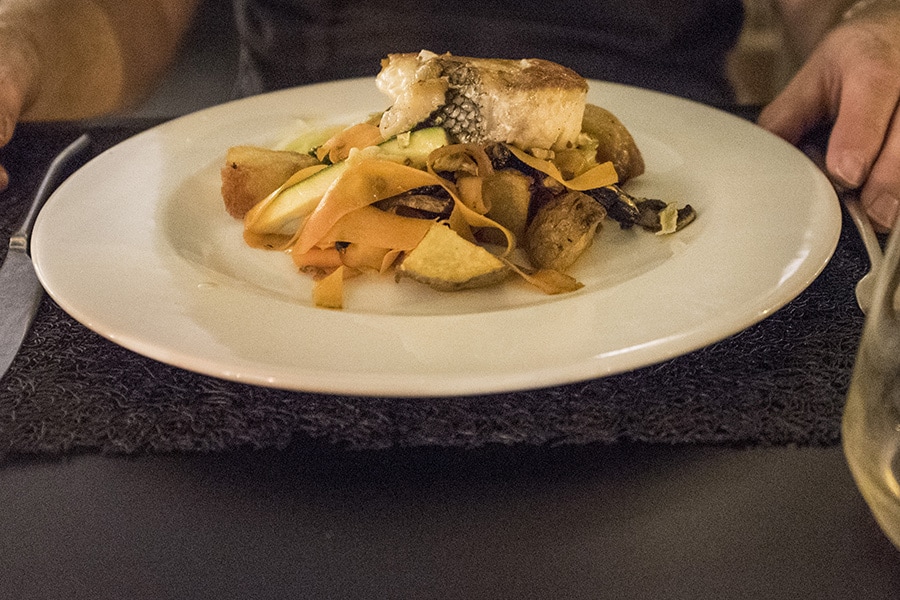
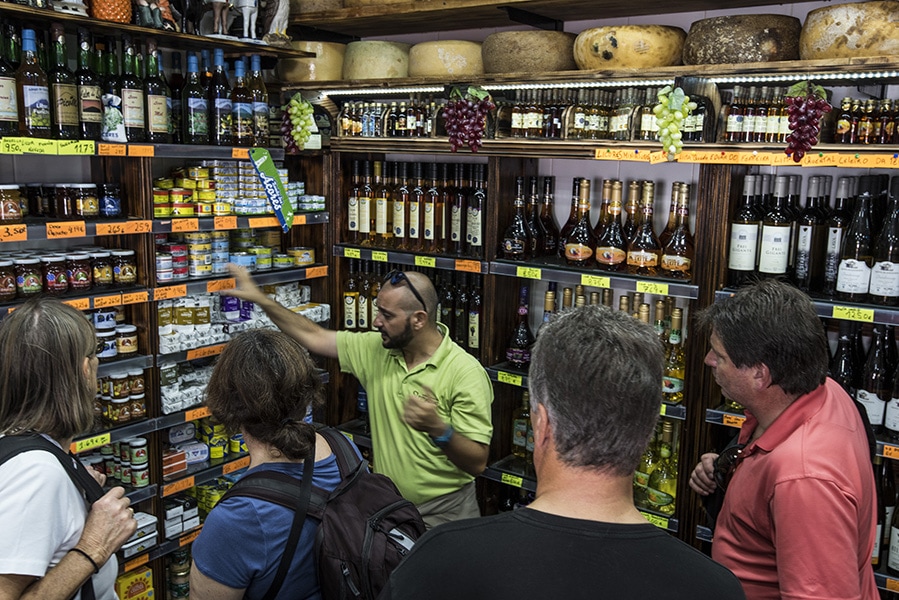
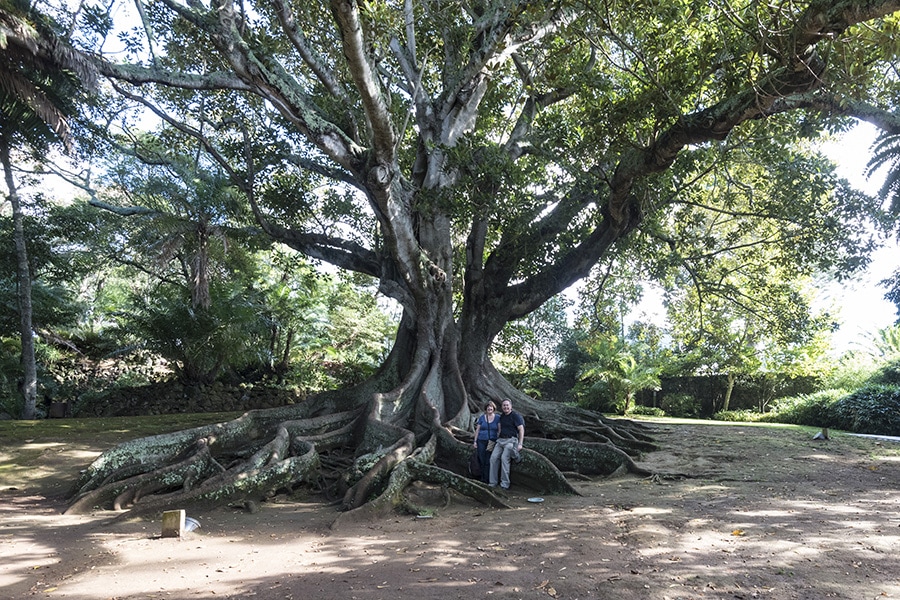
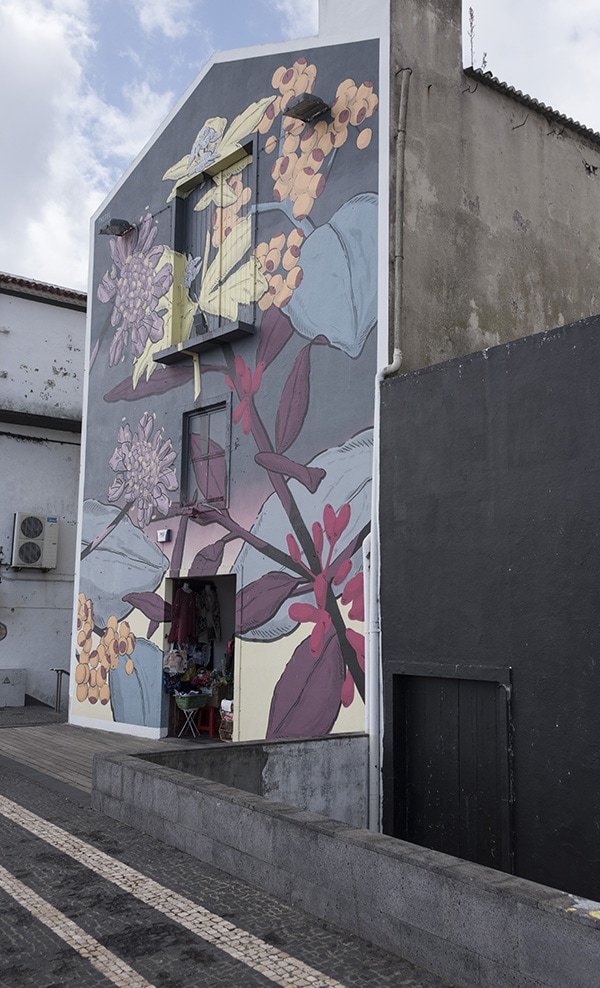
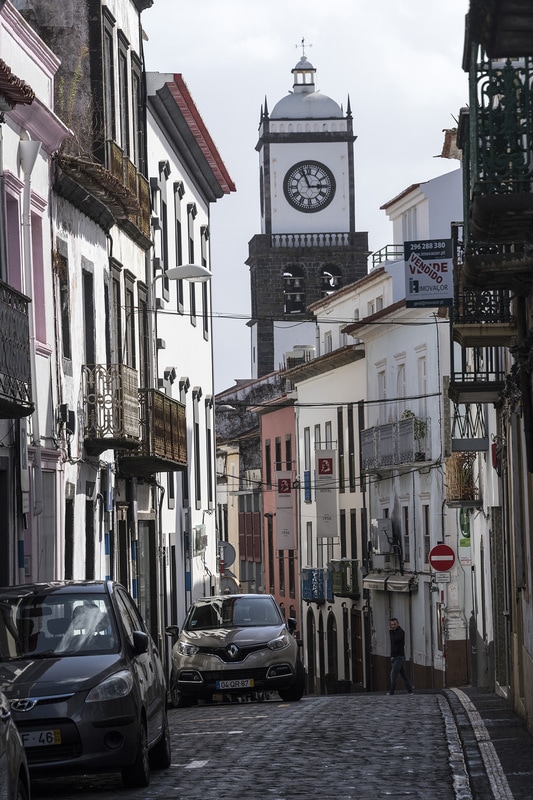
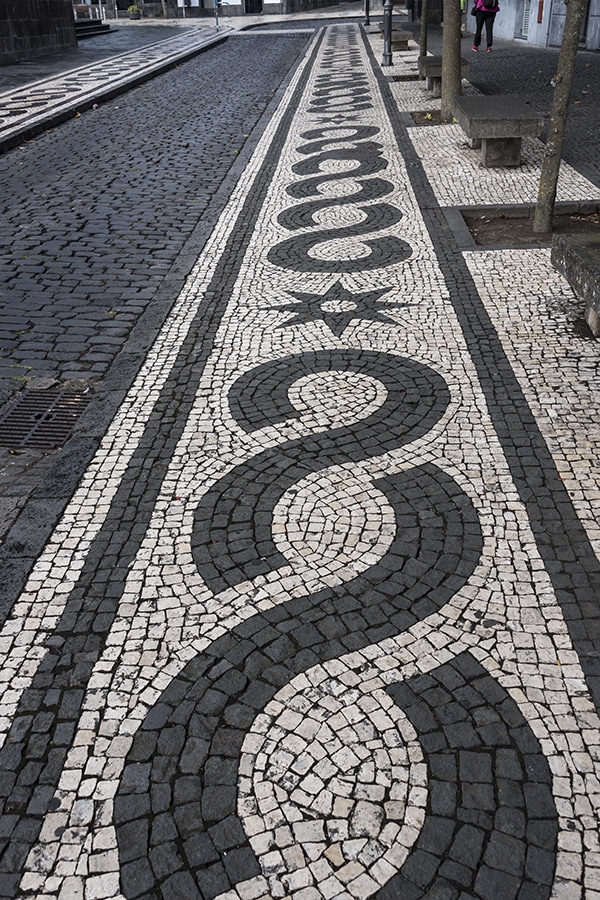
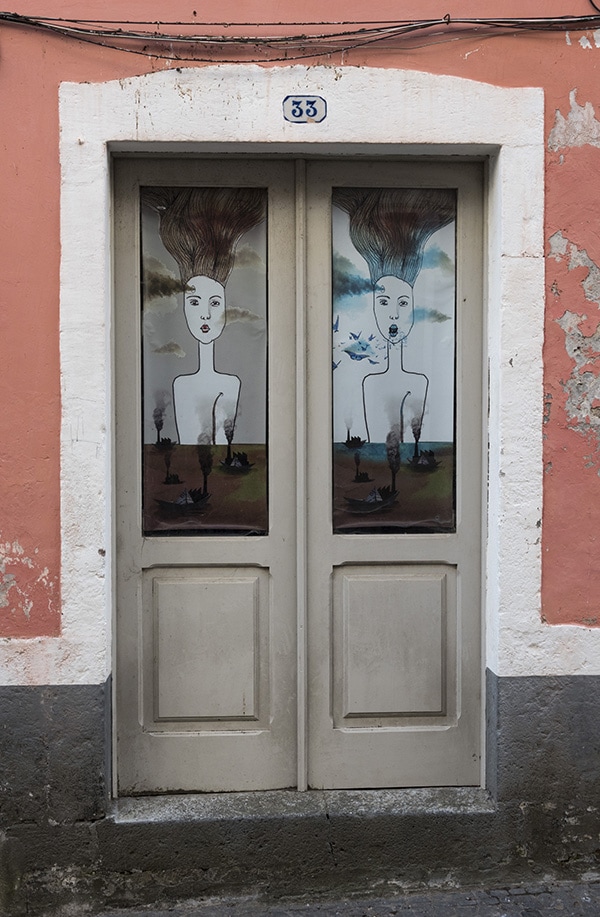
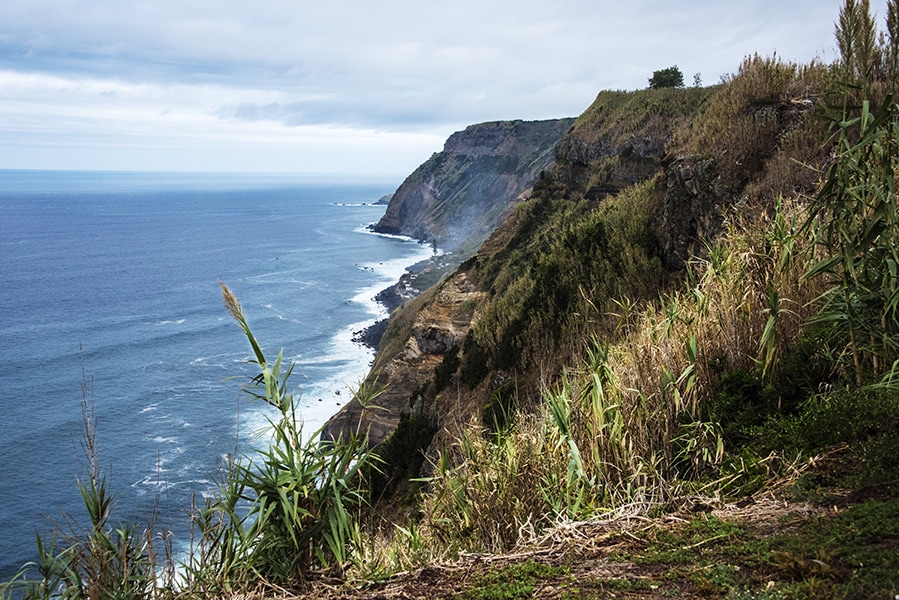
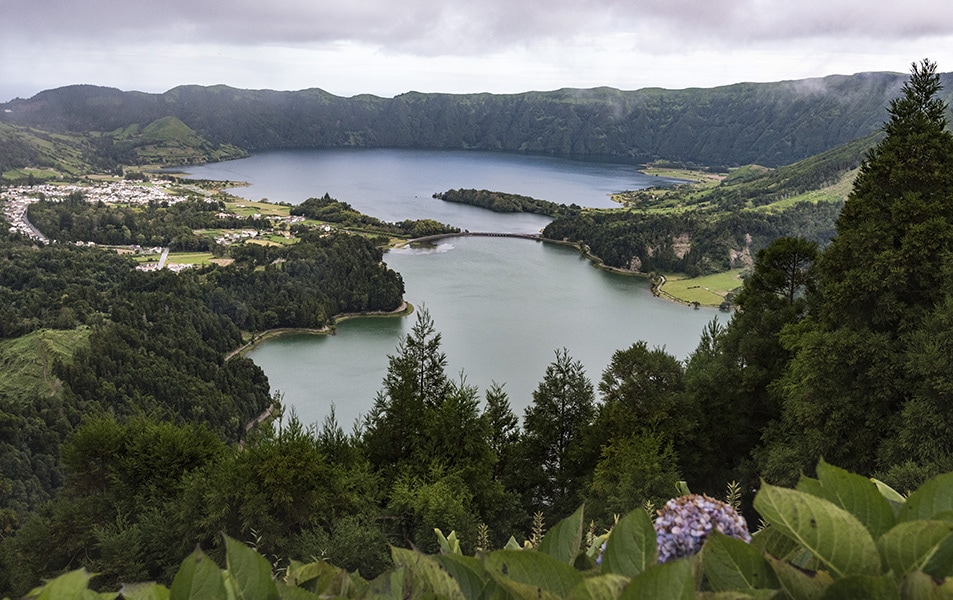
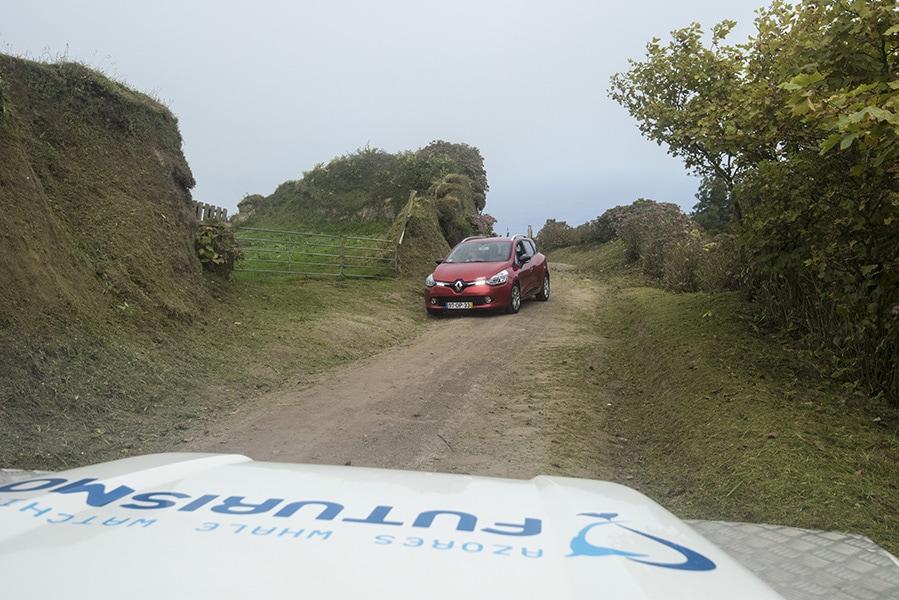
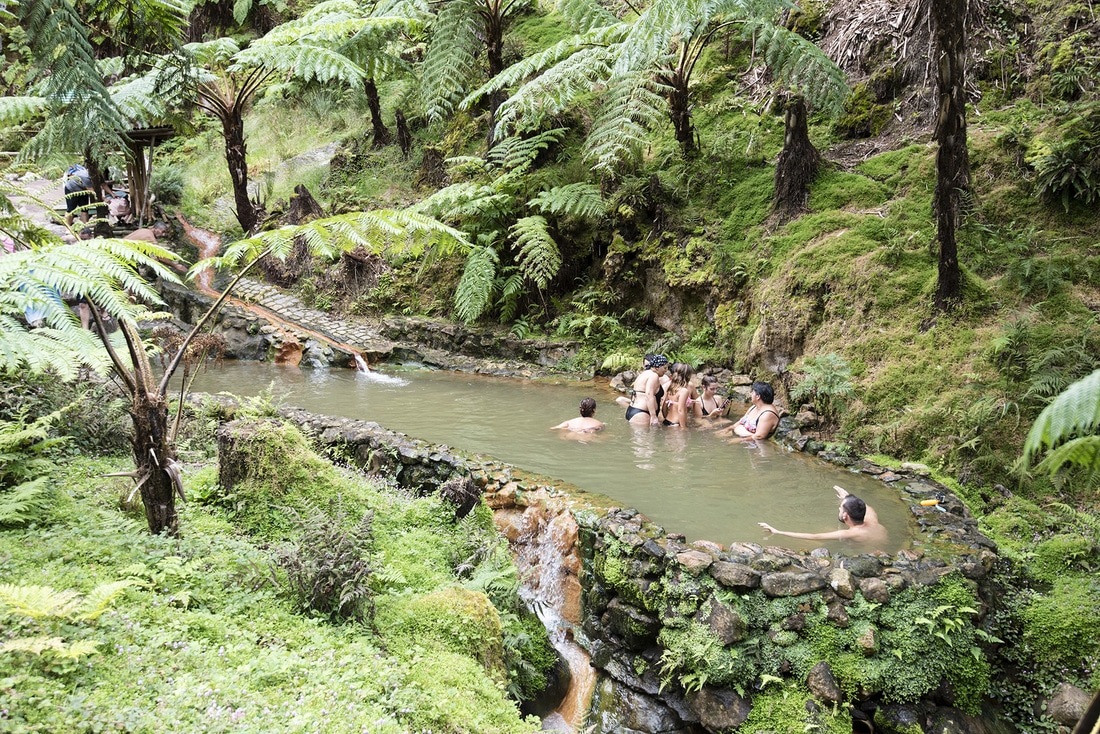
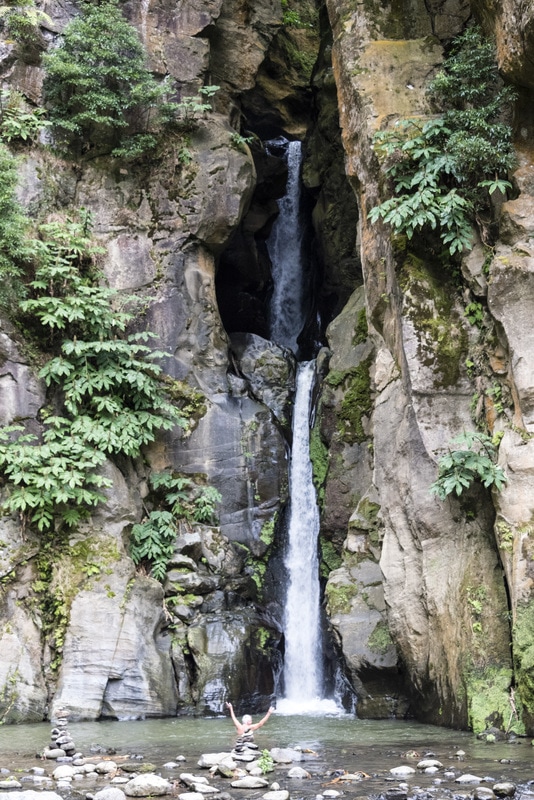
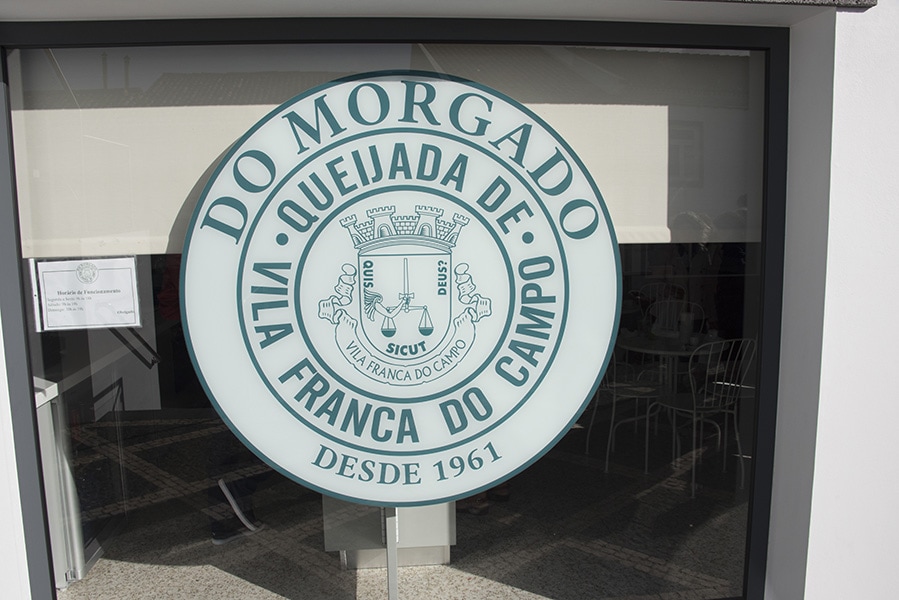
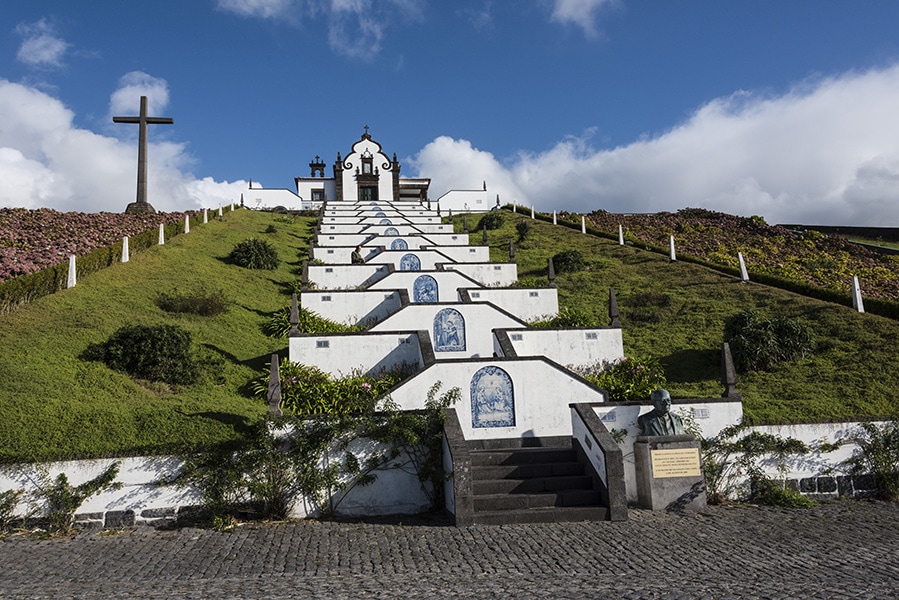
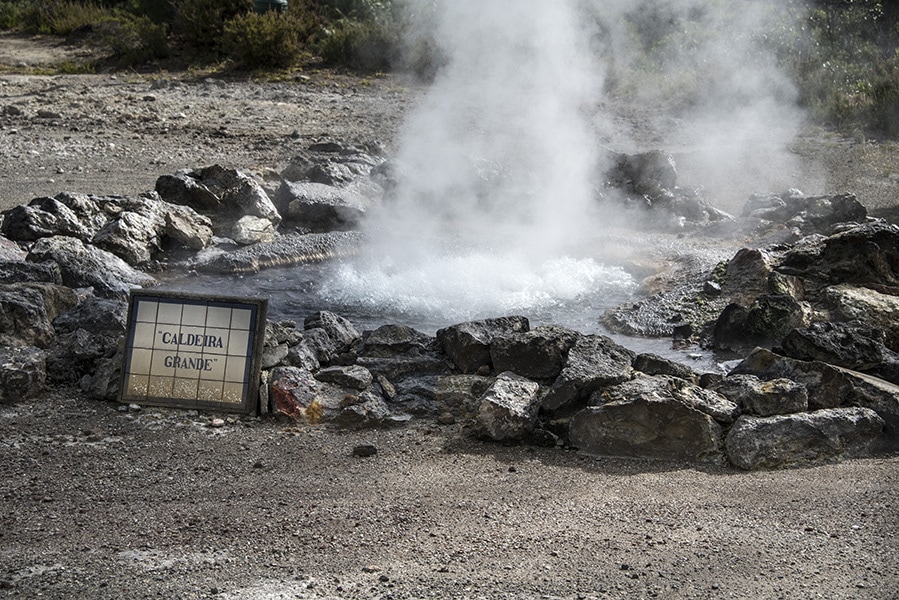
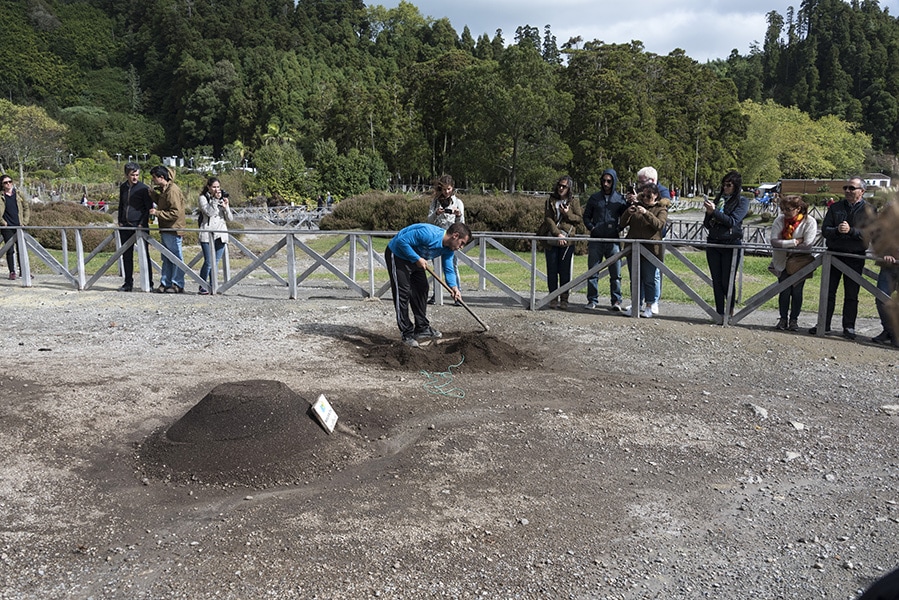
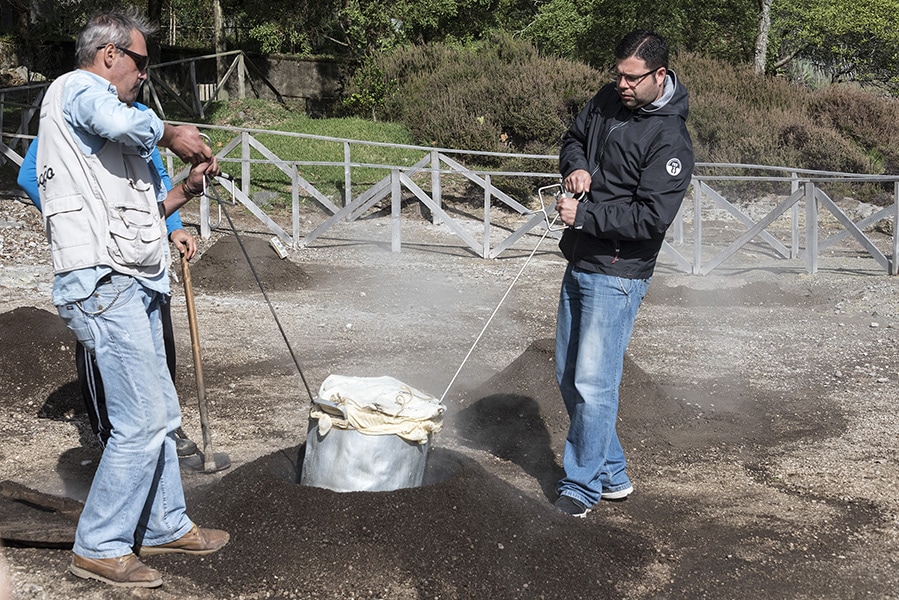
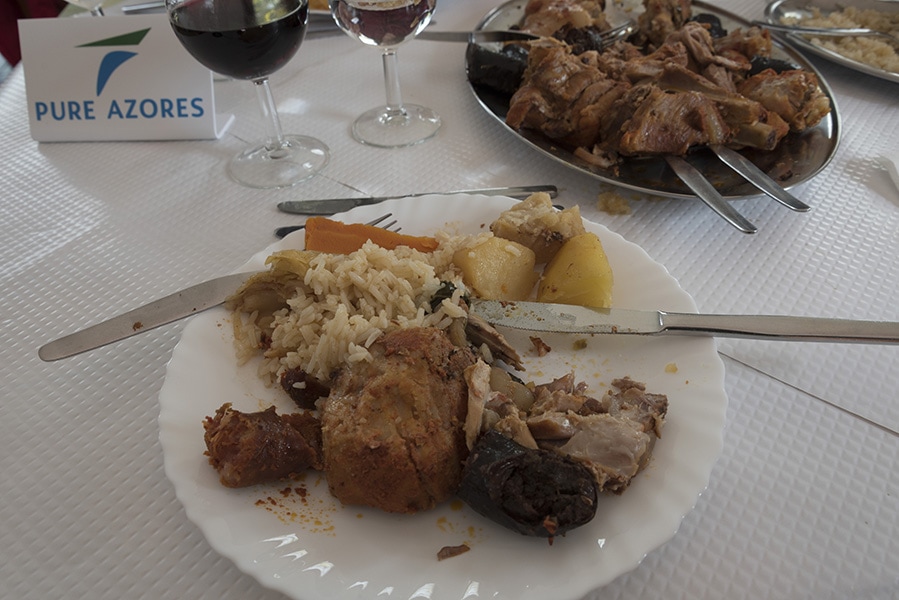
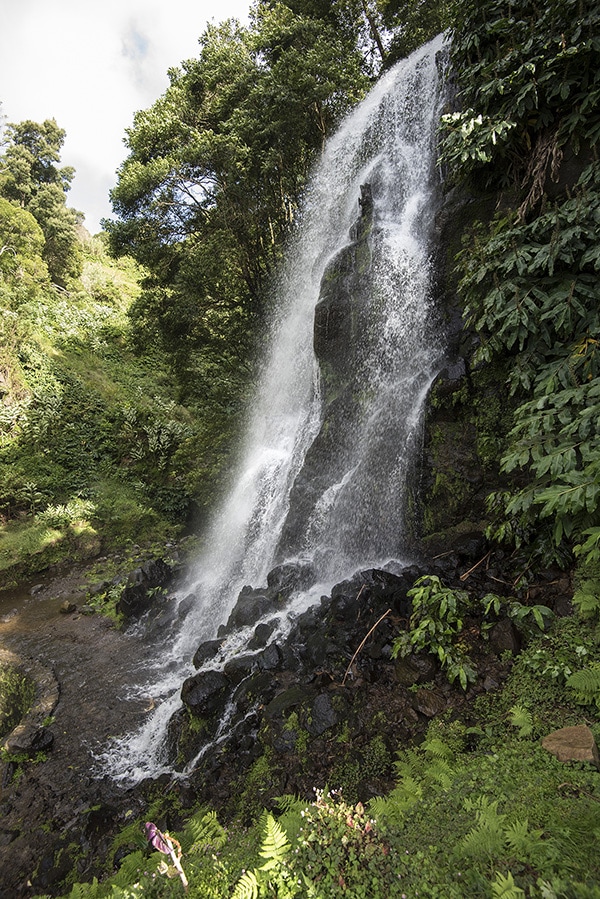
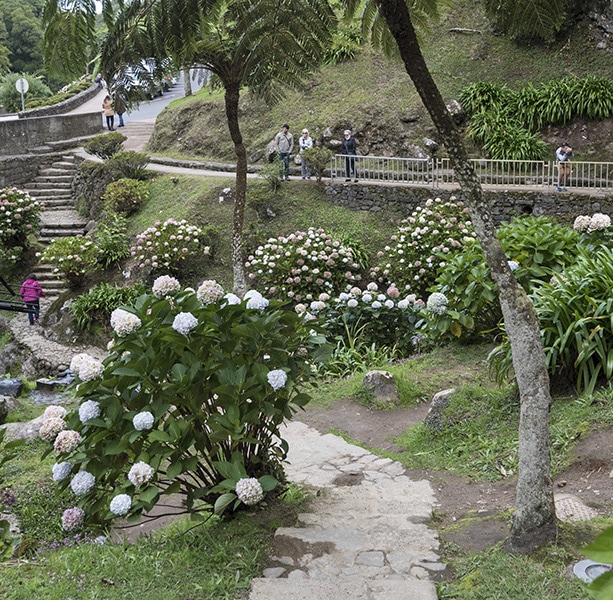
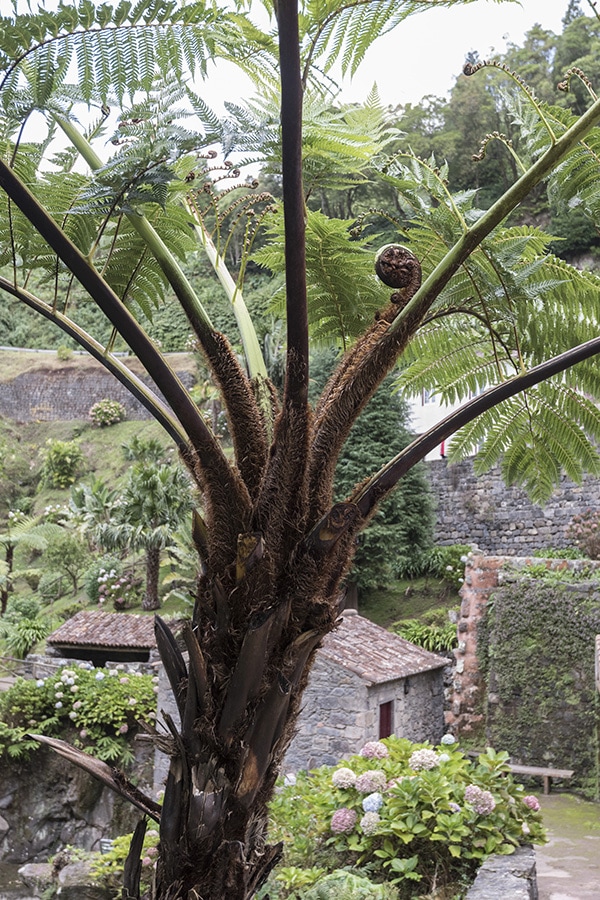
The Azores archipelago is an autonomous region of Portugal that were discovered in the 1400's by Gonçalo Velho Cabral, a monk and explorer. A group of 9 islands, the Azores is located in the mid-Atlantic. The islands enjoy a temperate climate making it an ideal place to visit, regardless of the time of year. 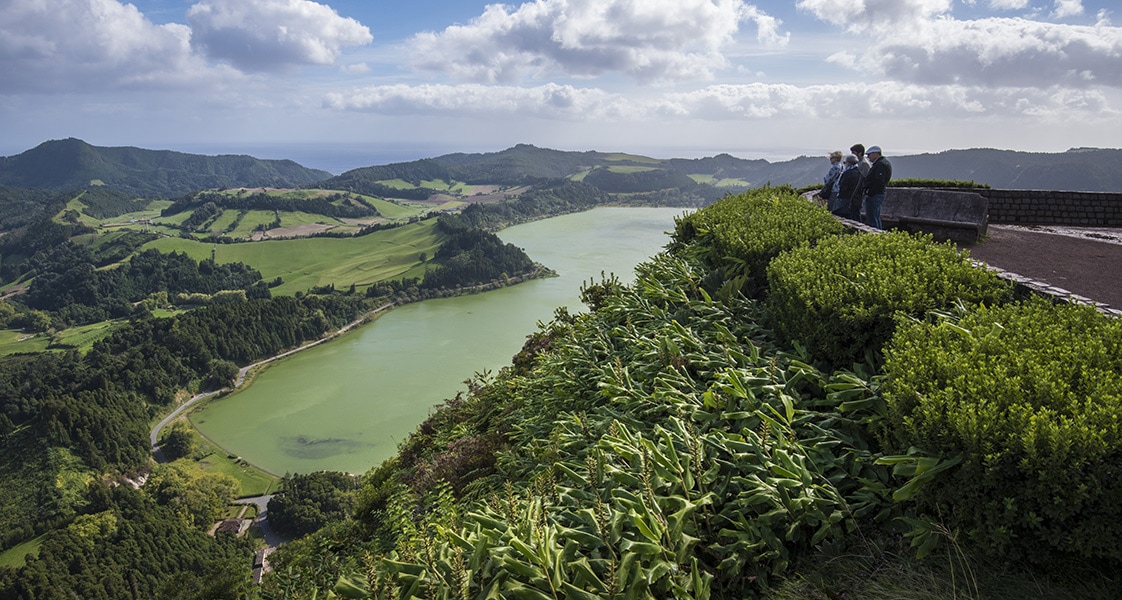 Lagao das Furnas In October 2016, we visited São Miguel, the largest island in the Azores islands. Although October can be a bit wetter than in summer, we experience relatively little rainfall and our daily temperatures ranged between 17°C and 24°C. So what's there to do in São Miguel? As it turns out a lot, especially if you love outdoor activities, fine dining, exploring centuries old historic buildings, viewing street art, taking photos or relaxing in rejuvenating thermal pools. 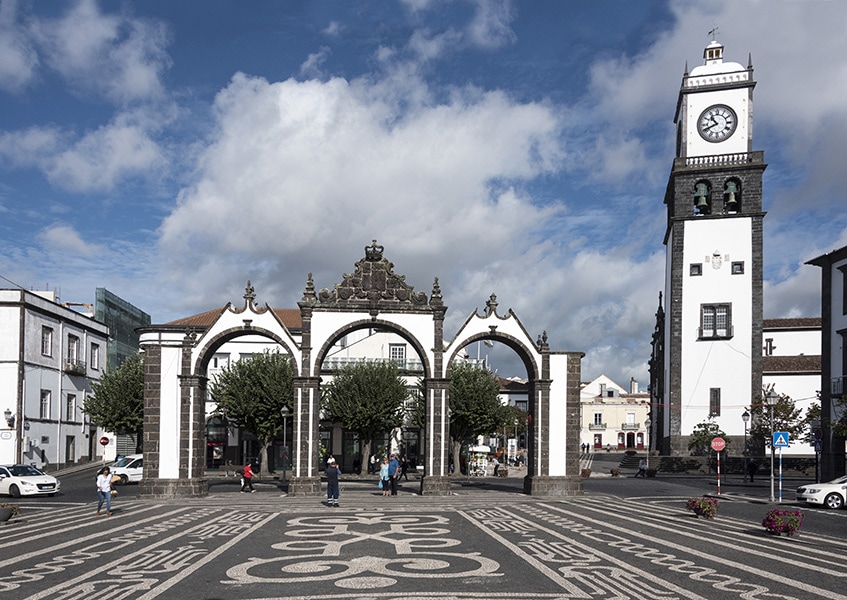 City Gates Ponta Delgada, the capital of the Azores, is located on São Miguel the largest island and locally called the "Green Island". São Miguel is very lush and a gardeners paradise with flowering hydrangeas everywhere. Ponta Delgada offers many sights including the historic City Gates, pictured above. It's also a great place to discover local restaurants serving fresh Azorean fare. One of our favourite places, Boca de Cena, is run by a single individual that is owner, chef, maître d' and waiter. It's a small restaurant with only 10 tables so it fills up quickly. We would recommend making reservations. There's a lot to explore in Ponta Delgada, just remember that places often close early (by North American standards) and on Sunday only a few stores and restaurants are open. Be sure to visit the fresh markets, Antonio Borges Park with the large Australian Banyan tree and grottoes, and the various churches such as St. Sebastien's Mother Church. Ponta Delgada is also known for its graffiti, colourful doorways and intricate cobblestone patterns in the street. As interesting as Ponta Delgada may be, the real Azores can be found by getting out of town and visiting the rugged and picturesque countryside created through volcanic activity. São Miguel still exhibits a lot of secondary volcanic activity such as hot springs although the last time a major eruption occurred was in 1652 on Pico do Fogo. We adventured both east and west. East to see Cete Cidades and Fogo and west to see Furnas. On our East Island adventure we decided to take a jeep tour through Futurismo. The jeep tour was more intimate than the bus tour and provided better opportunities to explore such as our visit to the Salto do Cabrito waterfall. Our guide was very professional and helped make the tour fun. We booked a Pure Azores west island tour to see Furnas, the north shore and the Ribeira dos Caldeiroes Nature Park. Our guide was wonderful and helped to make the experience special. Furnas is arguably the most volcanically active part of São Miguel and is known for its iron-rich hot springs and magnificent parks and gardens. It's also known for its volcanic steam cooked meals, a unique Azorean experience! On the way to Furnas we stopped in the little town of Vila Franca do Campo to try the famous custard pastries made by the local bakery there - Do Morgado. In many ways São Miguel is a photographers or painters paradise with visual opportunities around every corner. The image of the north shore is just one example.  North Shore. We took advantage of a vacation package that included flight and hotel. We flew to the Azores through SATA and stayed at the Antillia Hotel Apartamento. The hotel includes short and long term rentals and was conveniently located close to the city center so that we could walk and explore the city. Text and photos are copyright Eric David
0 Comments
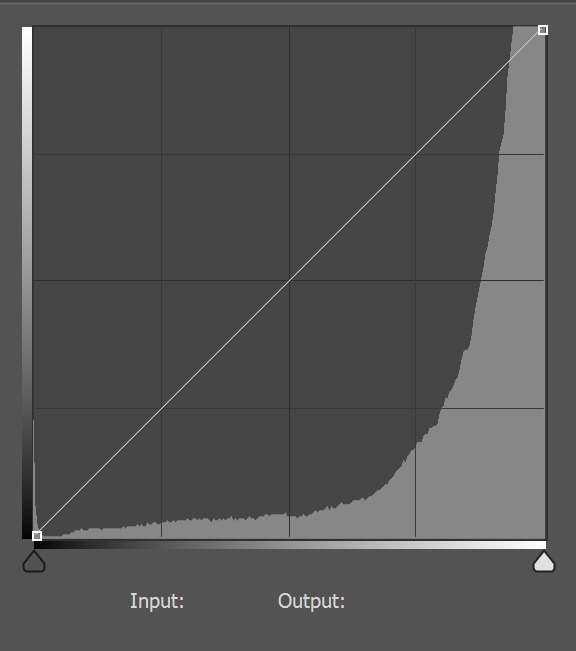
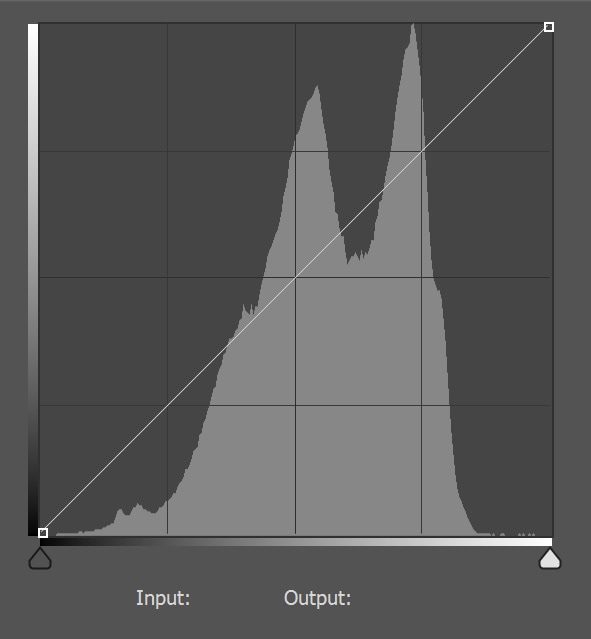
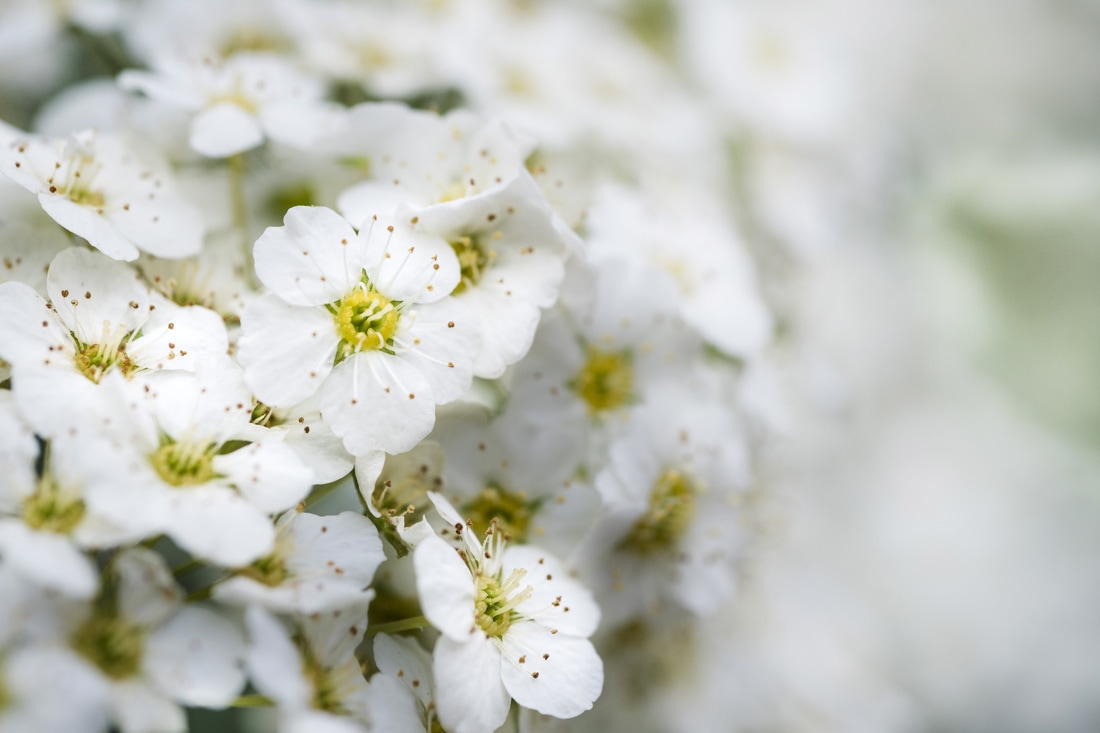
 What is a high key image? High key paintings and photos are images that have been created with the intent to reduce mid-tone values and emphasize the brighter (white) parts of the image. Think of an object bathed in bright sunshine so that when you squint all you see are the strongest shadows and bright surfaces. You can see the dramatic difference between a high key and "normal" histogram for the same image in the diagrams below. They "high key" histogram has most of it's values pushed to the right (or bright) side of the chart, while in the normal histogram the values are more evenly distributed and include many more mid-tones. This "high key" style is often used to convey positive, upbeat or happy moods. It's excellent for subjects that are lighthearted or beautiful. You'll often see this technique used for portraits, flowers, or children. That's not to say that you can't have a high key landscape. Think of the sun burning through fog, everything is bright with little contrast. So the next time you're planning to create an image, think about high key and what it may add to the message. Thought for the Day
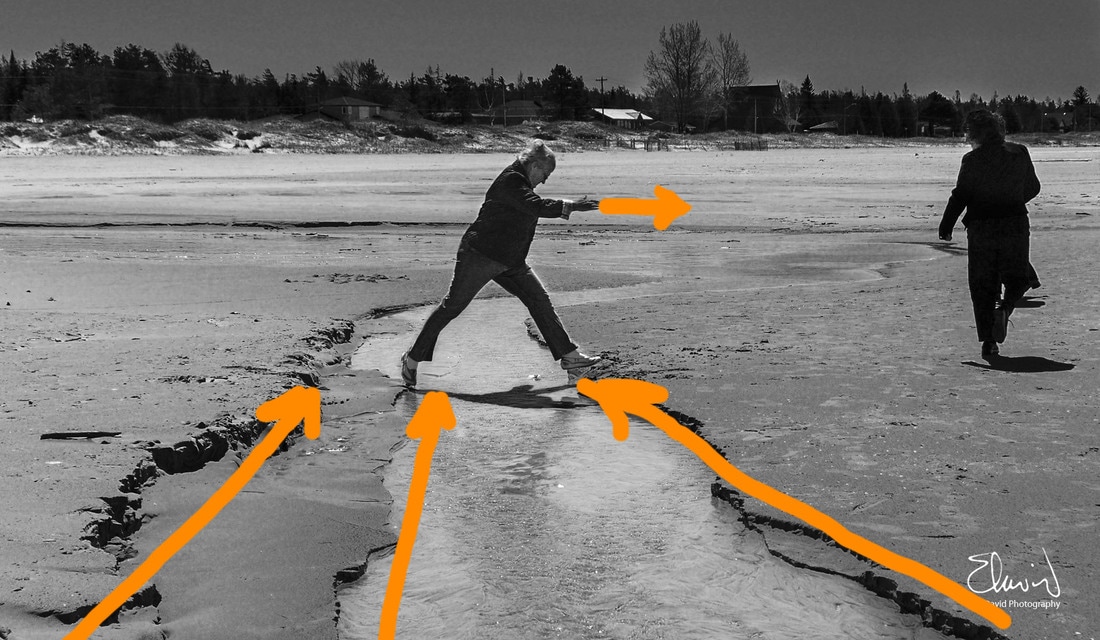
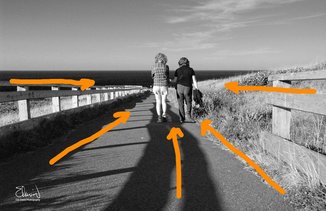
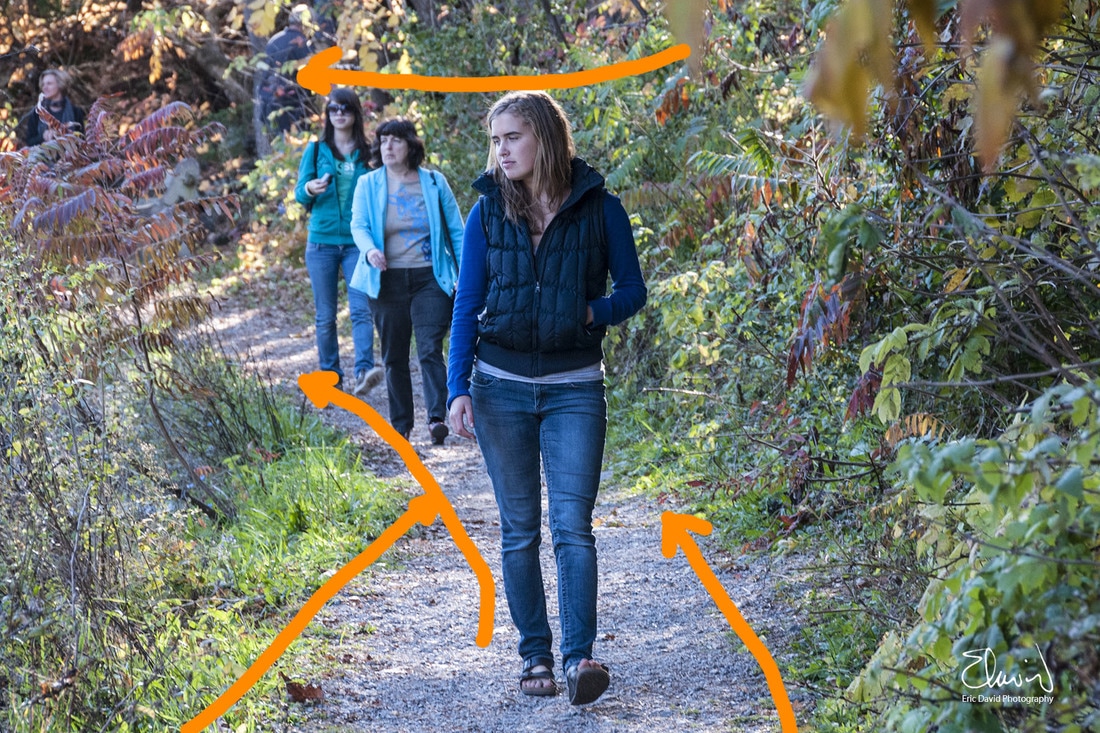
“The single most important component of a camera is the twelve inches behind it.” Ansel Adams  A leading line is a compositional technique that draws the viewer's eye into the subject matter of the image. The line(s) guide the eye through the image to the focal point. Sometimes a leading line can be very direct - a road, railway track or shoreline. At other times they can be softer and more subtle. Leading lines can originate from anywhere in the image, but most often they start at the bottom of the frame and work up towards the subject. Leading lines play an important role to:
In the next set of images the leading lines are very obvious, created by the lines in the sand on the left or the pathway on the right. The image on the left, after drawing the viewer into the images also to the destination of the traveler.
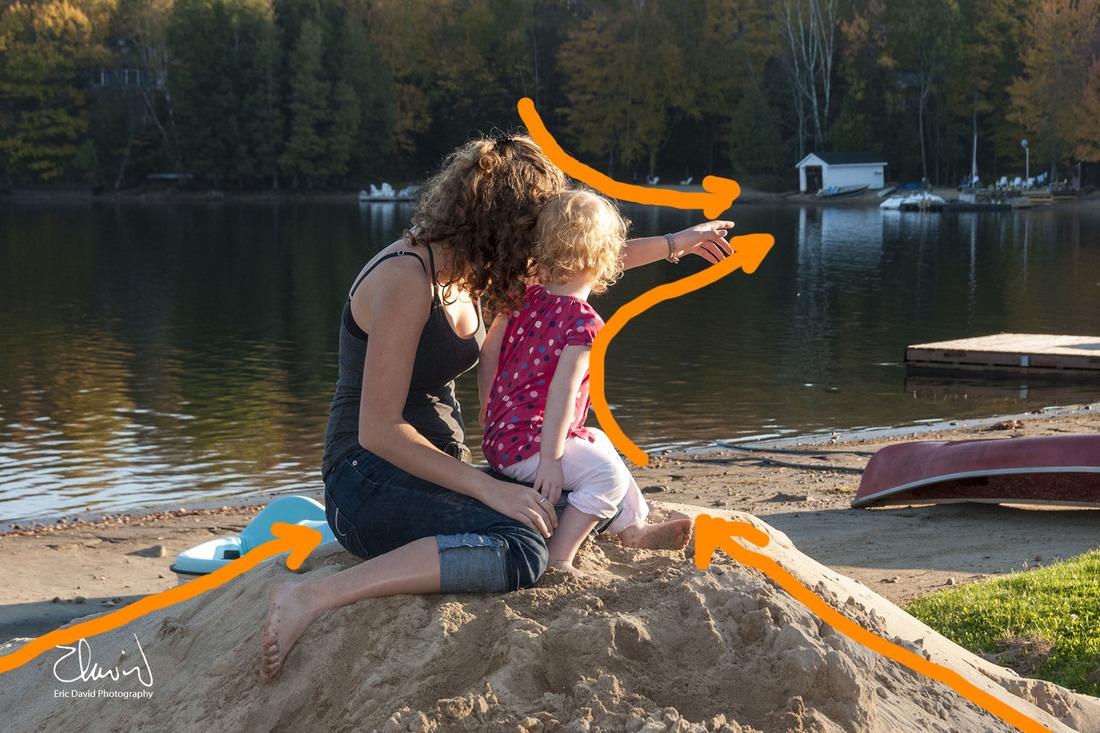
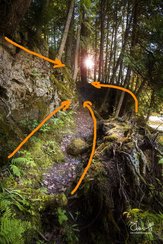
As well as leading the eye into the images, leading lines can guide the eye through the image. In both of the following photos the eye once led into the image is taken on a visual journey.
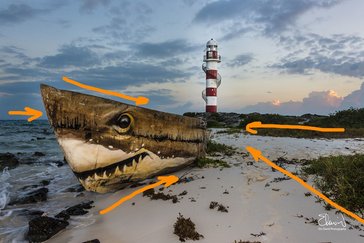
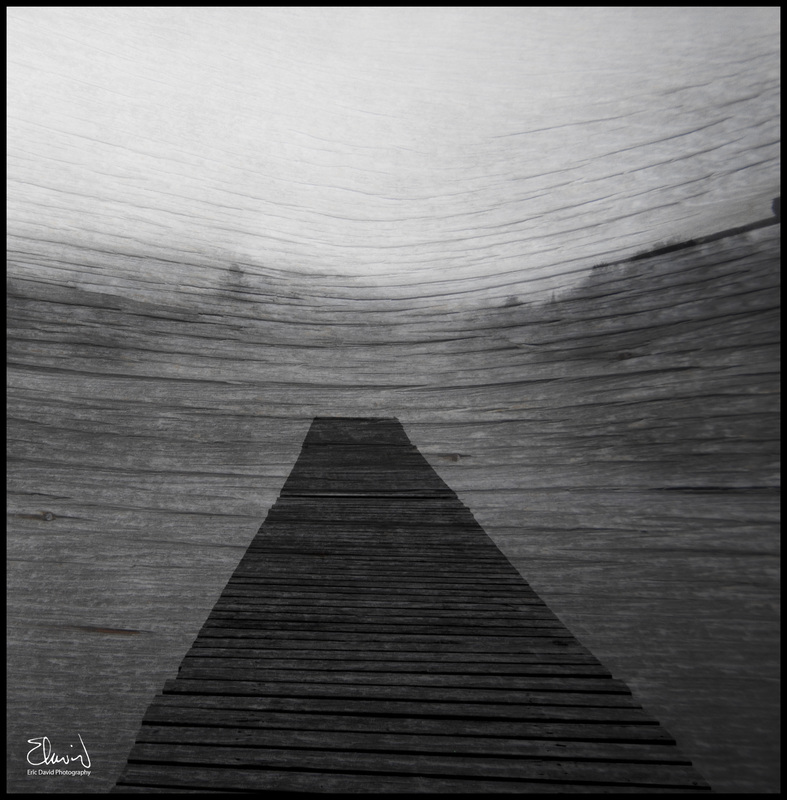
Leading lines are also an excellent way of adding depth and perspective while focusing the eye on the subject of importance in the frame. In the following images the eye is led to the lighthouse on the left, and the setting sun on the right.
Using leading lines as a key compositional technique in your image can help you improve your photography or painting, and help you tell your unique story.
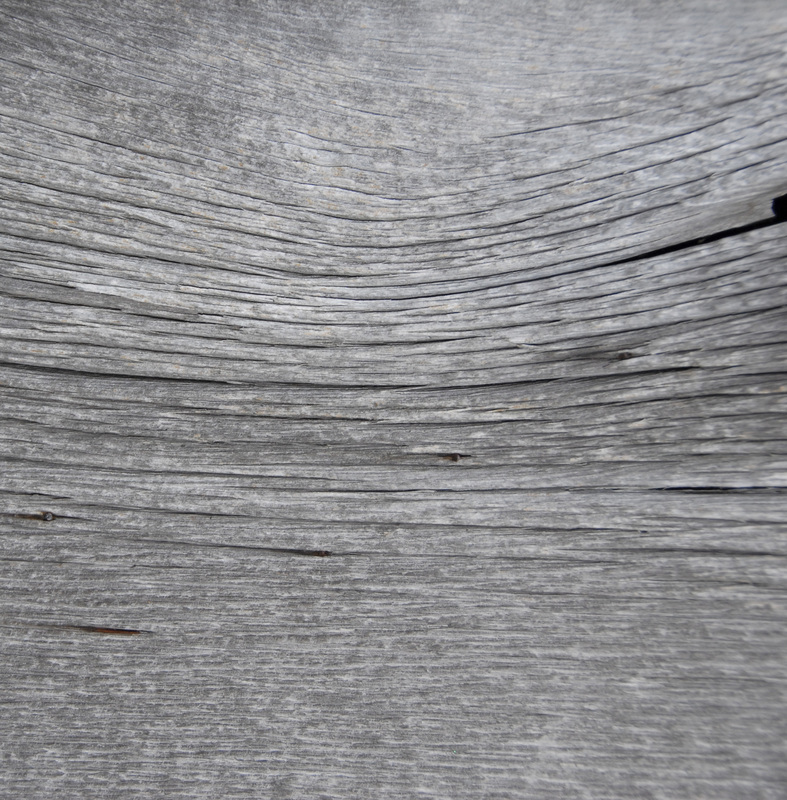
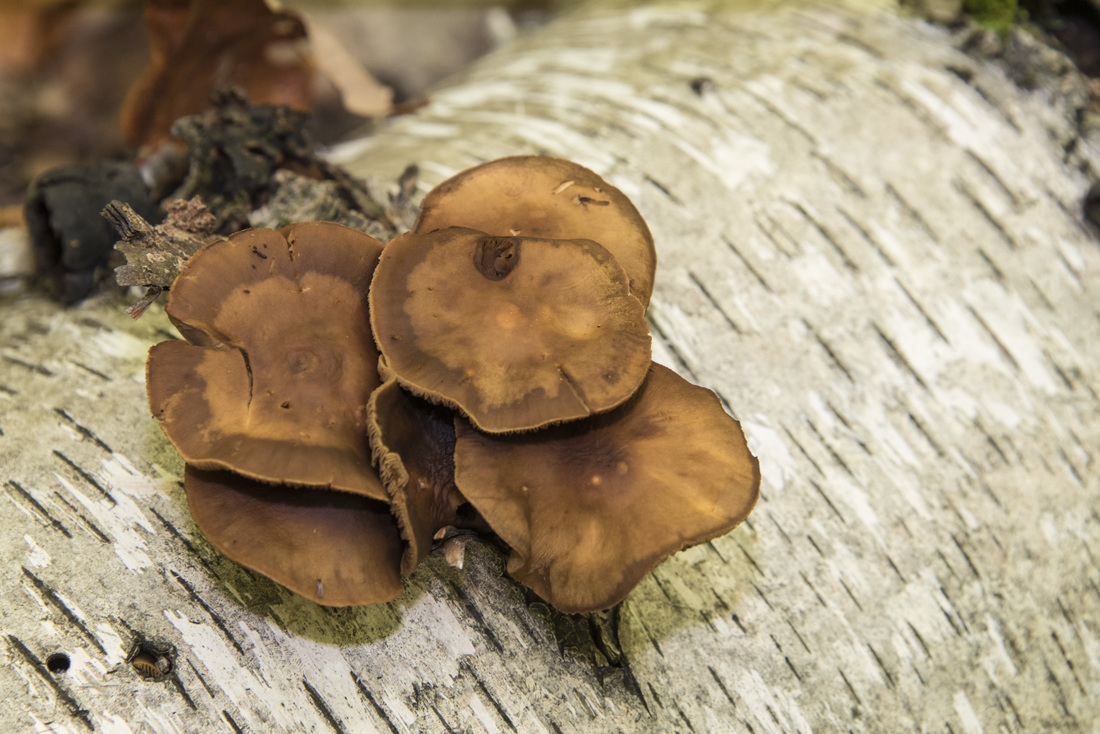
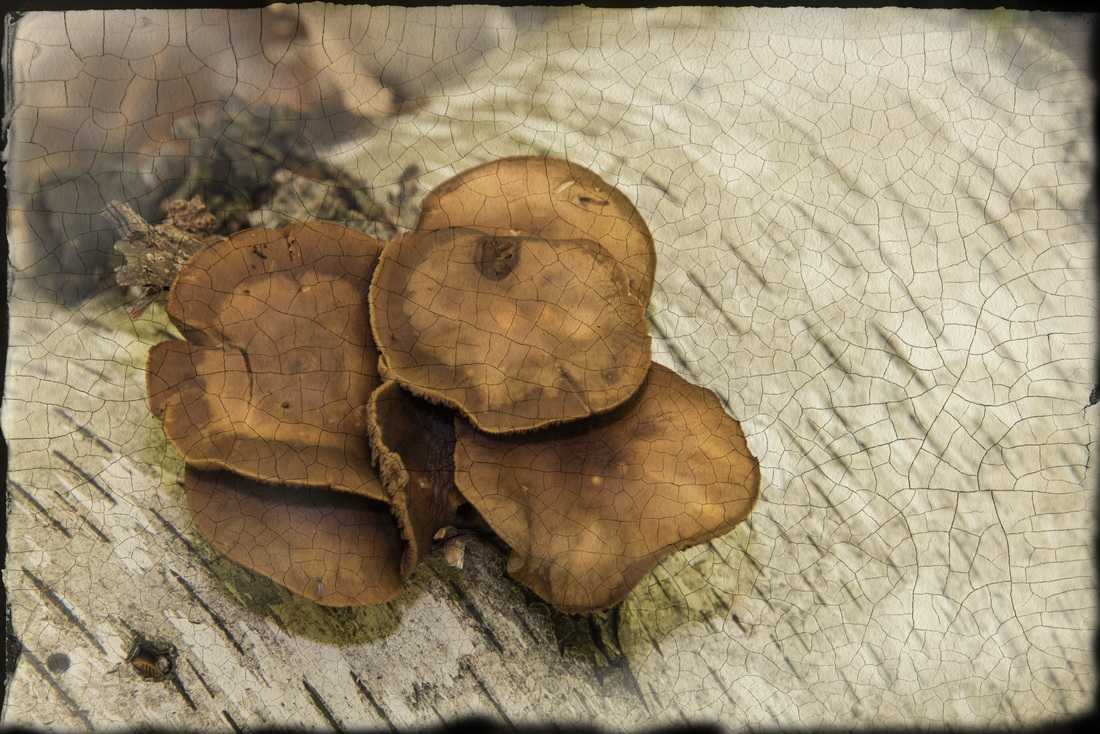
Thought for the Day "The artist is nothing without the gift, but the gift is nothing without work." Emile Zola Have you ever wondered how to create those photos with textures integrated into the image? The challenge is really one of melding a good base photo with an appropriate texture so that when combined it looks natural and adds value to the interpretation. In the above "Before & After" image I combined a photo of the forest floor with the texture from an aging sidewalk. I think the texture subtly enhances the image, making it more interesting and providing deeper meaning. If you have an image editing program (Photoshop, Elements, Painter) with the ability to combine layers you can create these photos too. Place the texture image on top of the base image and use soft light as the blending mode. You can also use screen (which lightens) or multiply (which darkens) as blending modes. It's worth while experimenting to see what works best. Once you've blended the images now it's time to experiment. For example, modifying the texture layer's opacity can improve the integration of both layers. Or try burning and dodging parts of the image. This can help bring into focus those areas that are most important. In the three images below the left most image is the original, the center image is the final result and the right most image is the texture that was used. Texture can be used in all sorts of ways. Here's an example of how Victoria Wallace, a good friend of mine, uses texture to enhance the acrylic painting The End of Innocence. Victoria uses the crackle in the piece to suggest an earlier time, which in combination with the vintage ceramic figurine subject matter suggests an unchangeable innocent past. Similarly one could expand the interpretation of the original photograph by combining the physical with the metaphysical. The wood, which is present in the dock, also becomes part of the substrate of the reality around it. The crackle suggests something old and worn supporting new mushroom growth that couldn't exist without the rotting organic matter that they grow on, or the contrast between the hardness of concrete that through time transforms and breaks down just as the leaves transform to become soil for the forest floor. Thought for the Day
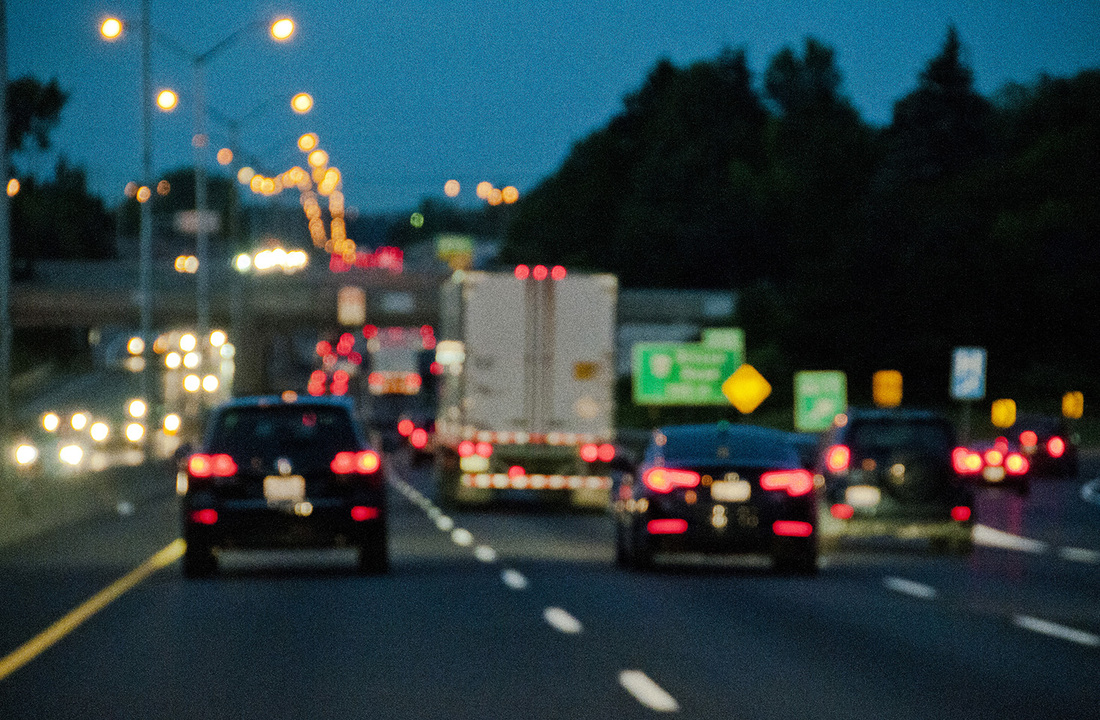
"The true work of art is but a shadow of the divine perfection." Michelangelo  Taking photos during the evening sometimes produces some wonderful results as the extreme contrast between light and dark can contribute into making a stunning photo. However it's very easy to over expose and blow out the highlights in the image. Also shooting with slower shutter speeds (to get the correct exposure) in available light often results in a blurry image. So what should you do? To ensure that you don't loose detail in the bright areas of the image underexpose by 1-2 stops to ensure that the highlights are usable, then recover the dark areas in Photoshop or another image editing program. Another option is to use the camera's HDR setting. There's a bunch of ways to solve the sharpness problem including using a tripod, setting a high ISO speed on your camera (the drawback though is increased noise in the image), or resting the camera on a firm base (chair, table, ledge, camera bag) and using a remote shutter release or camera timer. The image above was taken using the camera self timer and sitting the camera on a ledge as I didn't have a tripod with me. There's also various hand held techniques that will improve your chances of capturing a sharp image when shooting with slow shutter speeds. Techniques I've used include steadying the camera against a firm object (light pole, handrail), breathing in and holding your breath while taking the shot or taking a number of shots in rapid succession. One of the shots in the middle of the sequence should be sharp(er). The images below have been taken with different cameras and lenses and I've used a combination of the techniques described above. If you do decide to take photos of moving vehicles on the highway, just make sure someone else is driving! Thought for the Day
“One can have no smaller or greater mastery than mastery of oneself.” Leonardo da Vinci Artists such as George Braque and Pablo Picasso created a new way of seeing the world from different vantage points. In doing so they created a movement called cubism. For more information see the following link: cubism One famous example is the piece entitled Nude Descending a Staircase, where Marcel Duchamp wanted to explore motion and movement. I discussed an approach to movement and motion in my photography blog post "Go with the Flow" whereby using slow shutter speed one can capture a sense of motion. The blog can be found here: go-with-the-flow Another approach is to take a number of successive shots on the same frame. This more closely approximates Marcel Duchamp's painting as you can see in the image below. 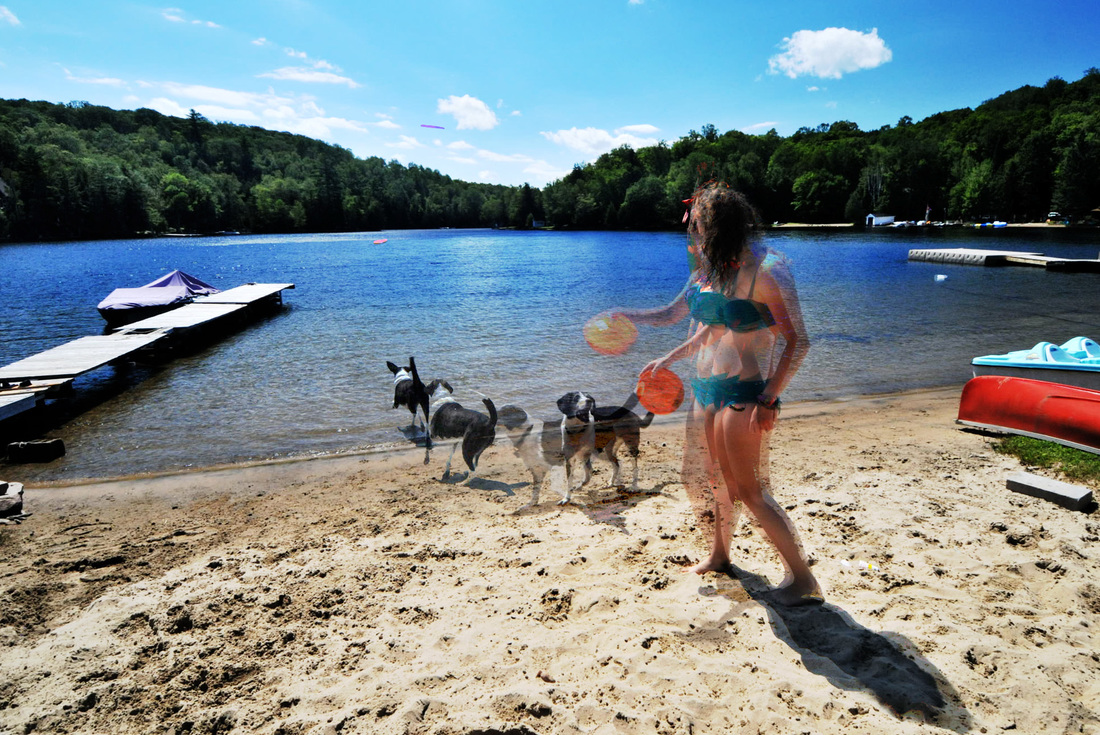 The following drawing study conceptually uses the same technique. As the model moved from position to position I continued to draw over the same image (frame) blending one position into the next. 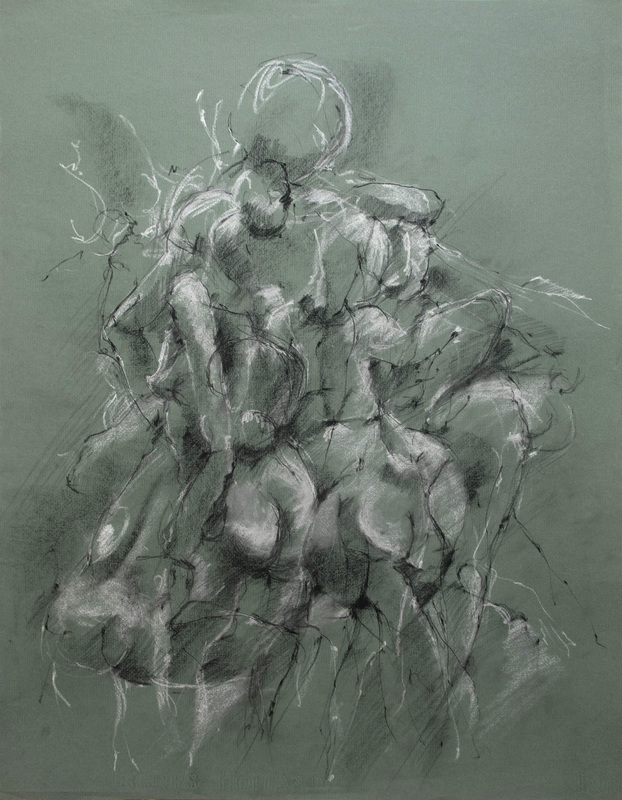 Thought for the Day
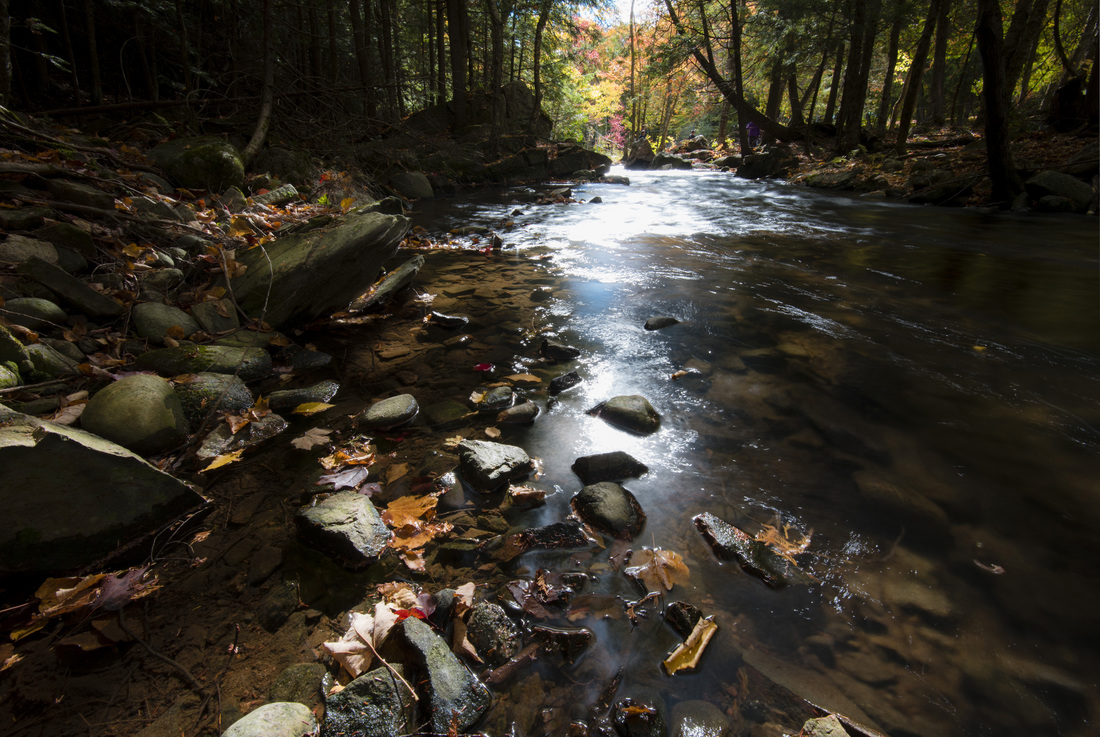
"Vision is the art of seeing what is invisible to others." Jonathan Swift  Sometimes it's worth your while to look again. On the long weekend I was out exploring an area beside the Gull River, taking a few shots and looking for that perfect picture. I'm not sure that I found that perfect image, but I was able to get some interesting shots, maybe even a couple of "keepers". The image above illustrates what you can do when you rethink your image. The first shot (on the left) is a standard exposure taken at 1/125 second, f6.3 using a wide angle lens at 16mm. There's not a lot of contrast in the image and the reflections in the water hide some of the interesting details underneath. The second shot (on the right) was taken at 2 seconds, f22 using a 3 stop ND filter. The second shot has a lot more contrast, the water's been smoothed out and the highlights aren't as fractured.
Here's another image, this time taken at 8 seconds using a 10 stop ND. 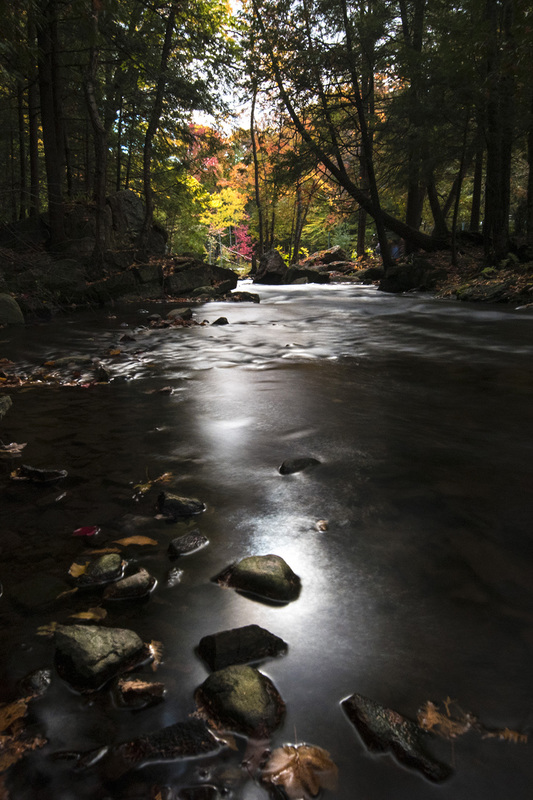 Thought for the Day
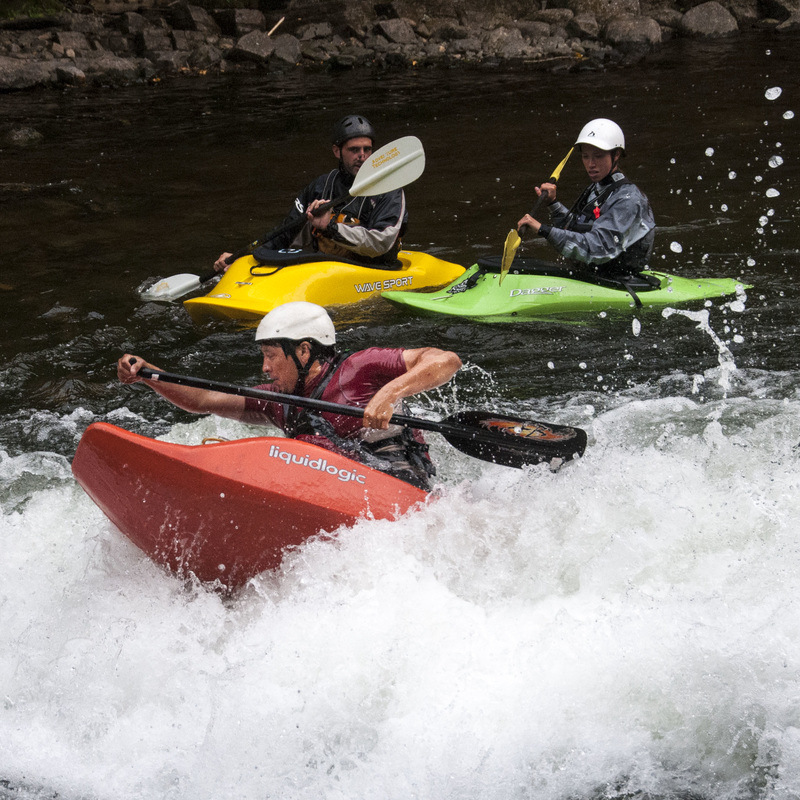
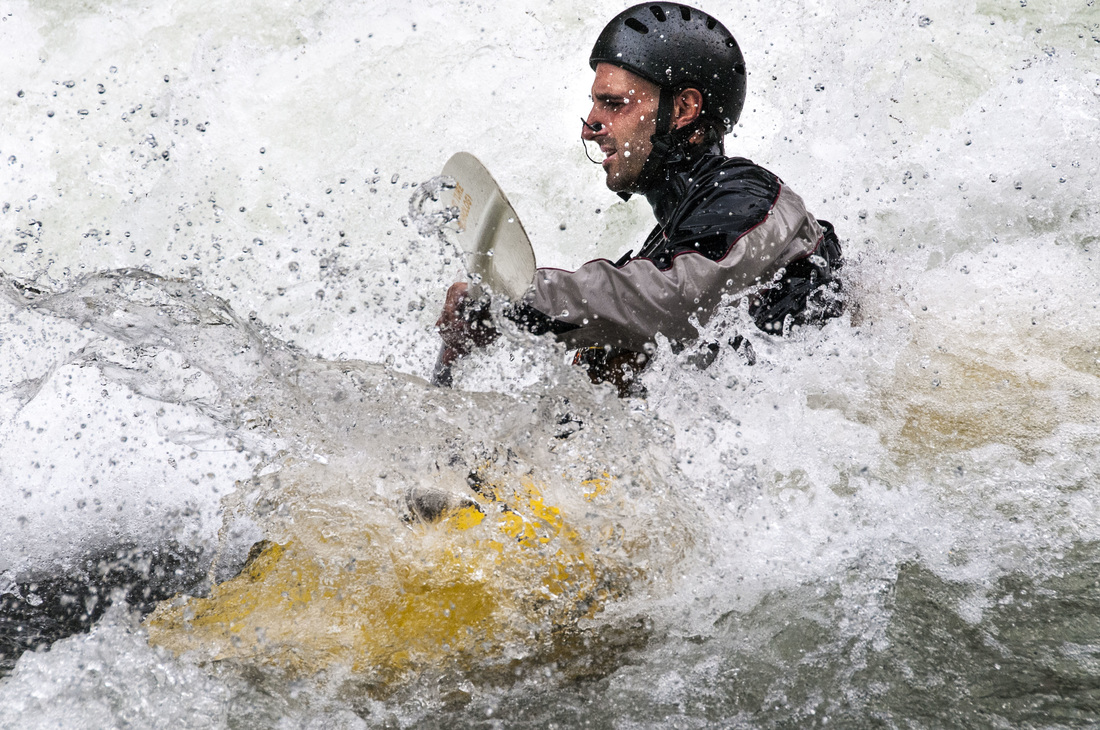
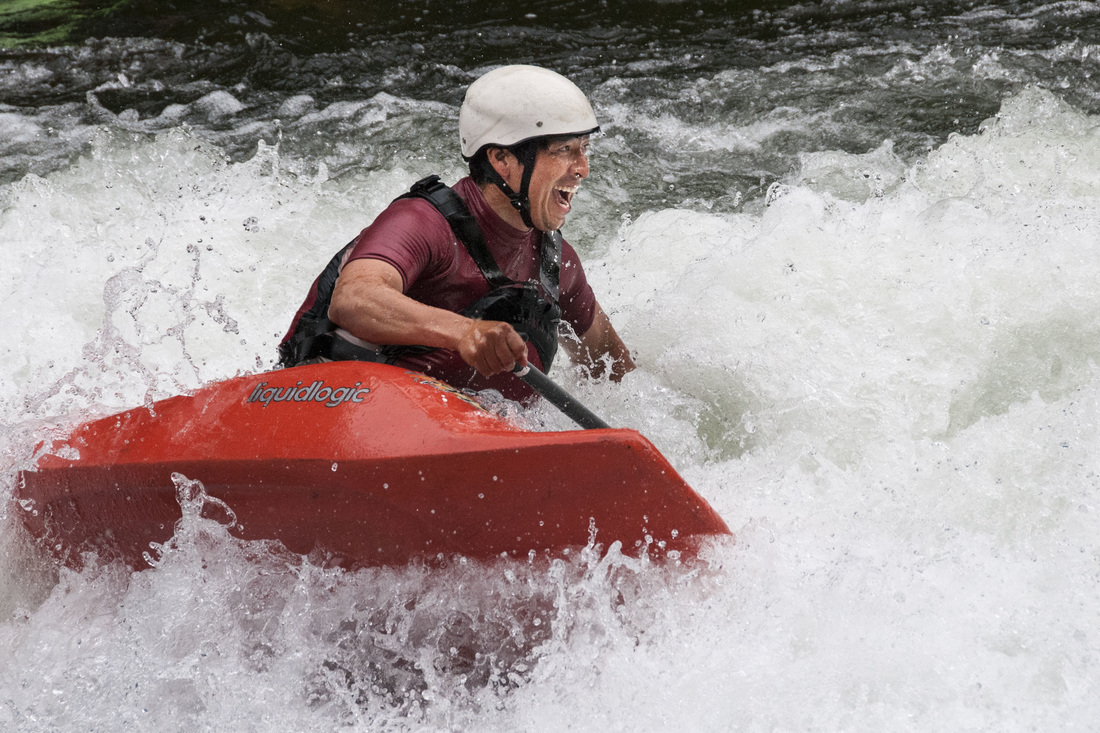
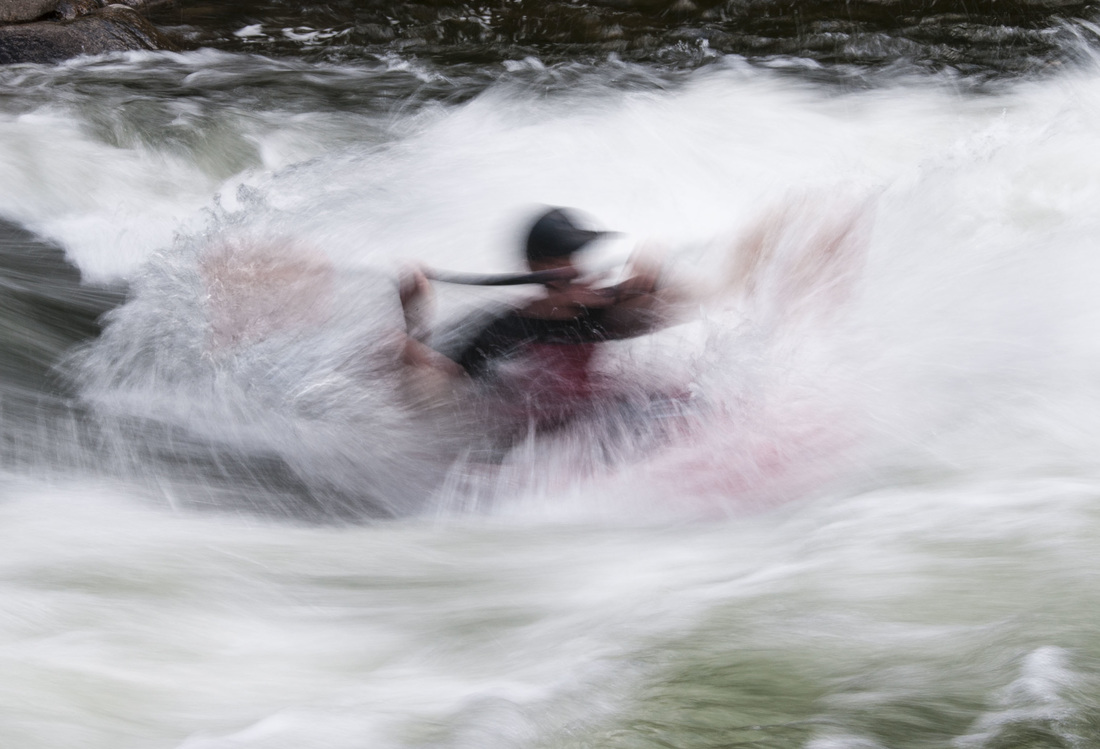
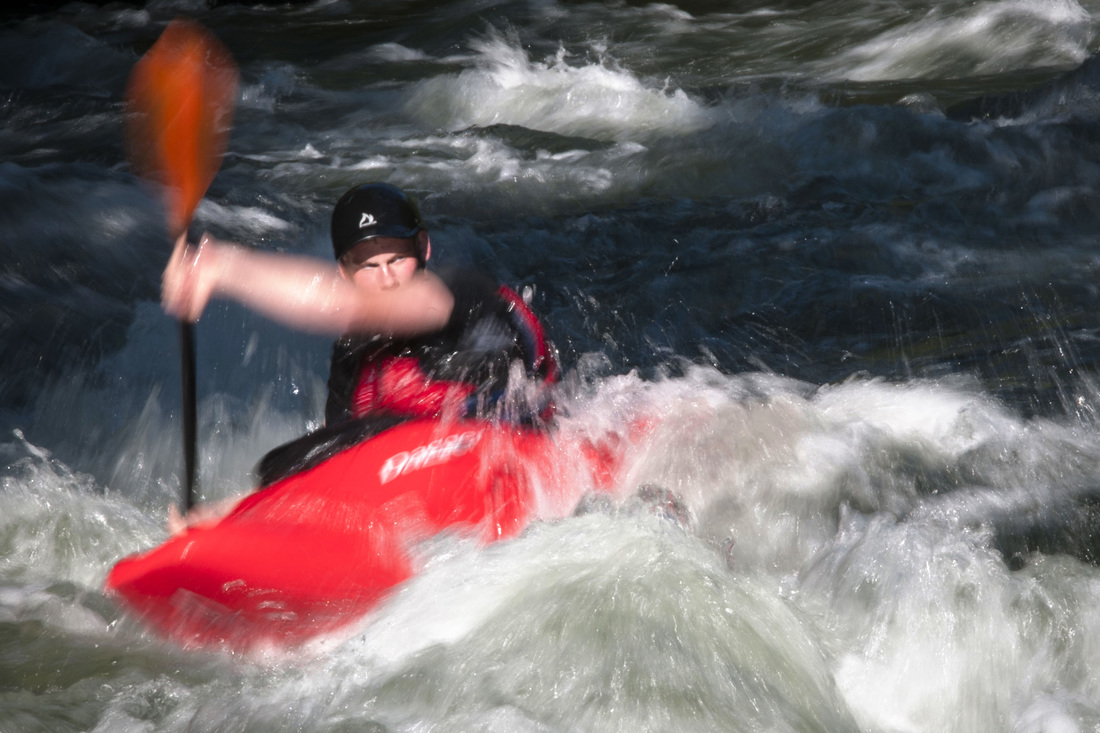
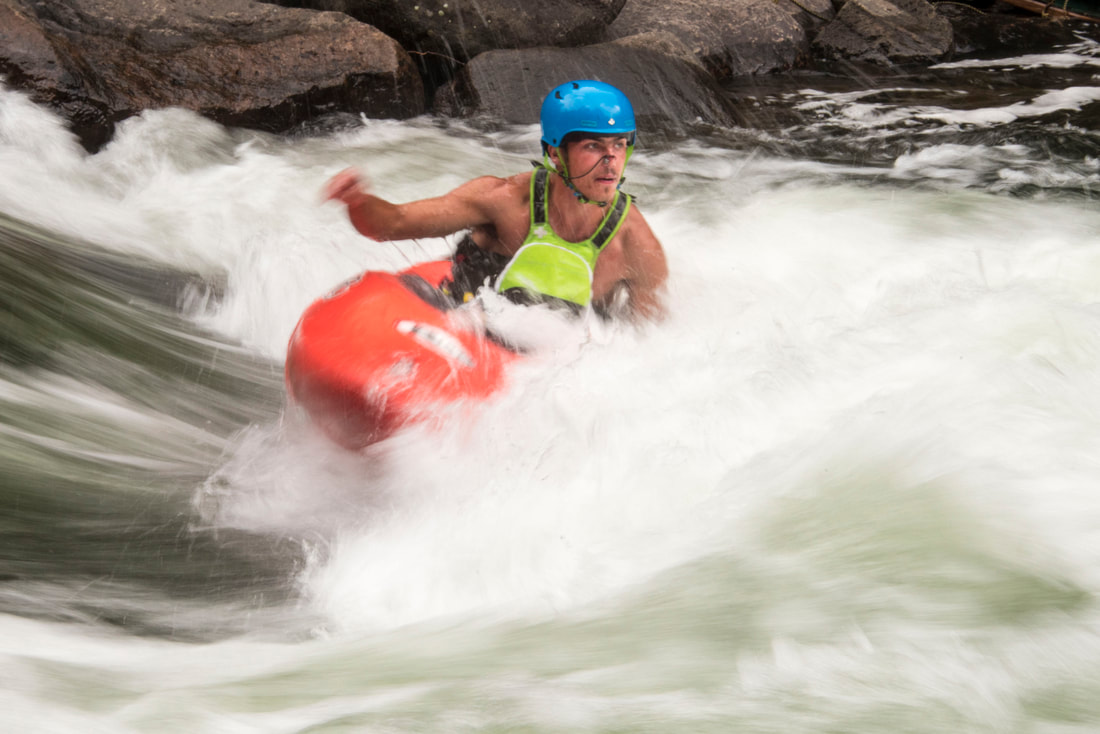
“Luck happens when preparation meets opportunity.” Senca 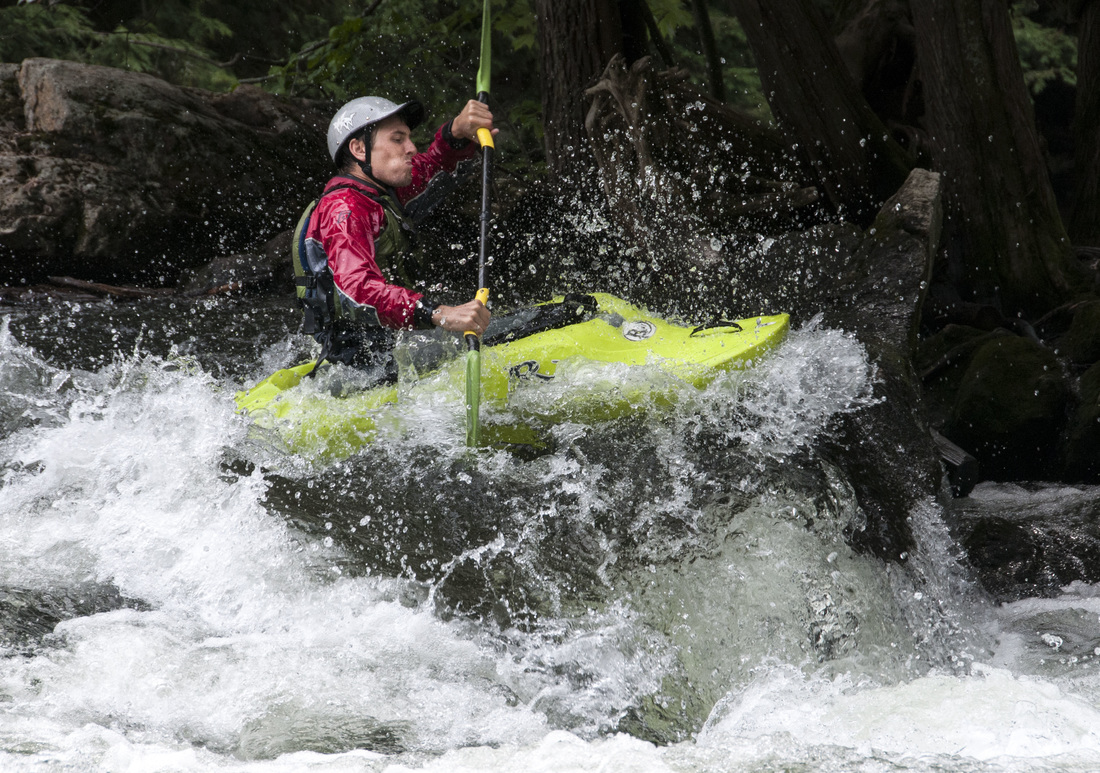 The Gull River near Minden next to the Wildwater Preserve is one of my favourite places to take sports-action photos of kayakers playing in the water. It requires a considerable amount of skill to navigate the upper rapids and lots of opportunities for a skilled kayaker to show off his or her stuff. The white water course is relatively short, with lots of nice locations to drop your tripod with camera and take part in the action. The first five images were taken at high shutter speed of 1/500 sec or faster. This allows you to freeze motion such as water droplets. For a more interpretive photo I also took a number of shots at slower shutters speeds to show the incredible flow of water and spray. These shots were taken at shutter speeds between 1/10 and 1/20 of a second.
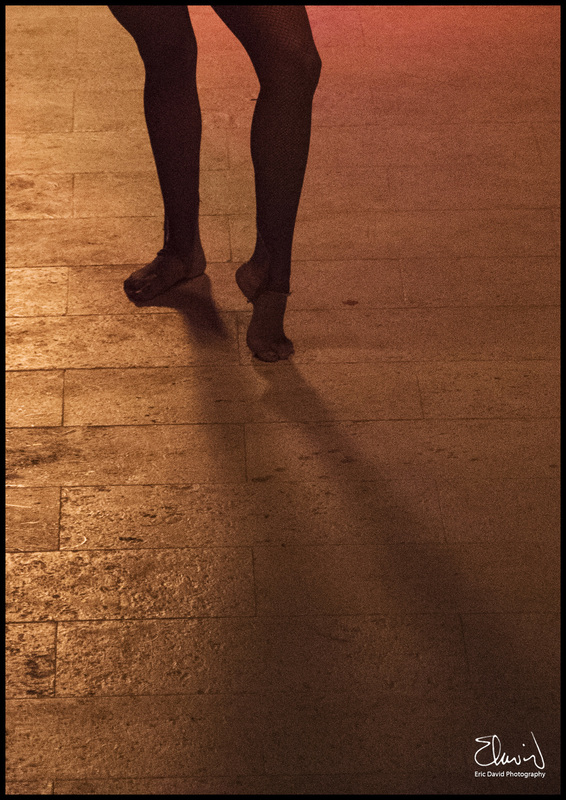
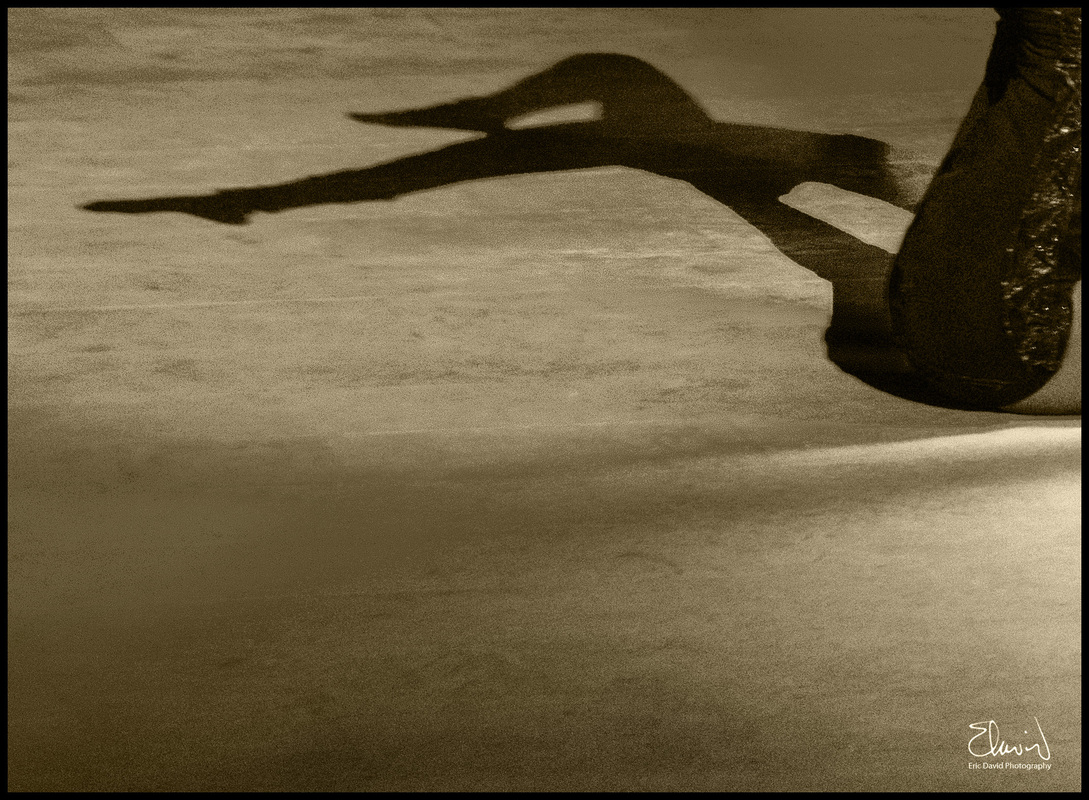
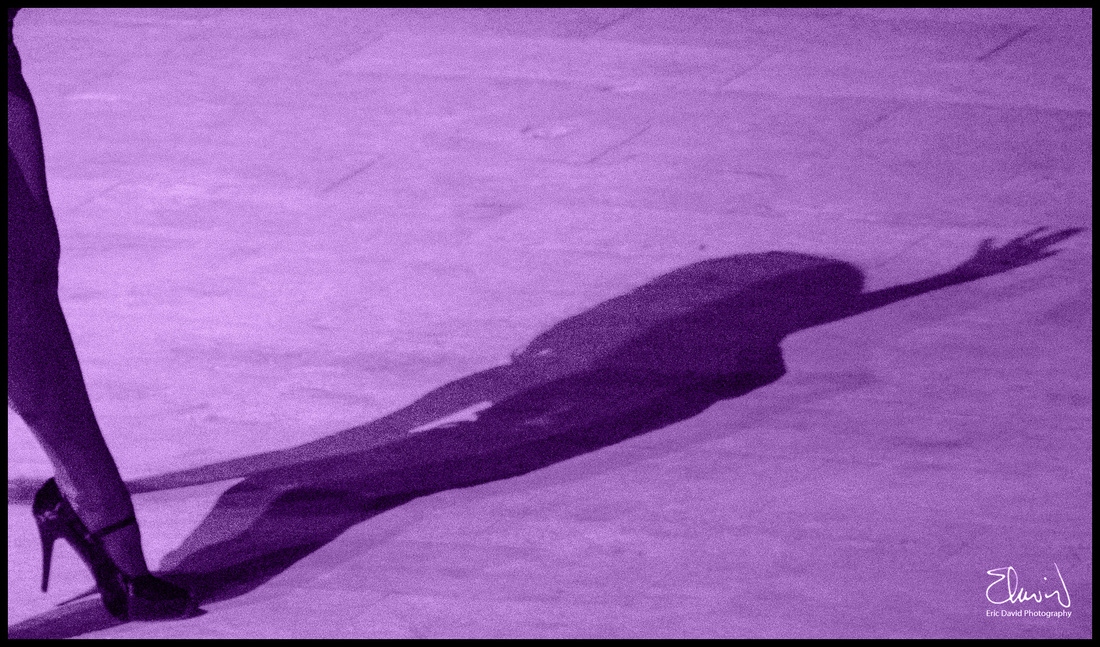
One important thing to remember is that your meter can be easily fooled by the extreme contrasts in the scene. This often results in blown out water highlights and water that lacks texture. I usually underexpose by 1/3 or 1/2 stop (or more) to ensure that I haven't lost the details in the water. Thought for the Day “Art washes away from the soul the dust of everyday life.” Pablo Picasso 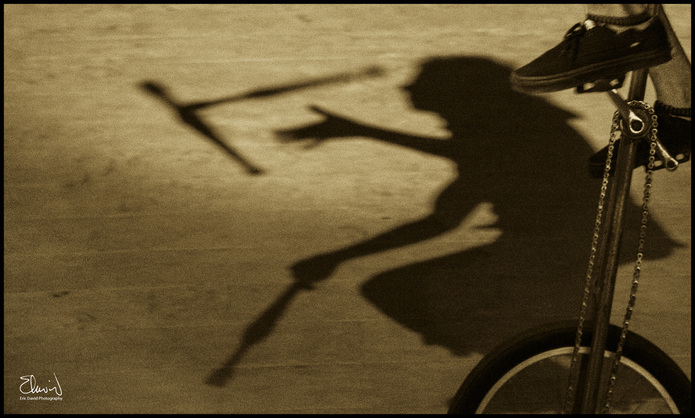 Dancers and other stage performers are not only fun to watch but also to photograph. We were staying at a hotel that provided nightly entertainment, usually in the form of a local dance or acrobatic troupe. I was taking a lot of traditionally composed shots - performer / dancer placed clearly in the frame like this one:  After a while I wanted to try something. Could I still communicate what the performers were doing if I pushed the dancer / performer towards the edge of the frame. Could the images still be visually interesting? Well these are some of the results. Thought for the day
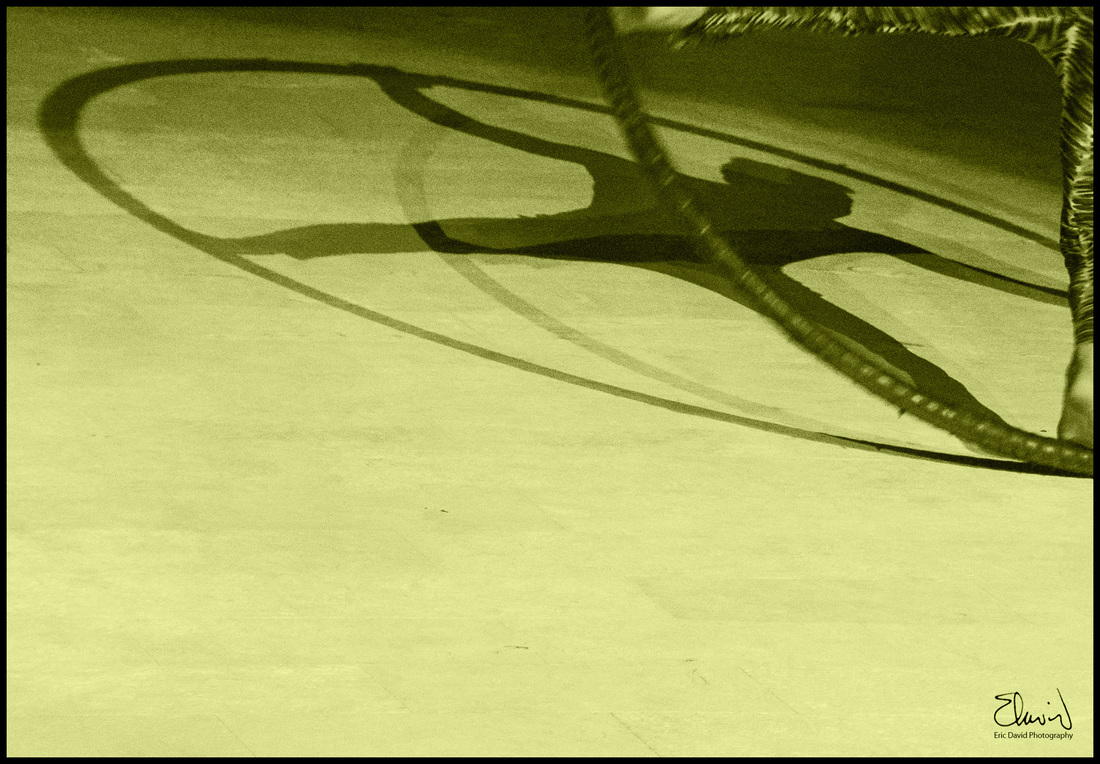
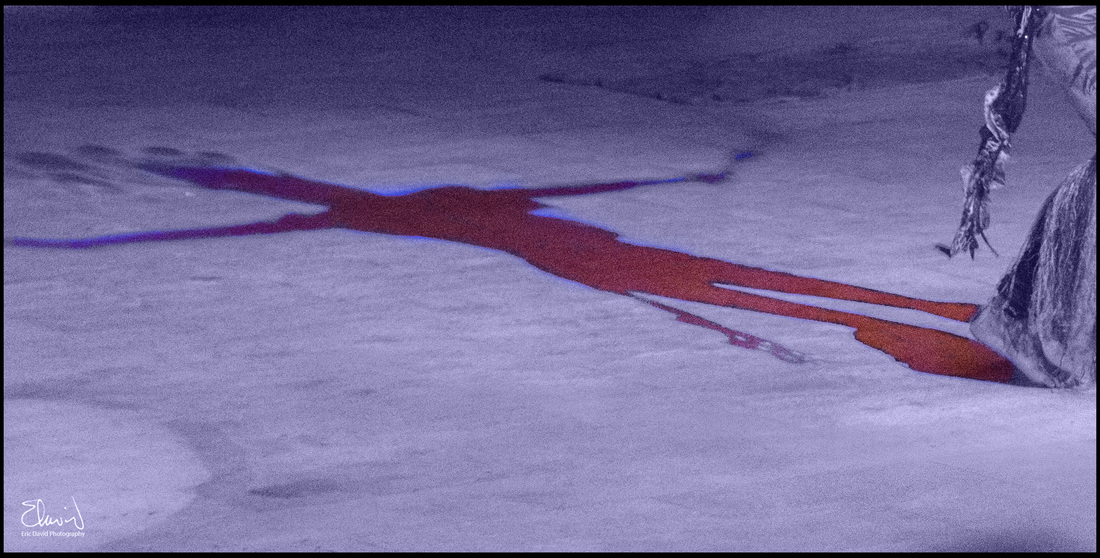
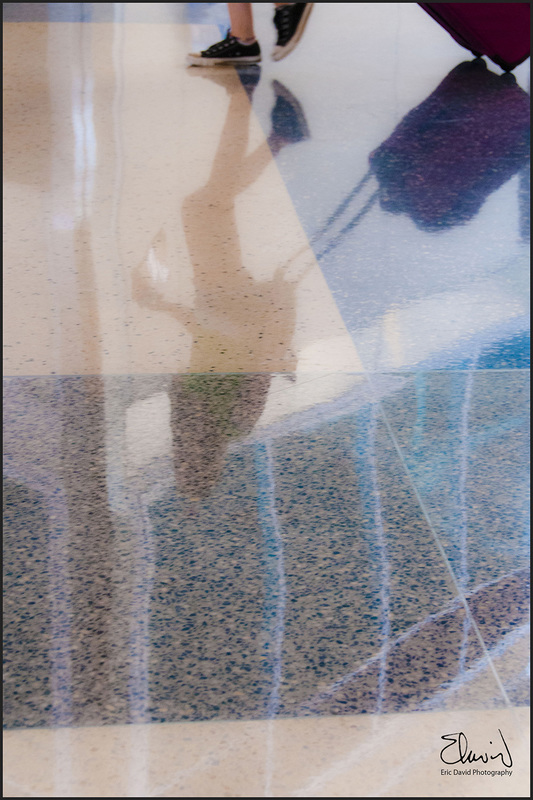
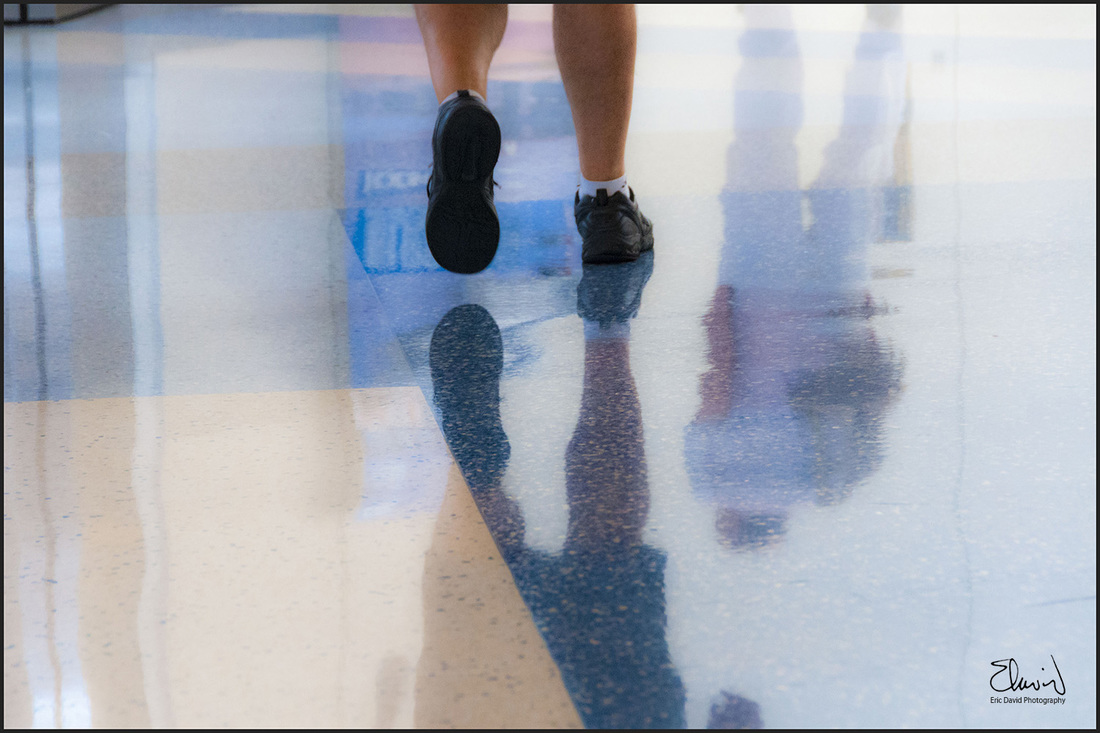
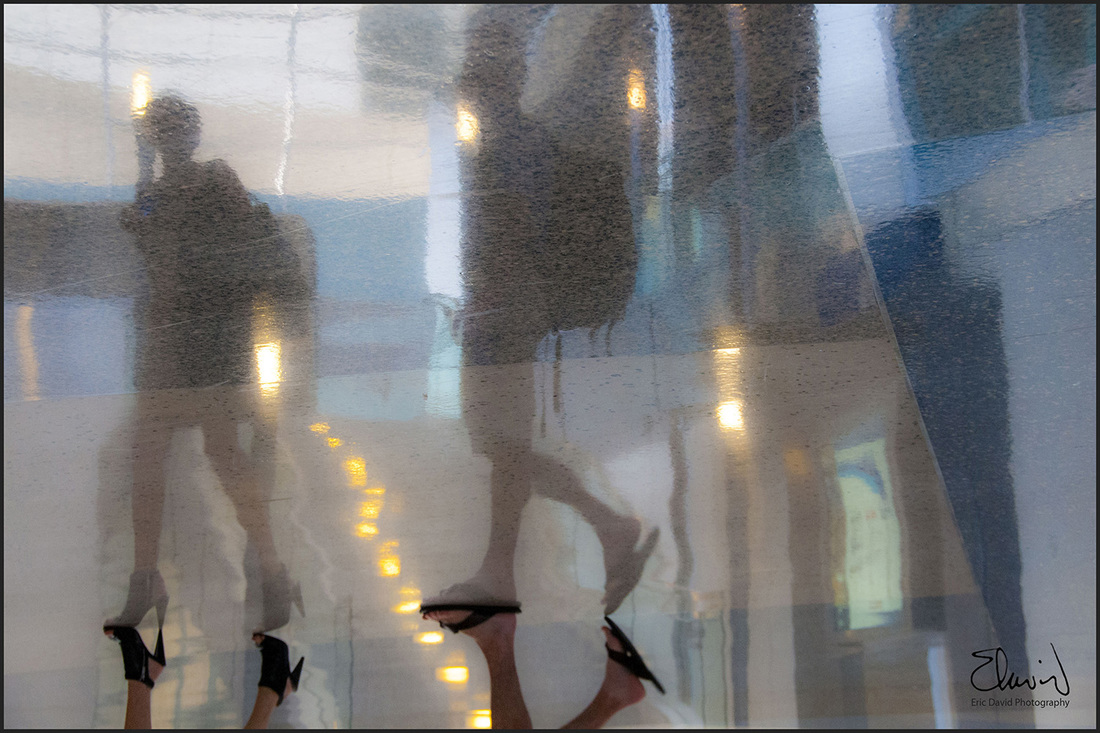
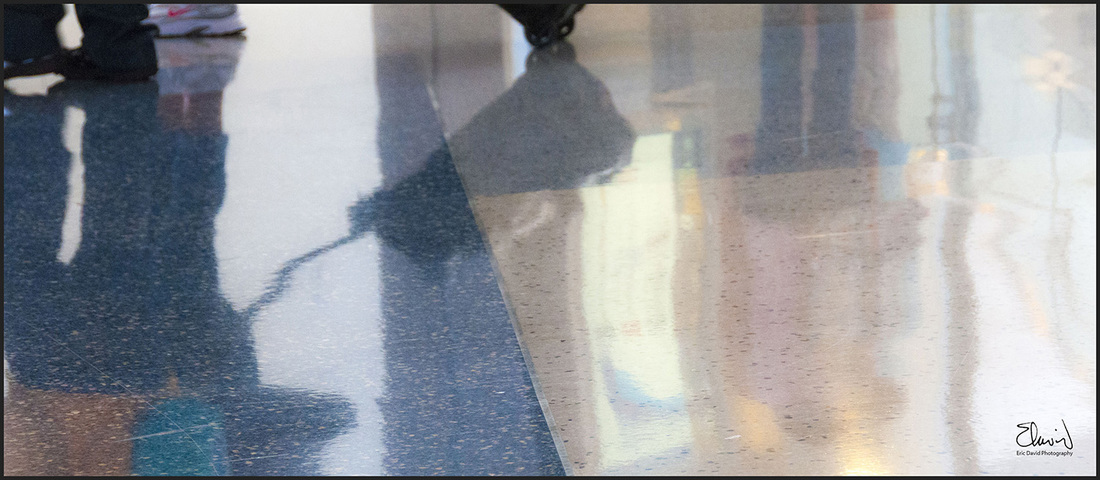
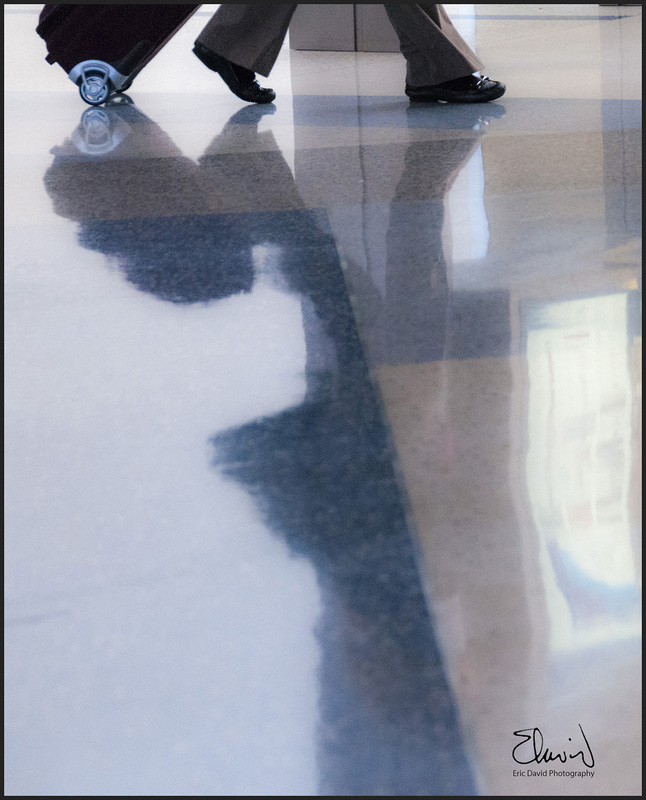
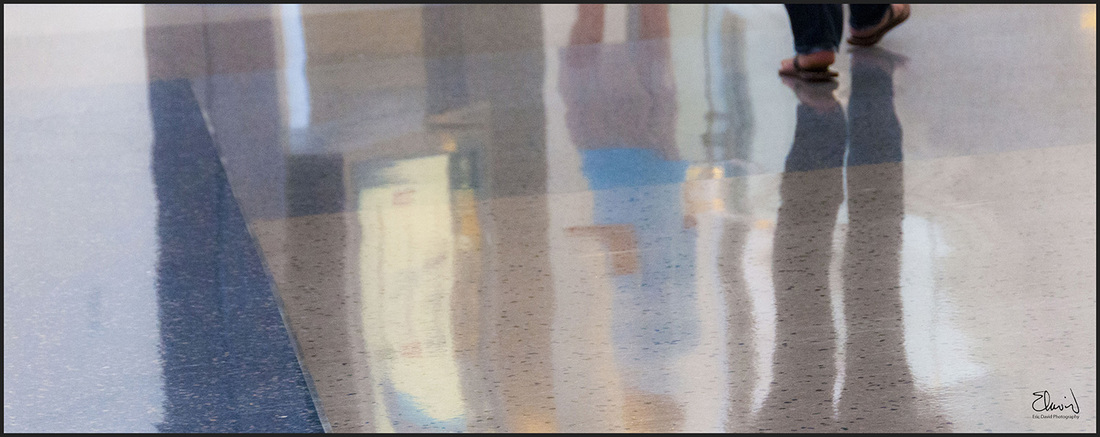
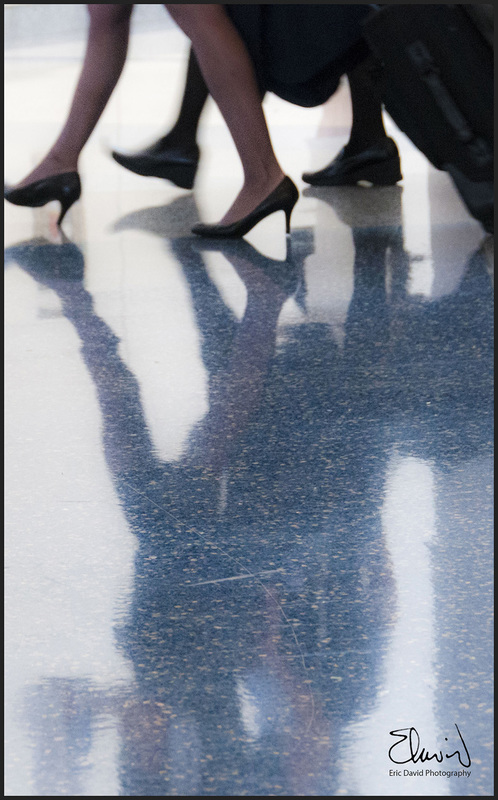
"I want to stay as close to the edge as I can without going over. Out on the edge you see all kinds of things you can't see from the center." Kurt Vonnegut 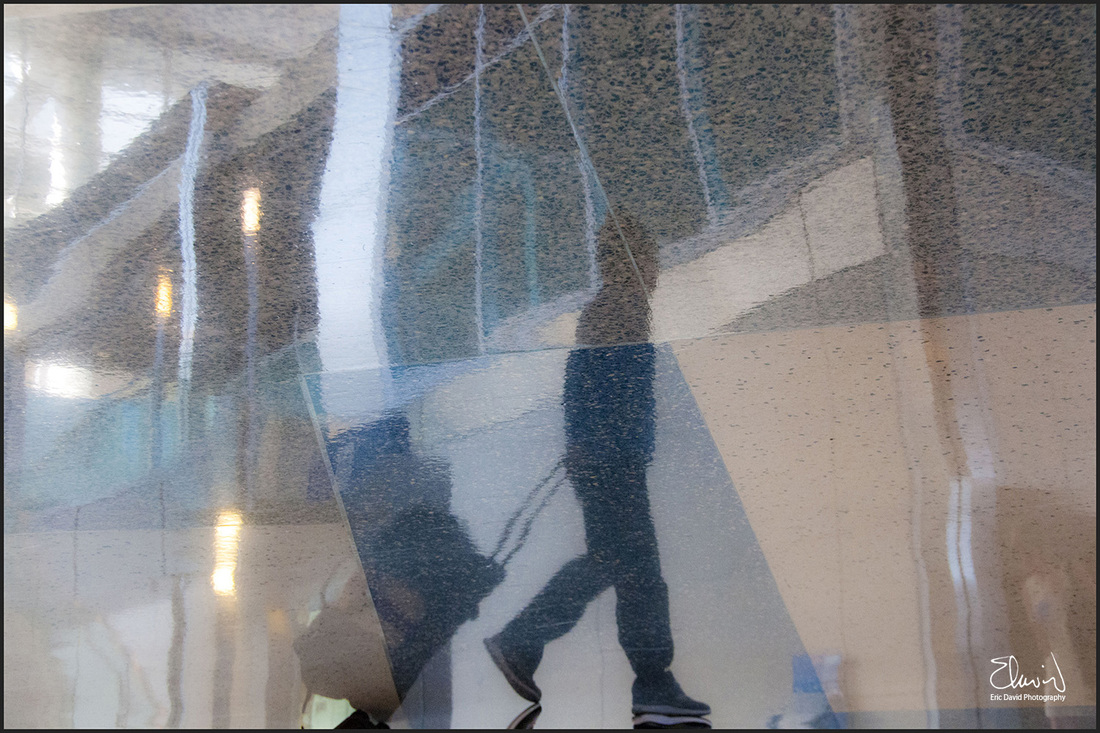 Almost every traveler has experienced an airport layover. Layovers can be frustrating, tiring and boring all at the same time. While waiting what do you do? Do you watch the clock for endless hours or spend time browsing shops for things that you don't need? Well what about doing something different. Think of a layover as an opportunity to take out your camera, look around and observe. Airports provide all types of subject matter from architecture and urban lifestyle to still life and abstract. So at a recent layover I focused on capturing the hustle and bustle of passengers and crew rushing to their destination. Thought for the Day
Luck isn't just about being at the right place at the right time, but also about being open and ready for the opportunities presented to you. |
Eric David
Eric David is a visual artist / fine art photographer that lives and works in Toronto. Archives
March 2020
Categories
All
|


 RSS Feed
