|
We all need to take care of our camera gear. Not only is it expensive, but cleaning your lenses properly and regularly are essential ingredients to taking good quality photos.
This blog from LensRentals, outlines their method and the products they use for cleaning lenses. Now mind you their approach may be overkill, but you'll learn the key steps and tools to use to keep your lenses in top shape. On another related topic it's timely to discuss how to disinfect your camera gear. This article by Petapixel outlines some suggested methods on how to disinfect your camera gear (including your smartphone) during this COVID19 Pandemic. Thought for the Day "Better keep yourself clean and bright; you are the window through which you must see the world." George Bernard Shaw
0 Comments
Sometimes a simple image can tell a powerful story. This image for me is all about connection and disconnection. About the physical and virtual. About generational differences and experiences. About having lived, and just starting to live. Although in the same physical space as the adults, the young girl is completely connected to the phone and disconnected from her surroundings. On the other hand, the adults are enjoying the fire, conversation and company by the lake. Even the differences in colour and clarity in the image help to build the contrasts between the two different worlds. The warmth from the glow of the fire, vs the cool glow from the virtual word of the phone. The nuanced value contrast in the real world vs the stark value contrast in the virtual world. 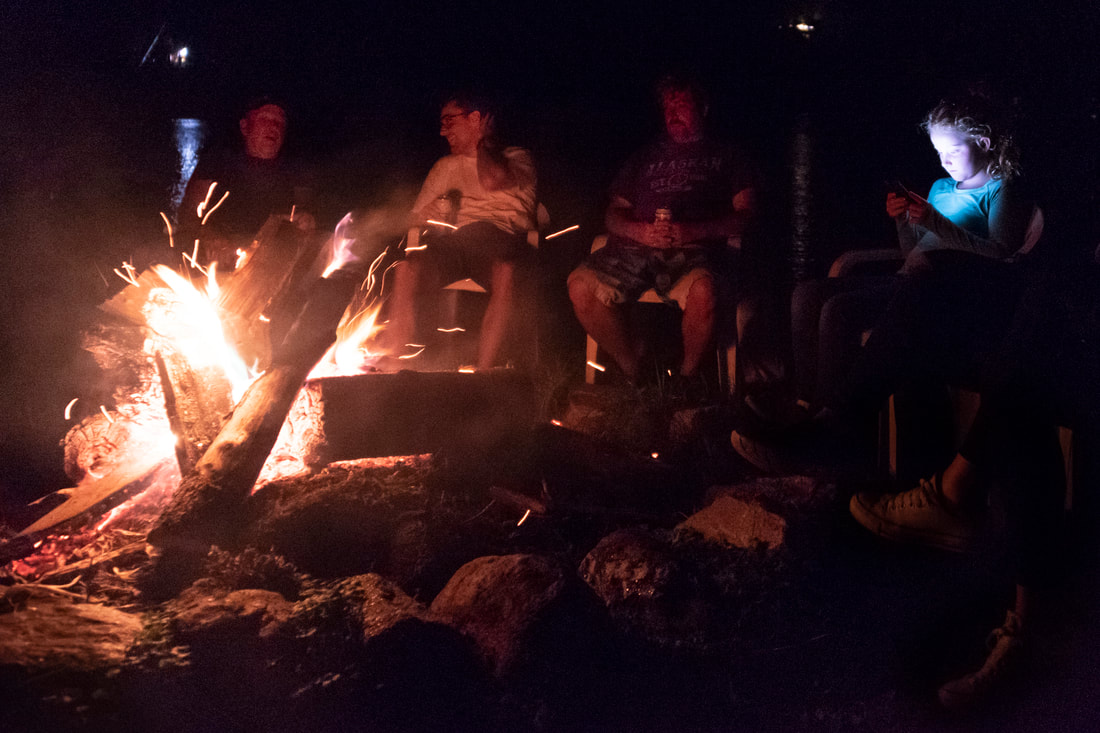 Thought for the day
"There is nothing noble in being superior to your fellow man; true nobility is being superior to your former self." Ernest Hemingway Sometimes I get asked to explain a particular work of art. Although being able to say something coherent is valuable, such as what may have inspired the piece or the project, and in general what drives and inspires me to create, I don't find providing a detailed explanation of a particular piece useful.
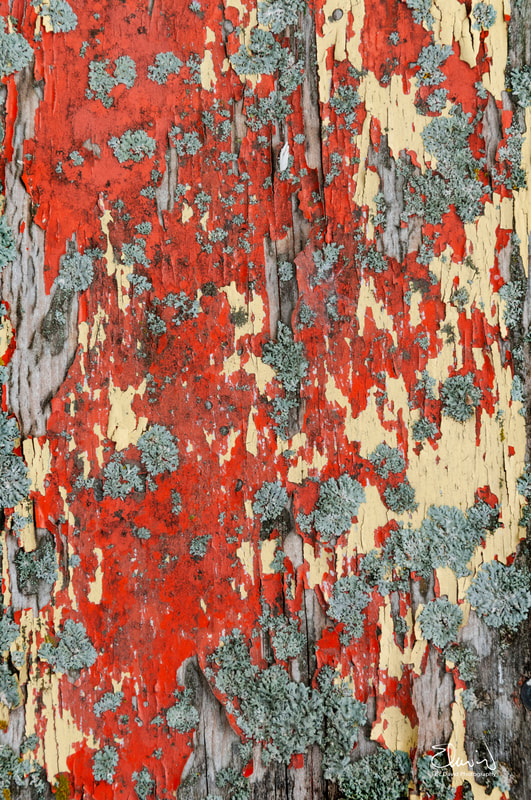
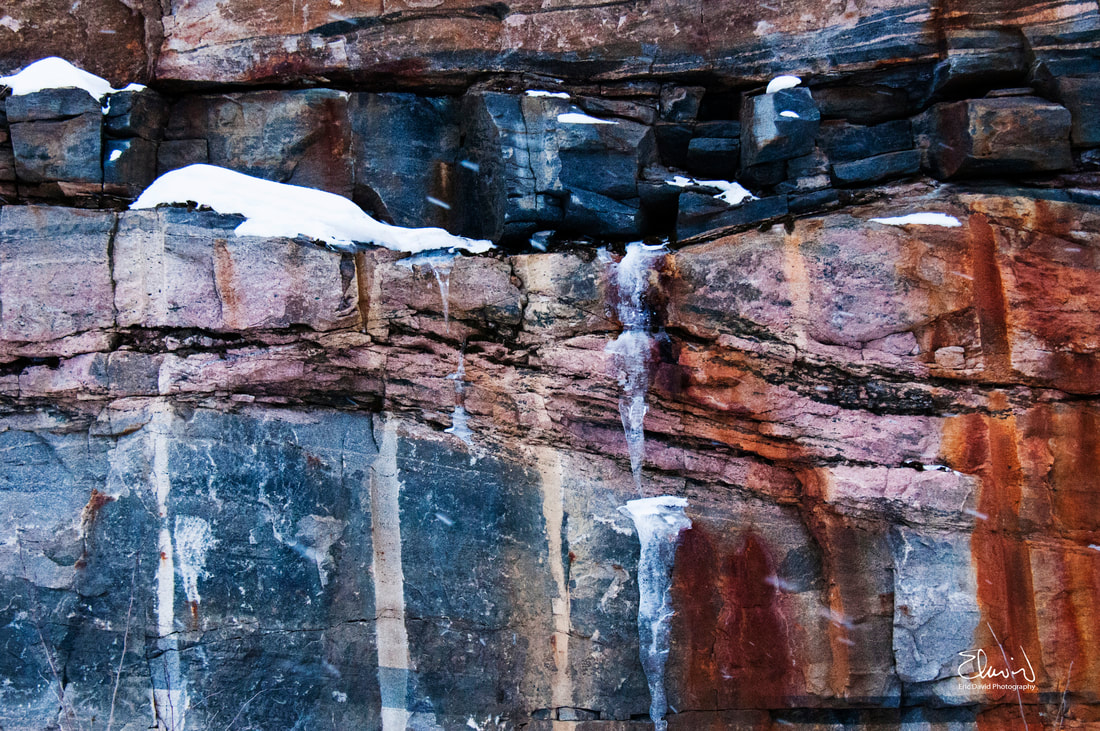
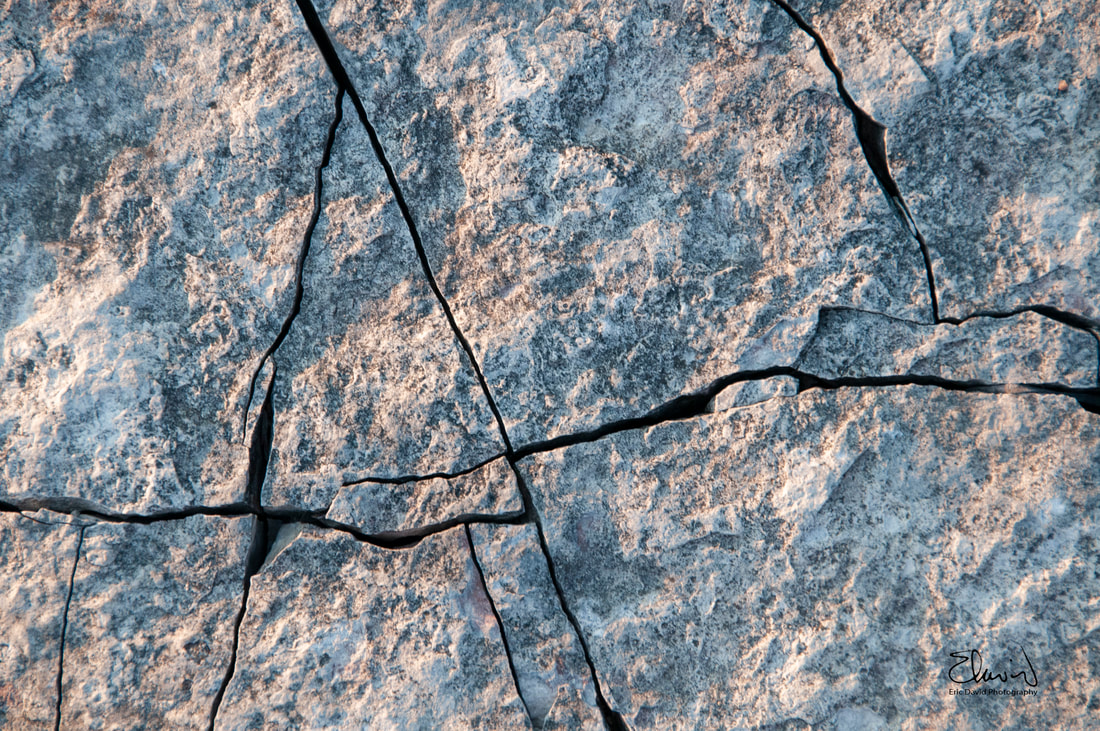
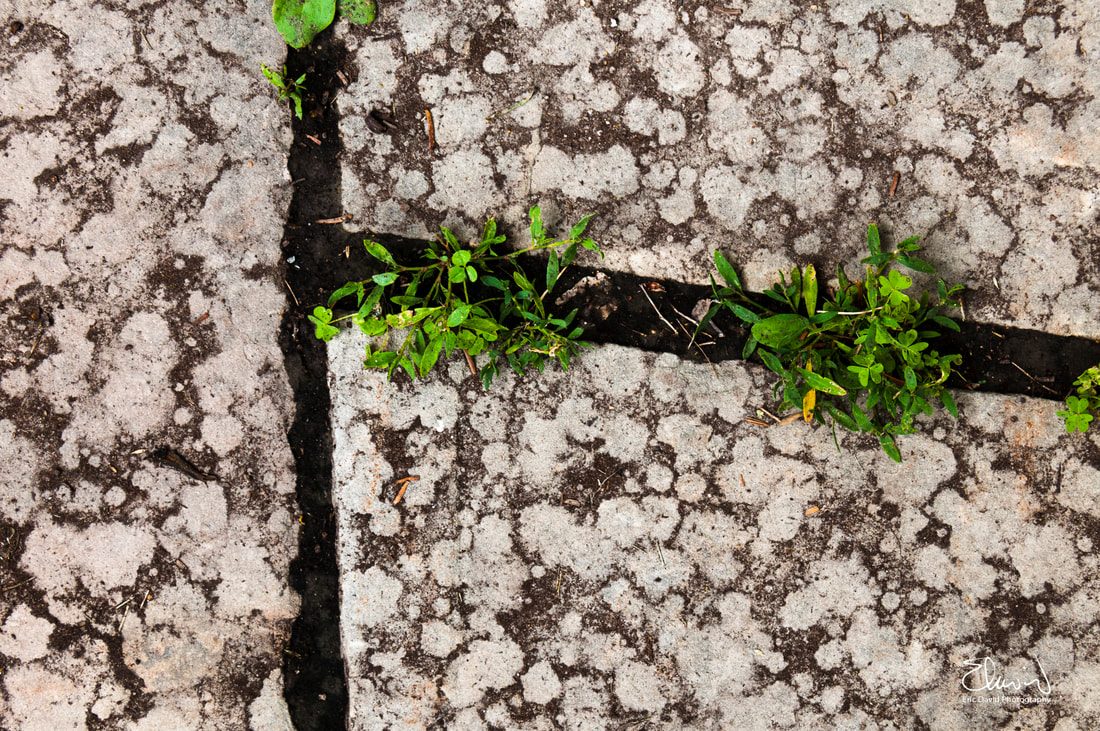
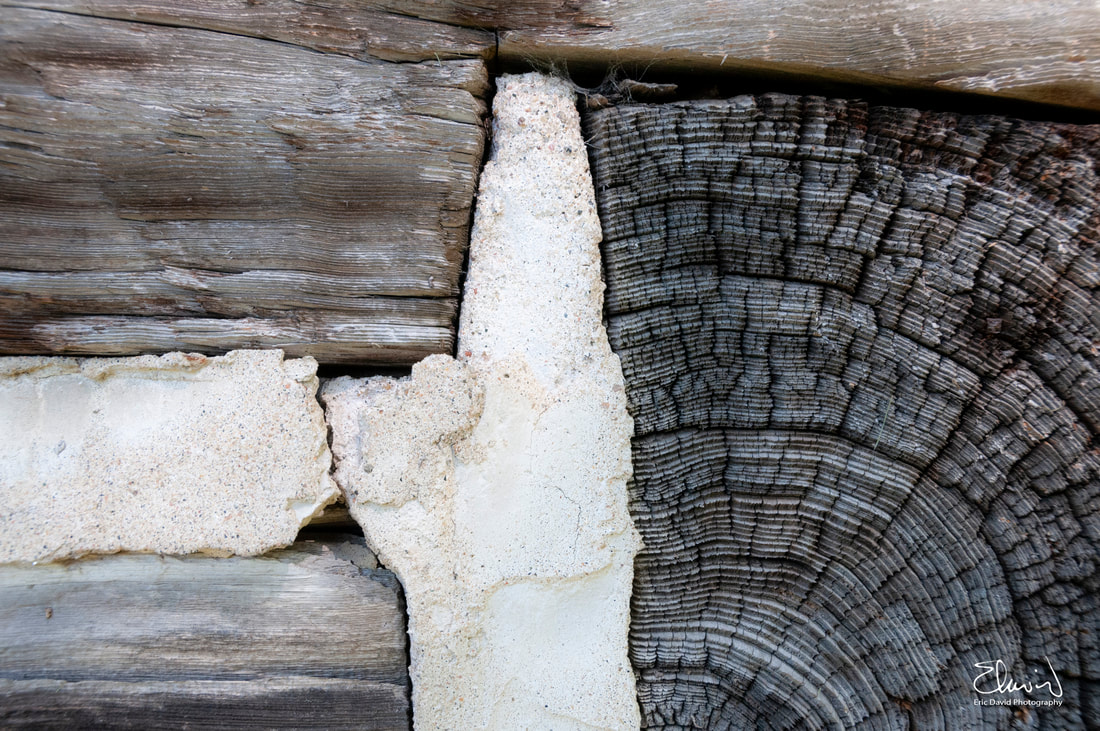
Let me explain why. My form of expression is visual. I like the viewer to engage without having to rely on an accompanying interpretation. My hope is that the piece will “speak to them” emotionally through my choice of subject, combined with form (shapes), colour, texture and value (contrast). That the story it tells is both personal and universal. In some ways I hope that the piece will invoke a child like joy or curiosity in the viewer and interest them enough to contemplate the image for more than 3 seconds. If I’m successful, the viewer will want to come back to the image and look at it again, perhaps finding a new story or emotional experience. As far explaining the painting process (technique), other than being of benefit to other visual artists, I don't think this would be of interest to non-painters. That being said, I can explain the “painting process” in a way that parallels the writing process. There’s an idea, followed by some design decision of how to express the idea, there are revisions, and then a final edit (in an artists case leaving it on the mantle and looking at it for a long time) to see what final changes need to be made. There are similar struggles (the white page vs the white canvas) and similar a requirement to grow and take risks. In the painting world, if every piece is “successful” then you’re not taking enough risks to push yourself to grow. In essence you’ve become too comfortable with your subject and technique. Just as in writing, there is craft in painting. Craft being the mastery of the tools (brushes, pencils, colour mixing and colour theory, design theory, mediums, surfaces etc.), used to express yourself. The better your mastery of tools, the easier it is to create and get closer to your final vision. Mastery also provides you with the ability to “break the rules” and try something new. To master the tools, there’s a lot of repetitive training needed (doing lots of paintings and failing, taking workshops and courses), including training the eye how to see shapes, colour and light and training the hand to create what the eye sees. Thought for the day "For a true writer, each book should be a new beginning where he tries again for something that is beyond attainment. He should always try for something that has never been done or that others have tried and failed. Then sometimes, with great luck, he will succeed." Ernest Hemingway 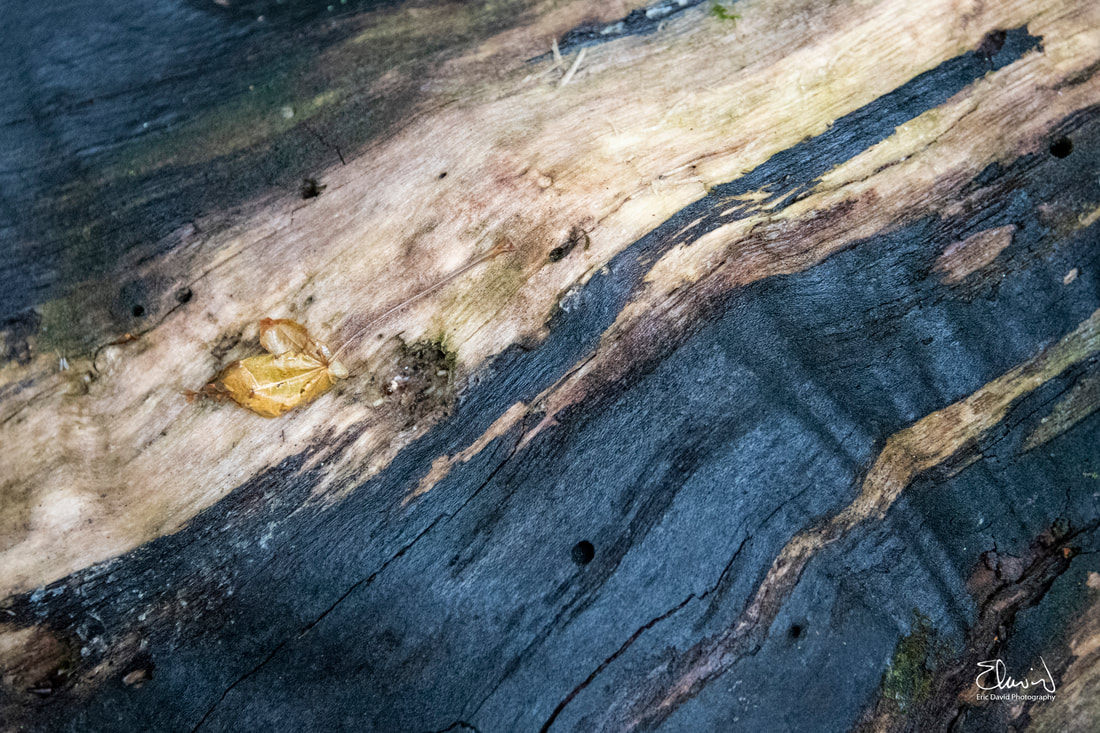 Log with stripped bark. I've always liked the texture of things. Perhaps, like a good abstract painting, the non representational nature of the image allows the viewer more leeway for interpretation. I've collected a wide range of textures over the years, sometimes combining them with other images to create a unique third image. You can see some of these composite images from my blog post "There's a Texture for That". Here's a sample of some images. Thought for the day
"Wisdom begins in wonder" Socrates When you're traveling or site seeing, one of the most frequent challenges is how to take a photo without it being filled with people obstructing part of the building, bridge, road, waterfall or other object of interest. So what are your options? Here are five proven solutions to removing those unwanted people in your image.
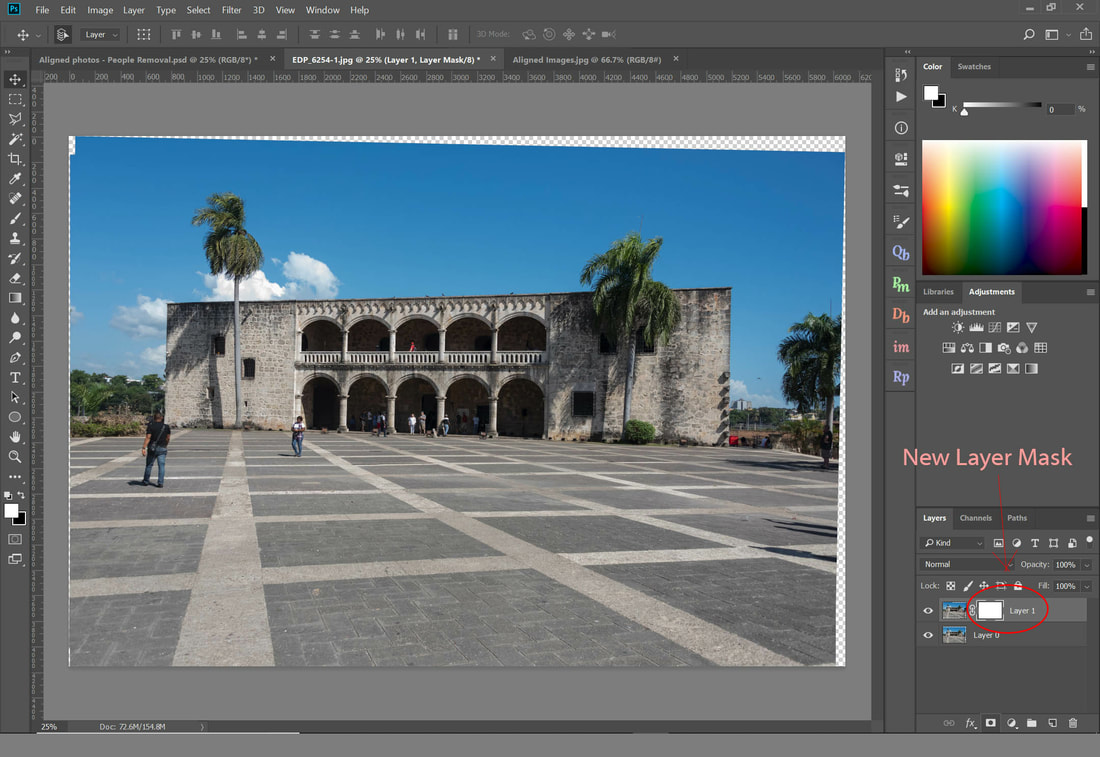
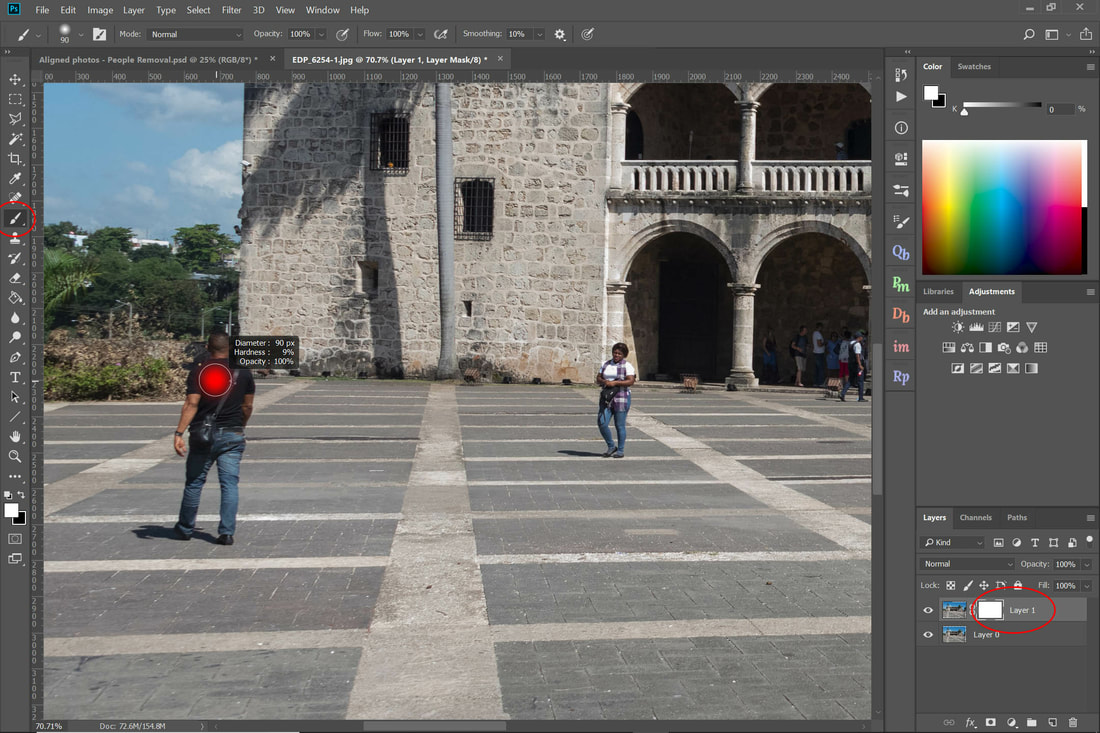
In the following example I'll walk through option 5, using multiple photos and then blending the people away in the image. In the following two images you can see a couple of people in the foreground as well as an individual in front of a column by the building that I want to remove.
The first step is to open both images on different layers in Photoshop. 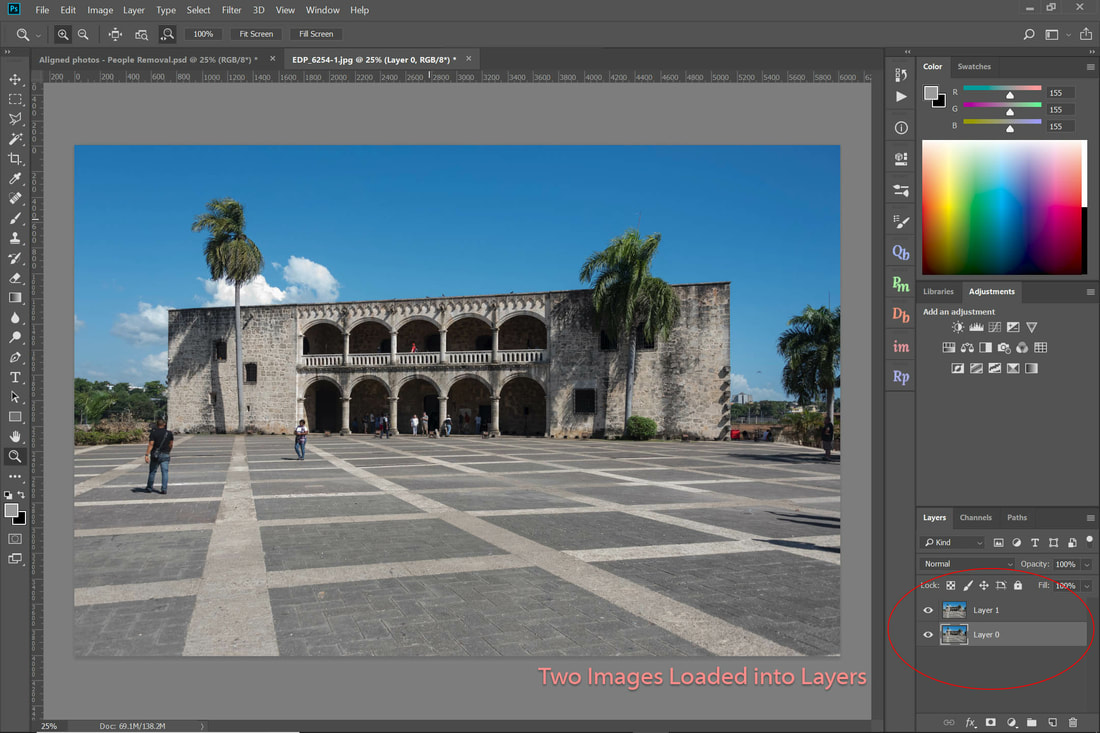 The next step is to align the layers. Select both layers and then use the Edit > AutoAlign Layers command to auto-align these layers. In the pop-up window select the Auto-Align projection option. 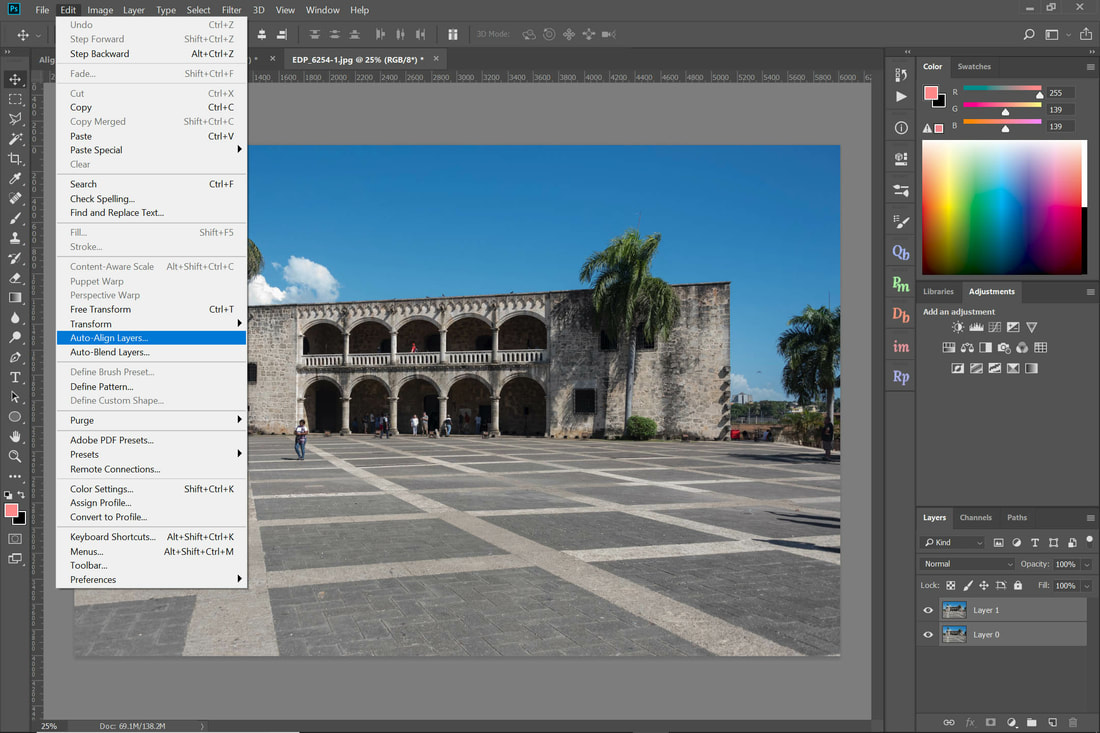 Your images will now be aligned. They may be a bit skewed or stretched as in the image below.  Next, add a layer masks to the top most layer.
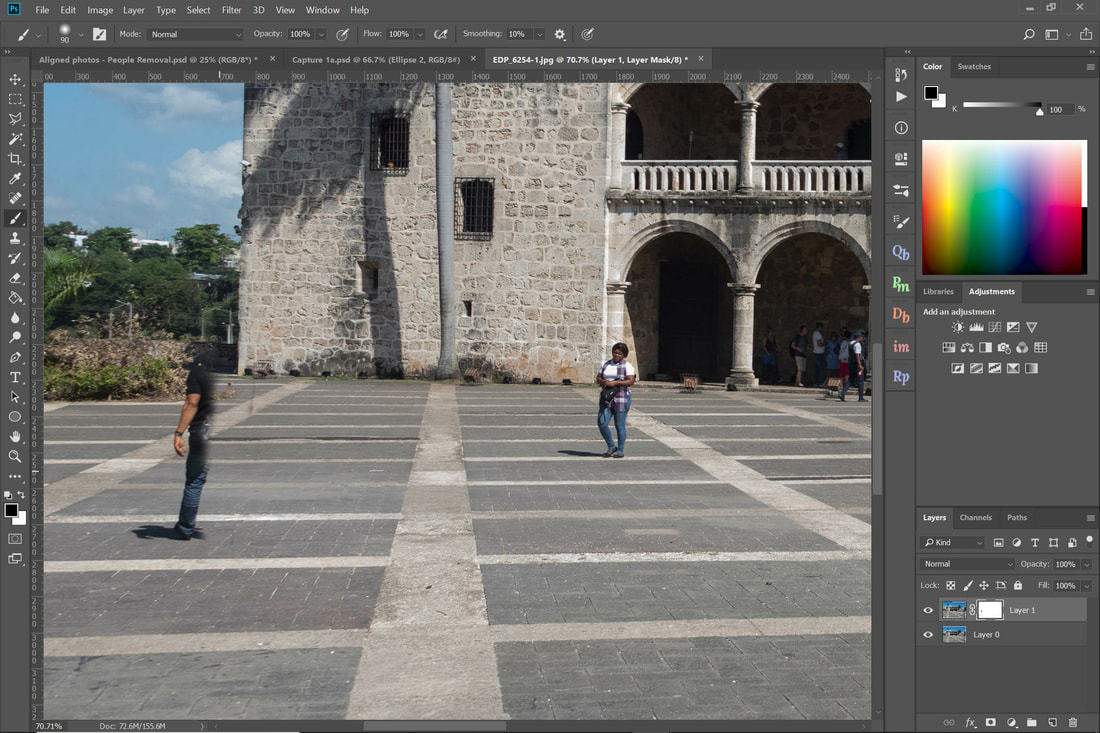
Once you have added your layer mask, you can now remove the figures you don't want by painting out the image using the Brush Tool. In a layer mask everything that is visible will have a white mask, everything you don't want to see will have a black mask. First Select the layer mask, ensure that your brush colour is black and then select the Brush Tool. Zoom into the person you want to remove and then start painting.
Keep on painting to remove additional figures in the image. 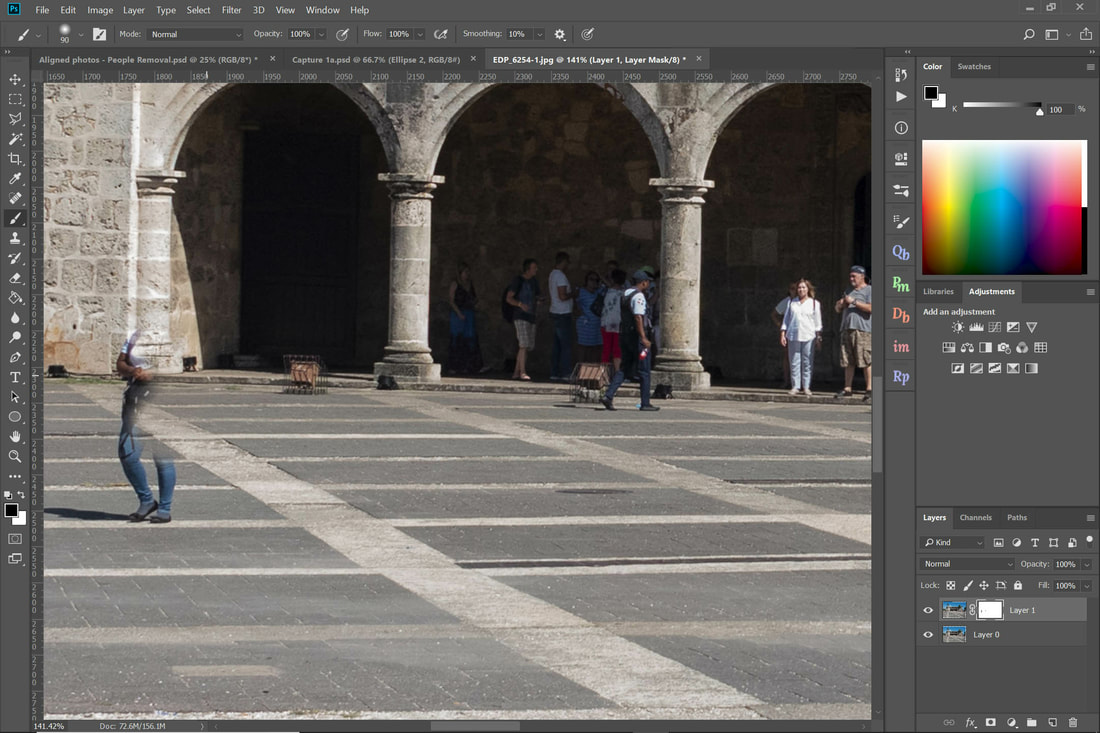 After removing your last person, crop the image (if necessary) and save. Just like magic, unwanted people in the image have been removed!  Thought for the day “Patience is bitter, but its fruit is sweet.” Aristotle  Common Misconceptions Shooting into the sun can add a lot of drama to your photos, but there are some common misconceptions:
Tips for Getting Better Shots
Sample Gallery Thought for the Day
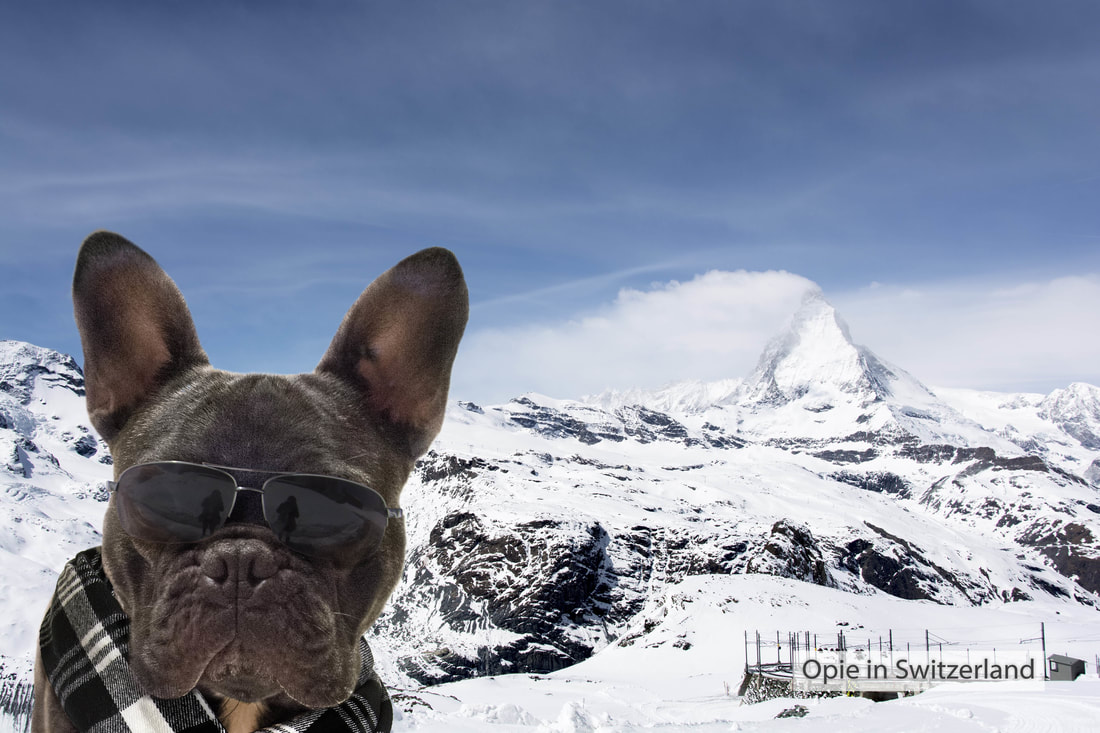
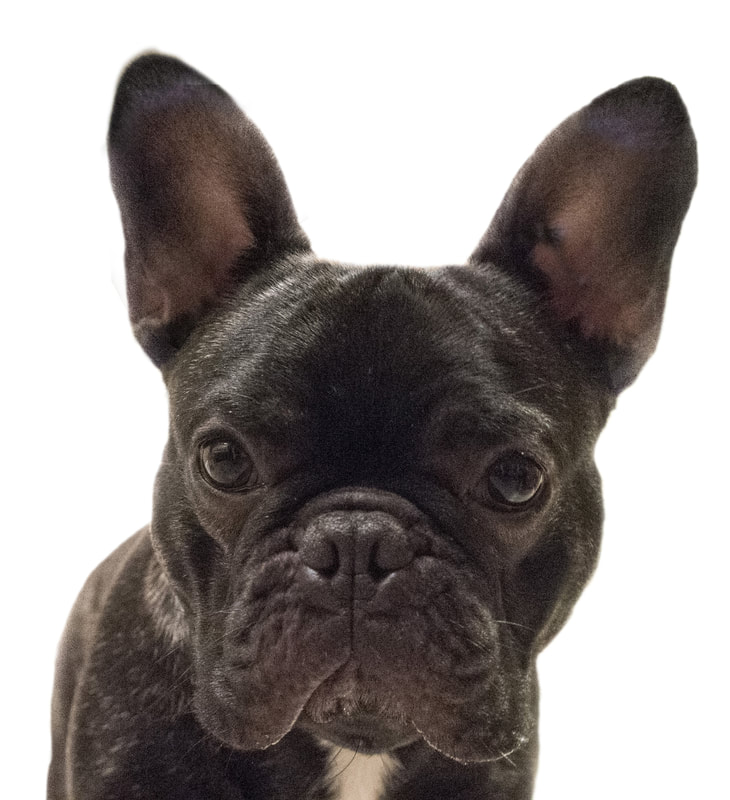
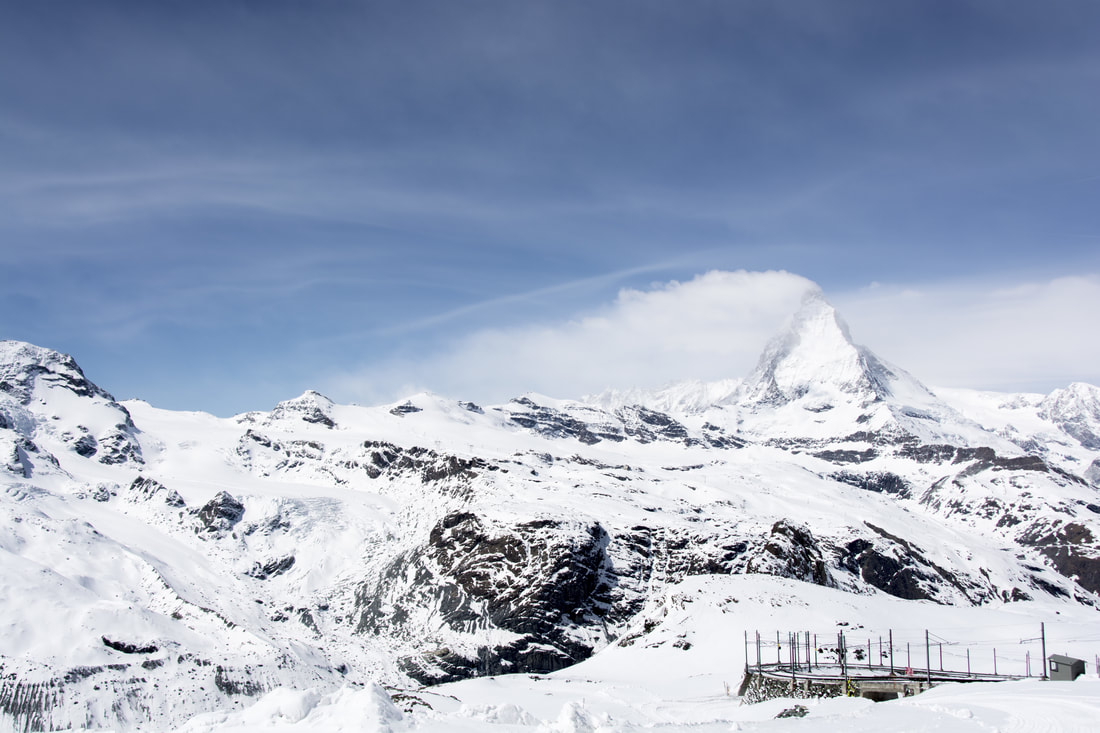
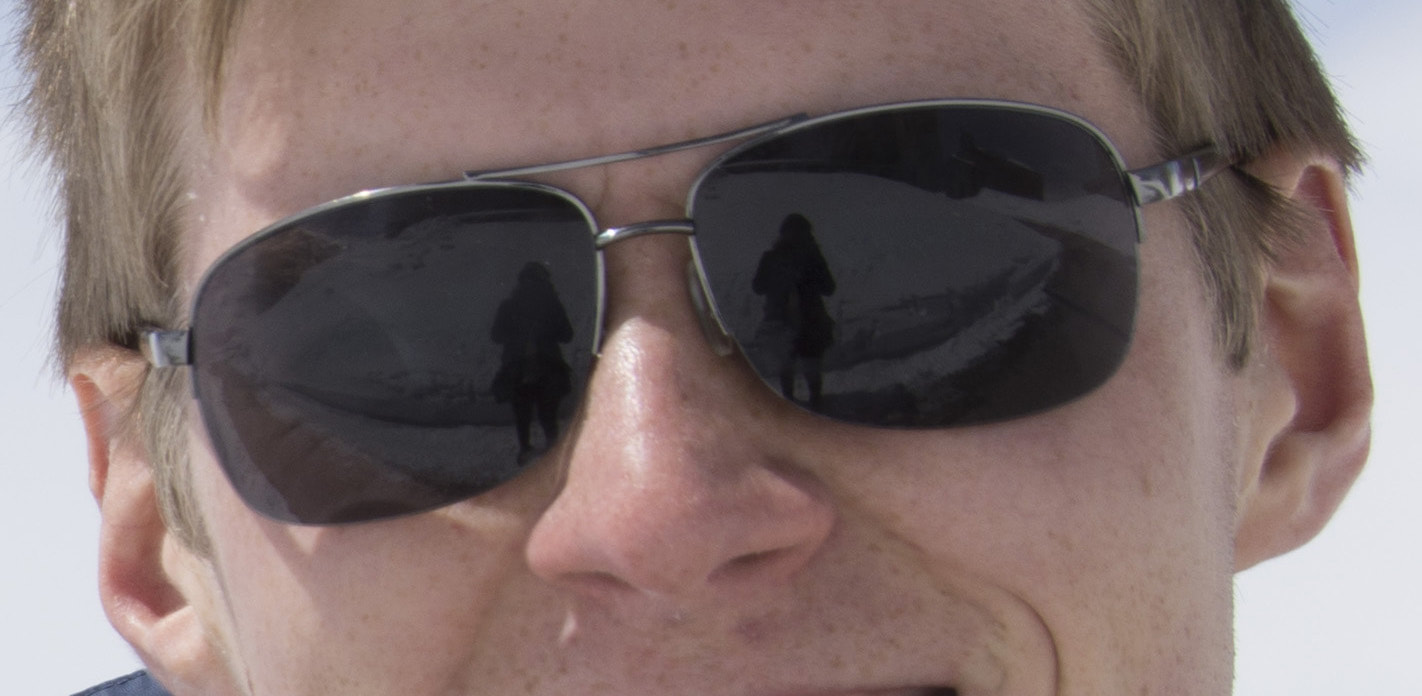
“There are always two people in every picture: the photographer and the viewer.” – Ansel Adams Or how to take your dog on a trip while staying at home. 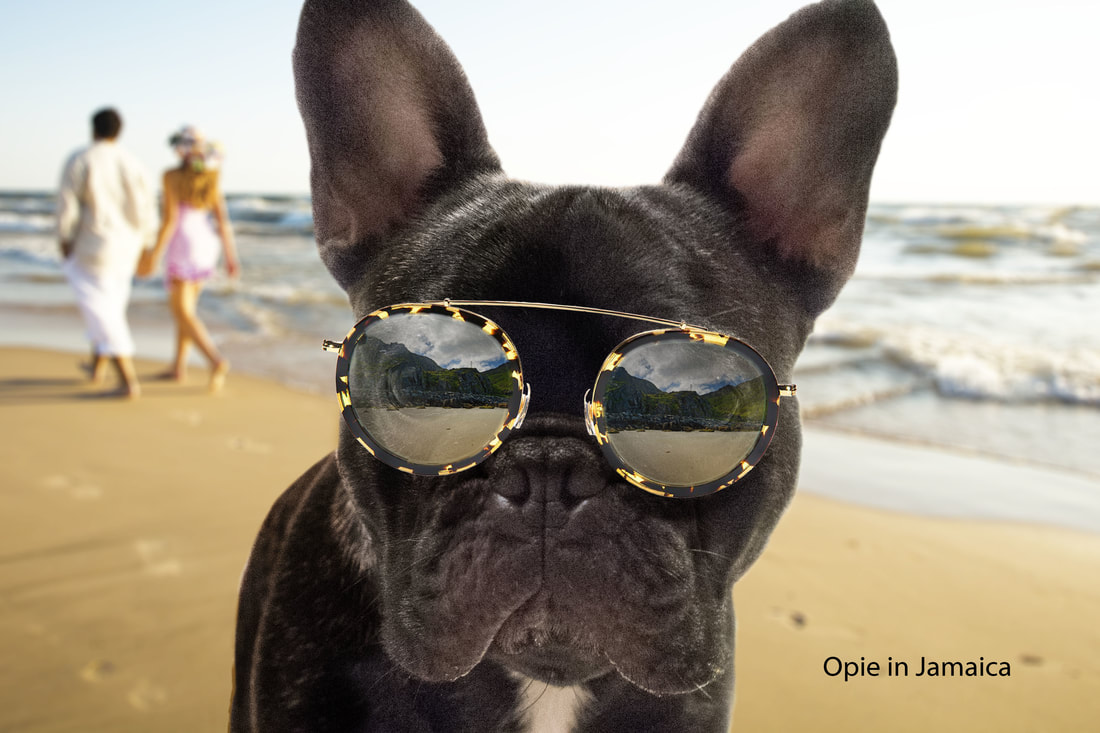 Sometimes it's fun to think about "what if". In this case what if I could take a "frenchie" traveling to different spots and have him participate in the adventures when I arrive. I have a library of french bulldog photos as my son has a little guy with lots of character. However the reality of traveling with an animal, let alone having the dog participate in activities in unrealistic. So what's the next best alternative? Well why not travel virtually, by taking Opie to different destinations. So I decided to combine a photo of Opie, with different backgrounds and props such as a pair eye glasses or a hat to integrate him into the scene. As well I needed to colour balance the photo of Opie (and props) and modify cast shadows to better integrate him with the background. Then there was the problem with the reflection on the lenses. These would have to be modified to reflect what's going on in the scene. In the "Opie in Jamaica" scene the reflections were added to the lenses. The following images shows the composited final image, with the component images that make up the final "Opie in Switzerland" scene. I hope you enjoy the traveling Opie images. May they inspire you to take your furry friend on a virtual trip. I decided to finish 12 images so that I could print a calendar. If you're interested in your own Opie calendar please contact me! Thought for the Day
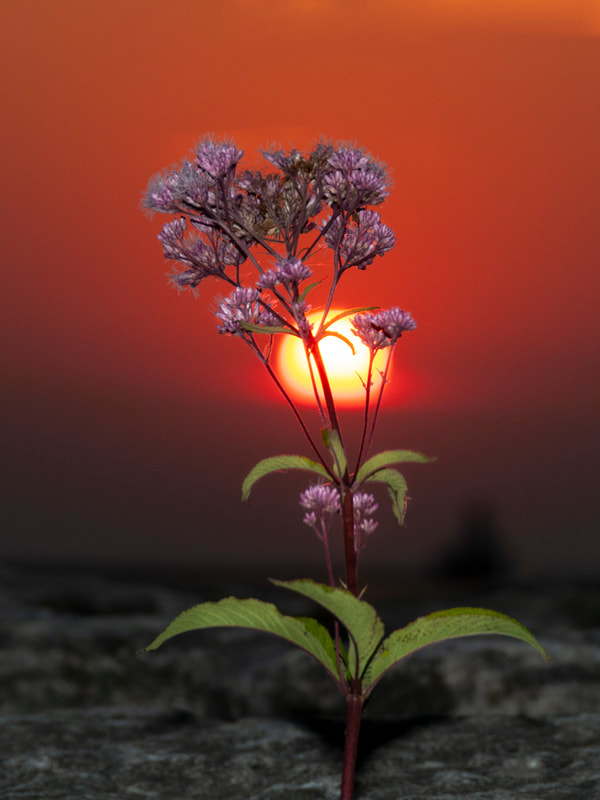
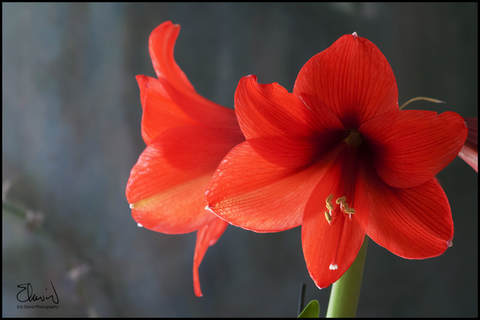
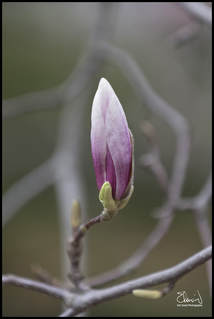
“Vision is the art of seeing what is invisible to others.” Jonathan Swift What's the best type of day to take photos of flowers? Surprisingly, not when you're taking that stroll through a wonderful garden on a sunny day. Bright overhead sun creates harsh shadows and can wash out colour. 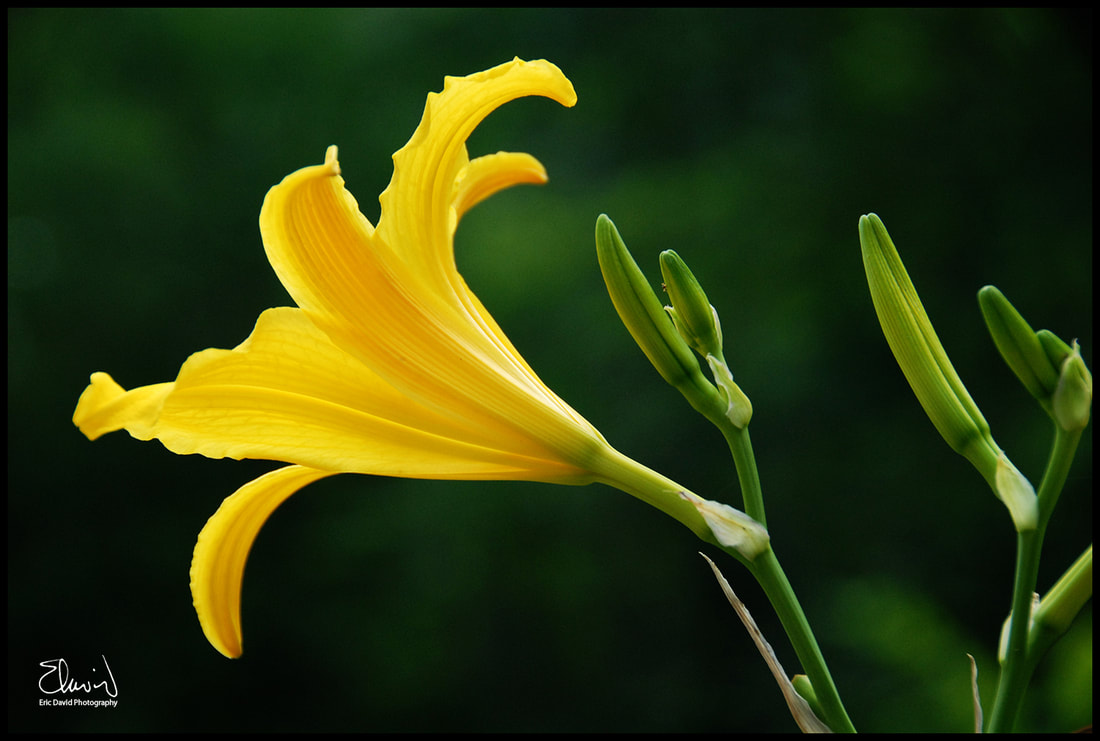 Photo taken on overcast day Take photos on bright overcast days or step out just after the rain has stopped and it's still cloudy. The overcast sky acts as a large soft box removing harsh shadows and enhancing colour. After a fresh rain colours are also intensified. 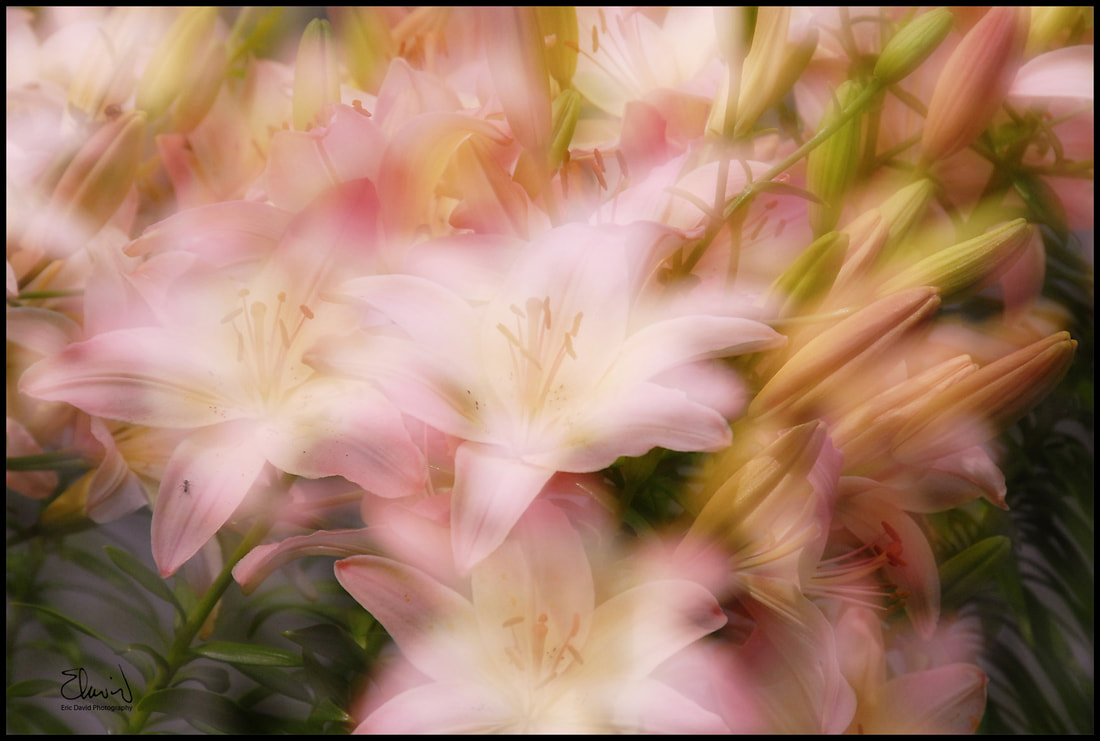 Multiple exposure photo If you can't avoid the sun try take an in-camera double exposure. By combining one exposure that's sharp with another that's out of focus you can reduce the amount of harsh contrast and create a glow around the flower. It's important to either use a tripod, or if hand holding the shot, keep your camera as steady as possible. Another option on sunny days is to take the photo while the flower in covered in shade, or create your own shade with a hat.
Isolate the flower and remove clutter by changing your perspective and simplify the background. This allows the flower to stand out. Alternatively, if you can't simplify the background this way, use a widest aperture available on the lens (F2.8 for example), and use the longest focal setting (for example 200mm) to blur the background. This isolates the flower by blurring the background. 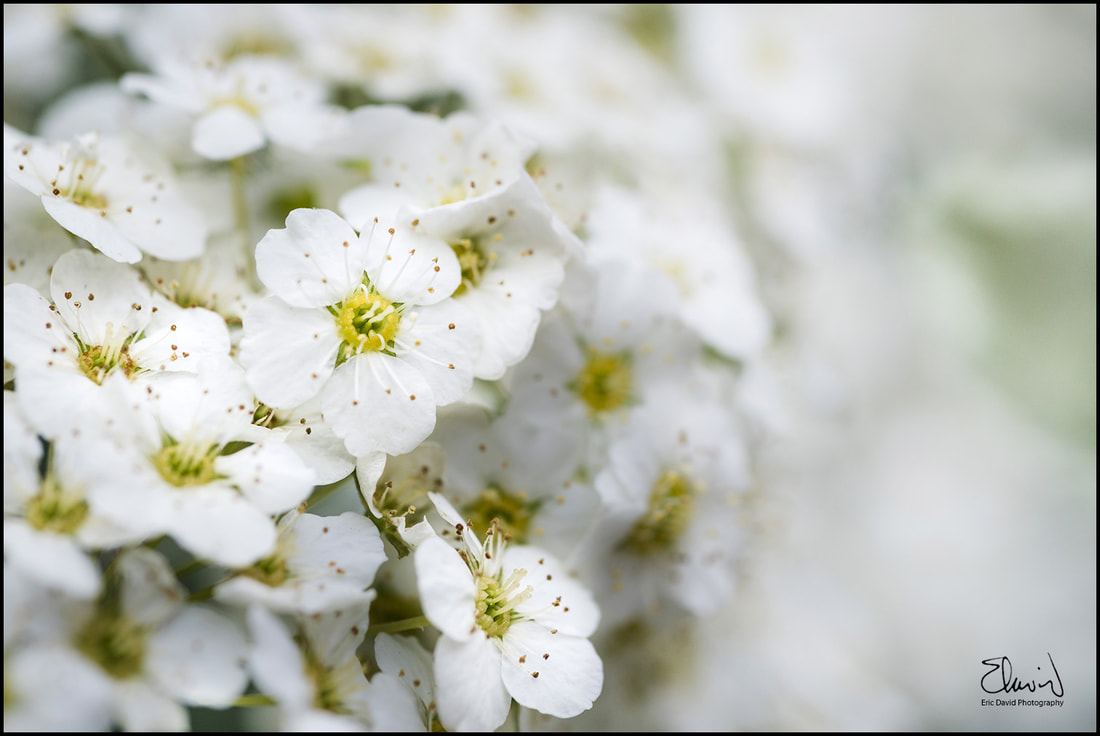 Dancing pattern of florettes Create a visual pattern. This works well if there are many flowers in a field or if there's a bunch of flowers in the garden. Look for interesting or repeating patterns and textures to lead the eye through the image.
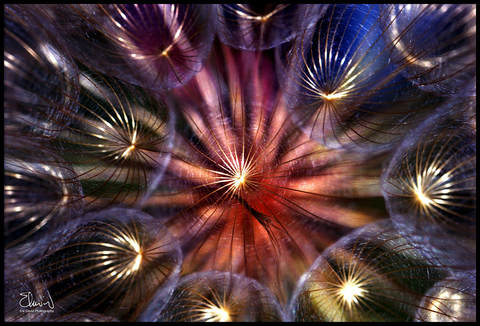
Take a close up! If you have a lens with macro capability zooming into a portion of the flower can provide opportunities to make wonderful images. Be careful with your focus however, as the depth of field will be very shallow. Thought for the Day
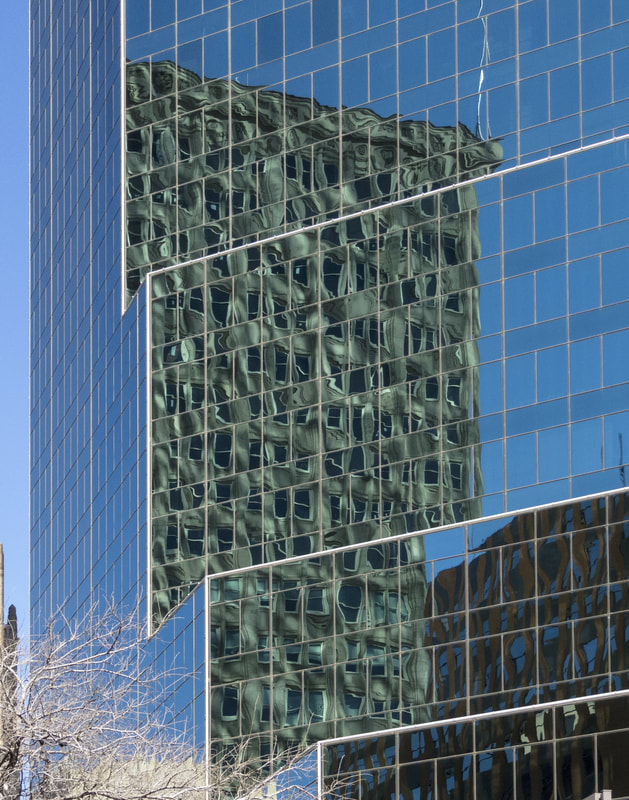
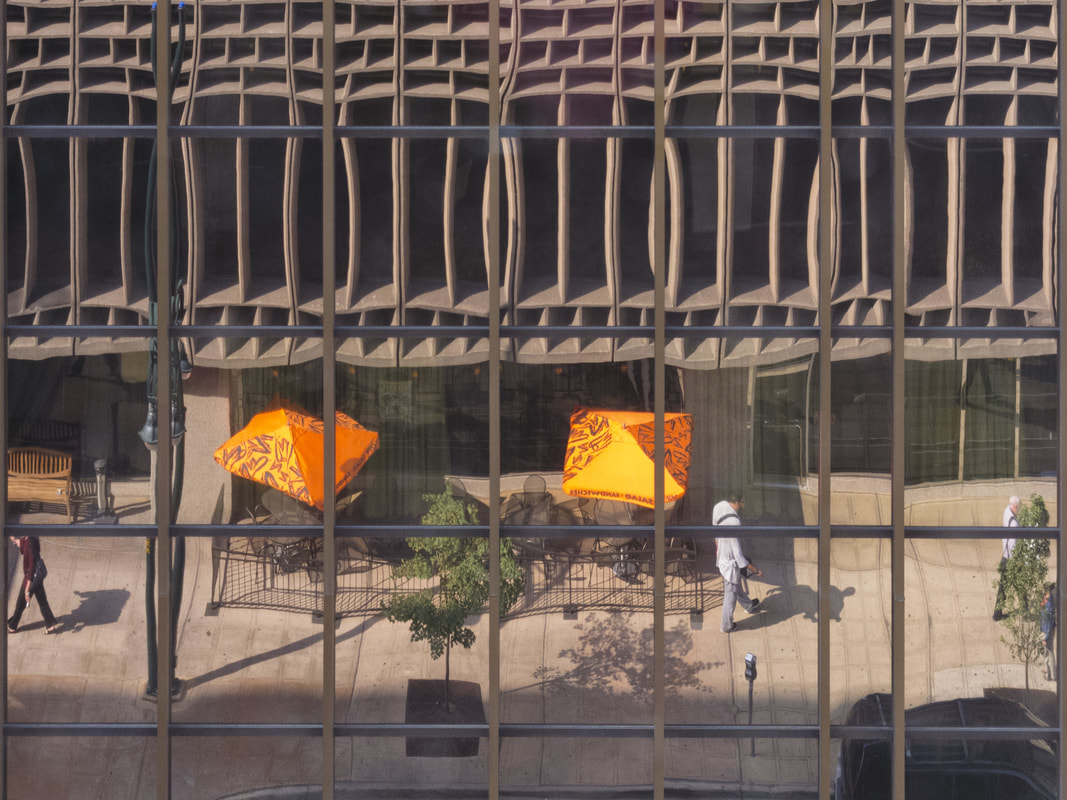
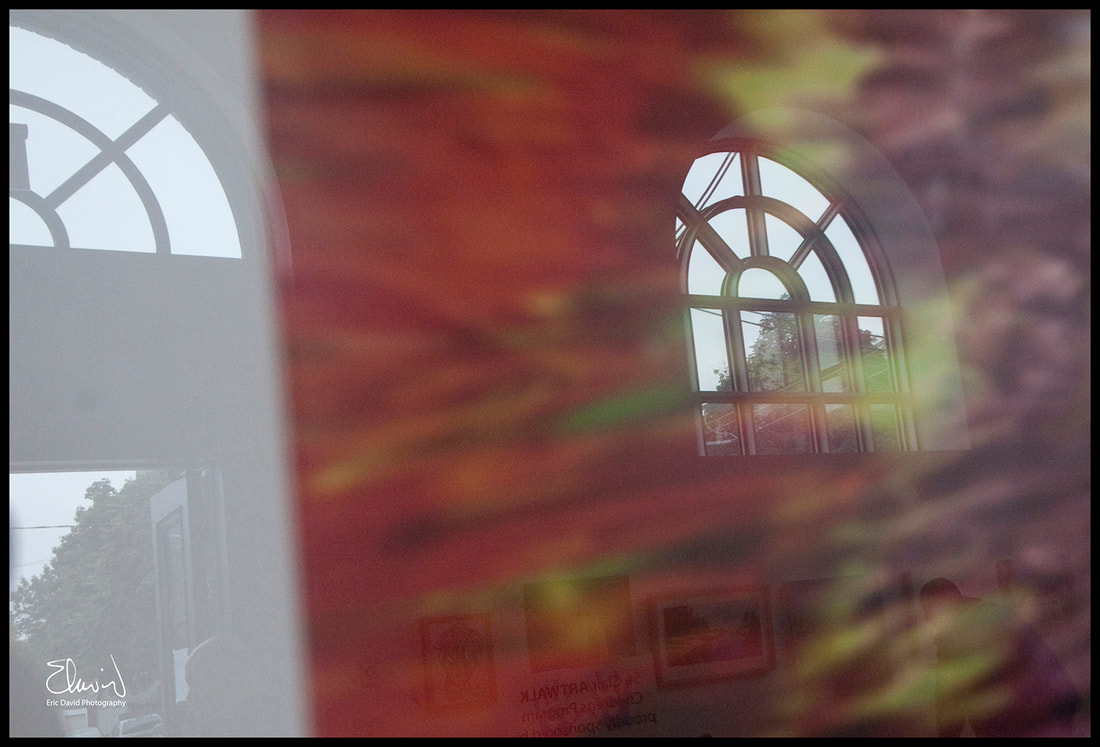
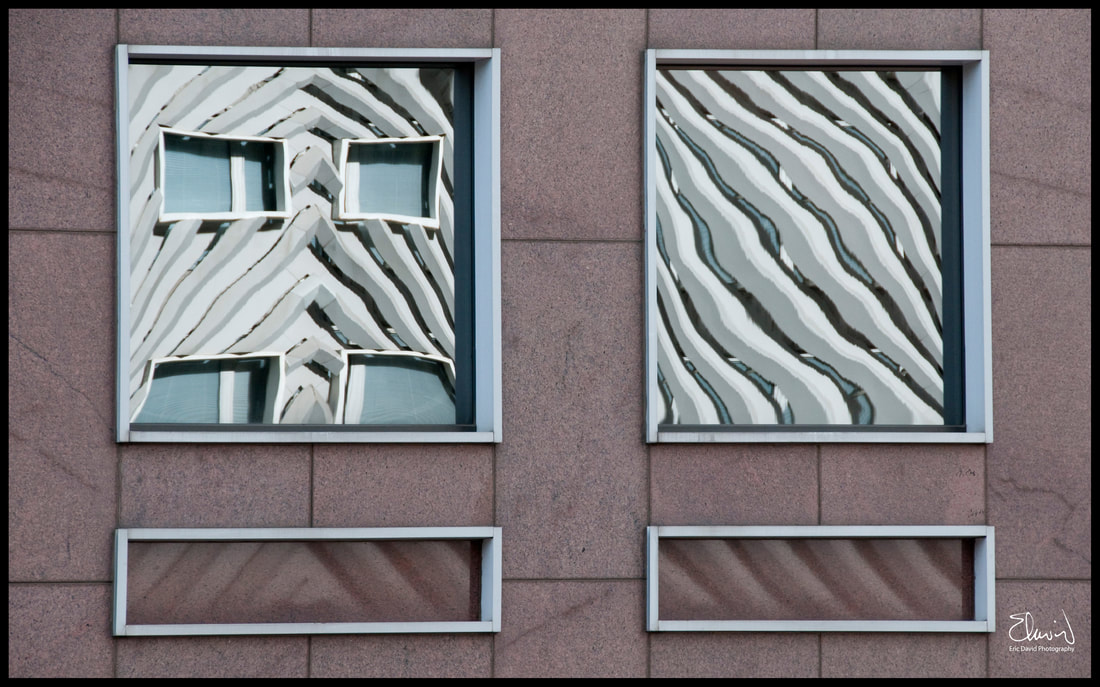
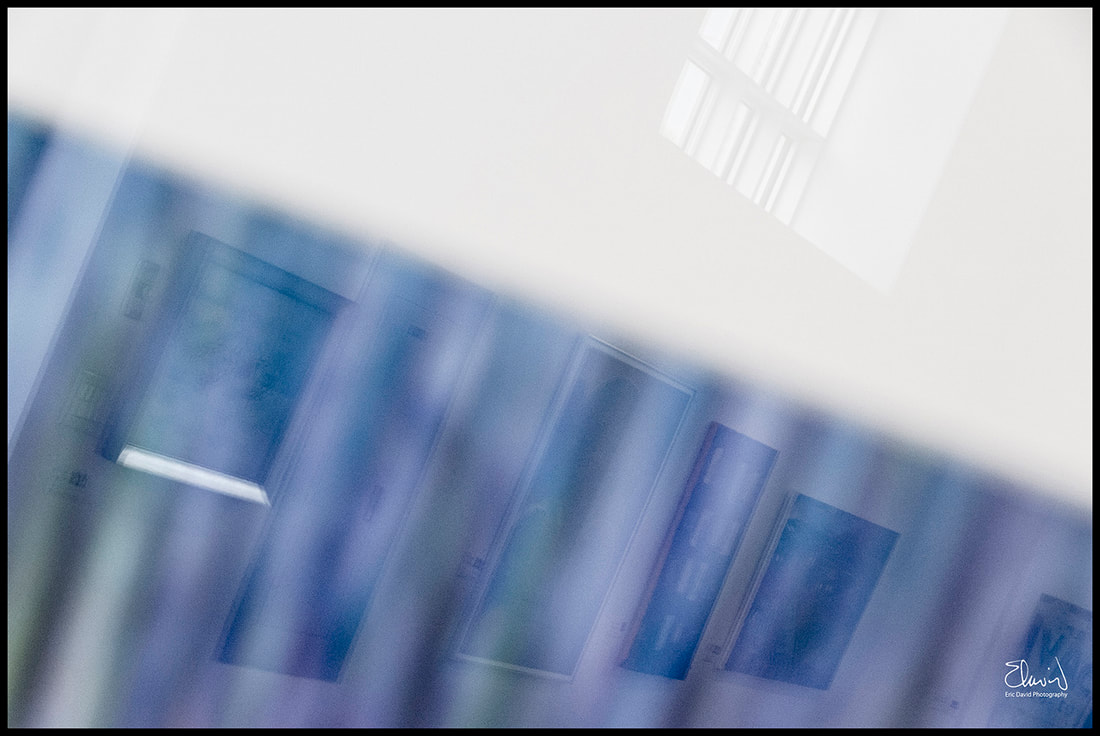
“To photograph truthfully and effectively is to see beneath the surfaces.” – Ansel Adams 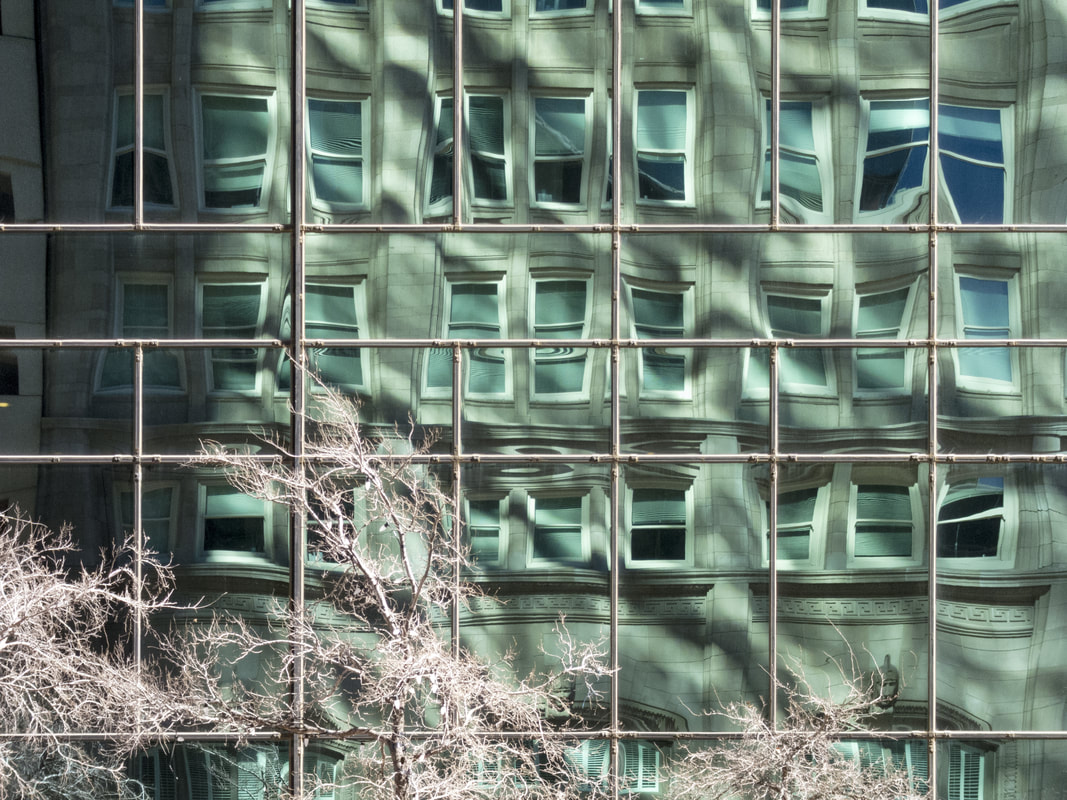 1, 2, 3 - buildings trees and glass Sometimes a change in perspective is all that's needed to get your creative juices flowing. Reflective surfaces such as windows, glass buildings and metal surfaces are great canvases that can be used to change your perspective and create some thought provoking images. Thought for the Day
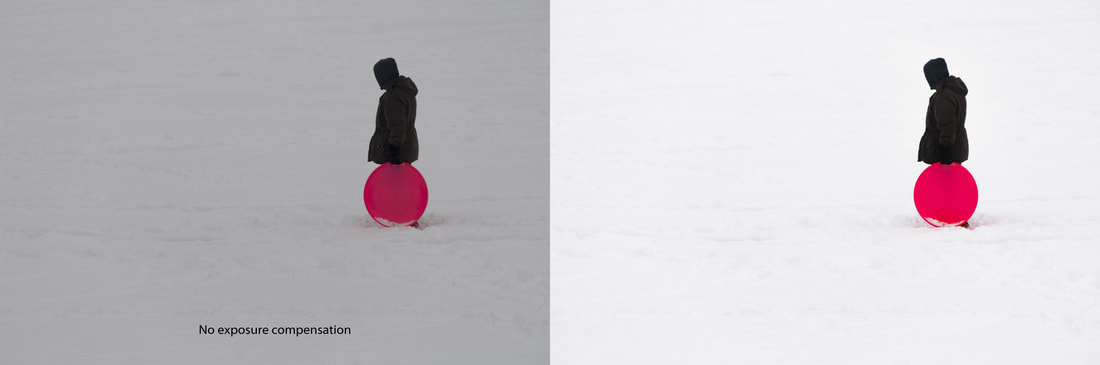
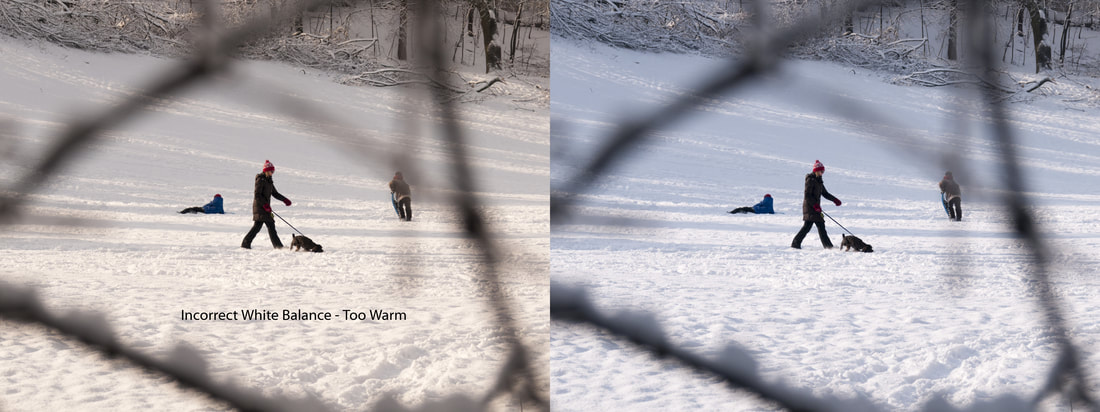
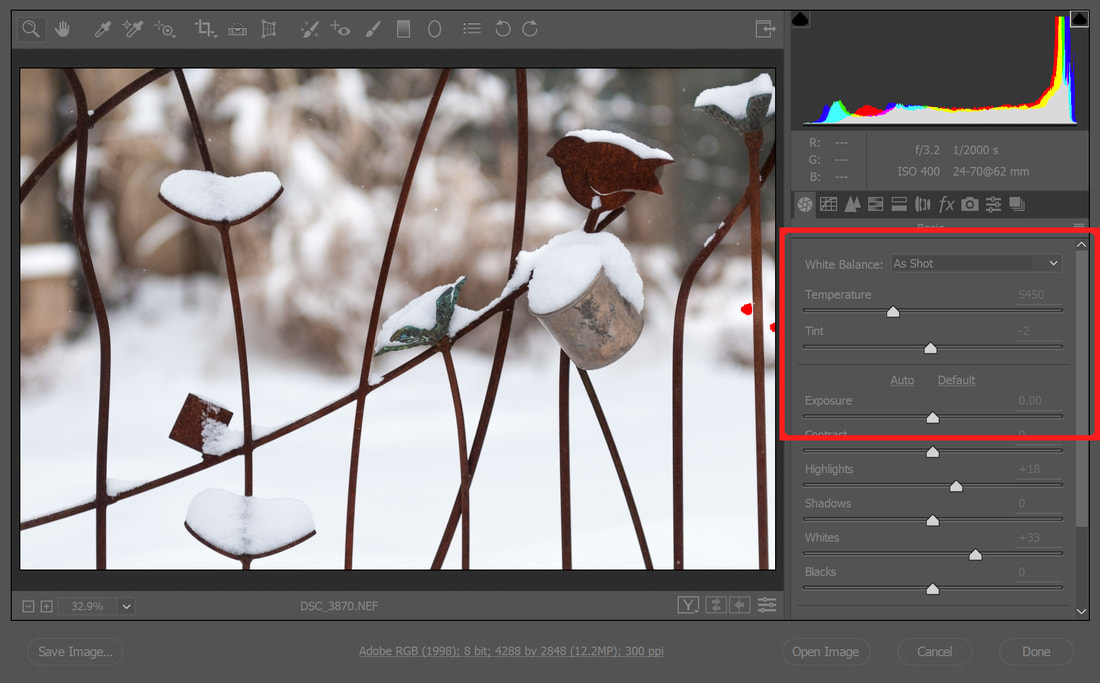
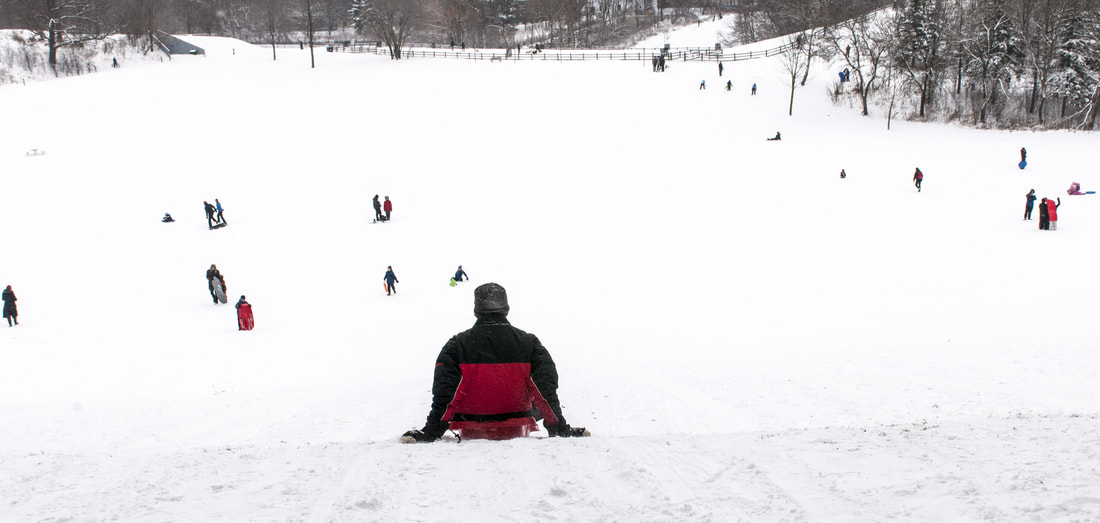
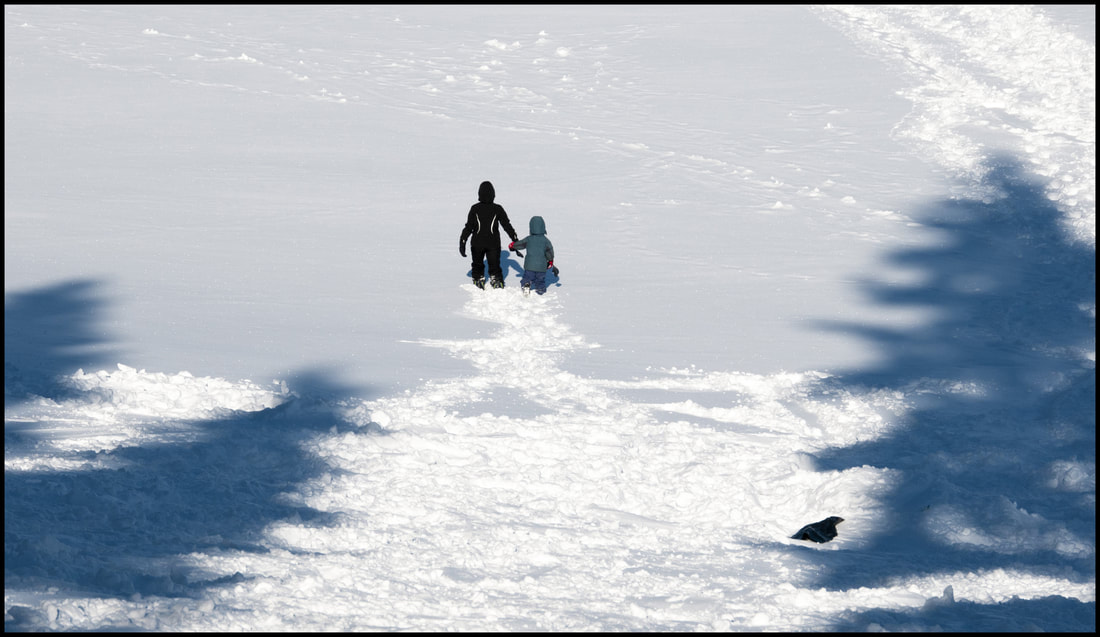
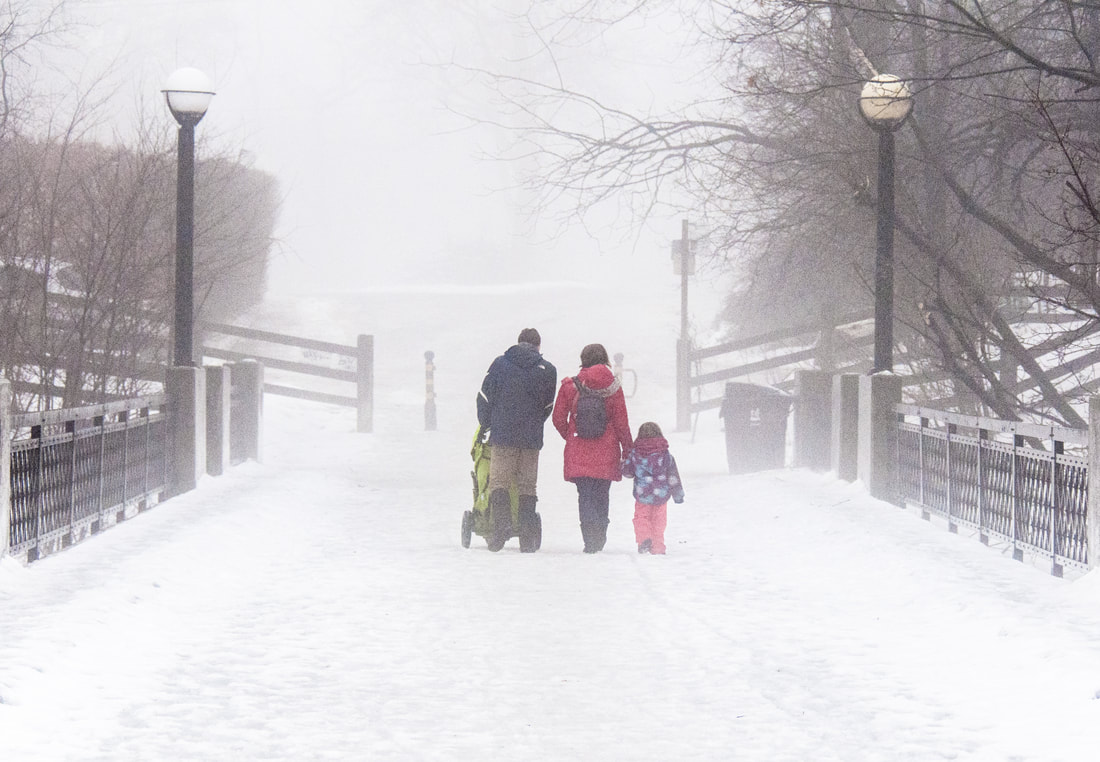
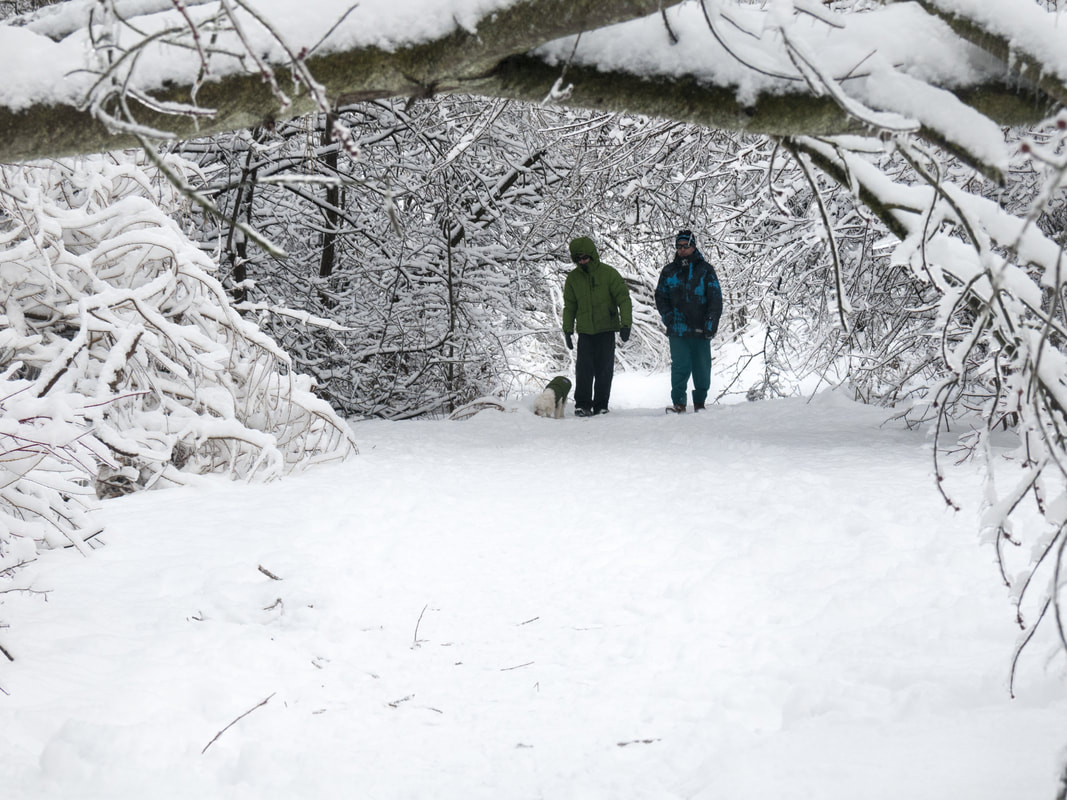
“You don't take a photograph, you make it." Ansel Adams  Eight essential tips for taking pictures in the snow.
 Thought For The Day “The single most important component of a camera is the twelve inches behind it.” – Ansel Adams |
Eric David
Eric David is a visual artist / fine art photographer that lives and works in Toronto. Archives
March 2020
Categories
All
|


 RSS Feed
